Contests! Jewelry and hackerspace craziness

A friend pointed me in the direction of a contest being held by Happy Mango Beads, with a “Trash to Treasure” theme.

I spent about 5? or 6? hours working on my entry, and I am delighted to announce that my entry was one of the alternate winners! Which means: FREE BEAD MONEYS. Also: fame and notoriety.

Maybe not.

Anyway, here it is, the Machinist’s Collar:

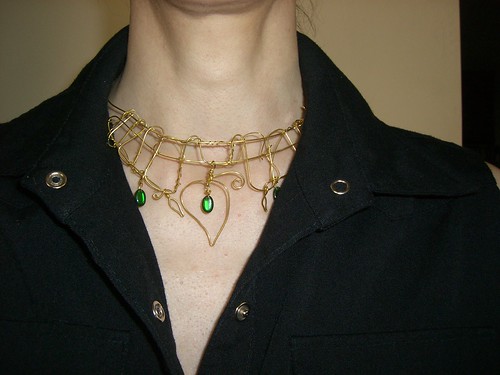
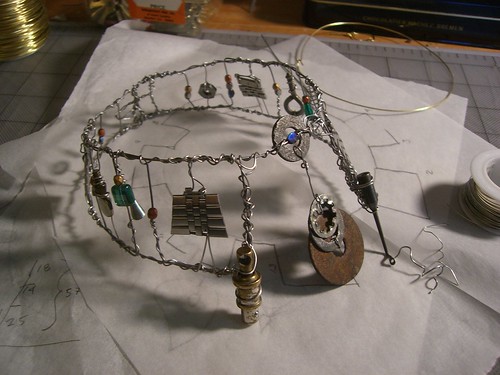
Collar made from stainless steel wire, glass beads, and found objects

"When I aimed my flashlight toward the back of the machine shop, an unexpected blue glint caught my eye. I was not expecting to find this: a collar made from stainless steel wire, woven into a framework for broken watch bands, rusted washers, and other metal objects I could not identify, accented with glass beads. Was this completed by a bored machinist, waiting for a necessary part to arrive? The result of finally emptying the jar labeled “Shiny! or might be useful some day”? Or a symbol of office, abandoned when the shop closed? Perhaps the number of washers hung from the front indicated levels of seniority. I may never know; I visited only days before the wrecking ball arrived."

I raided my collection of random metal objects for this. I knew they’d come in handy someday! VINDICATION!!

The collar turned out to be taller than I originally planned, and for a while I felt pretty bummed out that it was not matching my original concept. It was going to be terrible! And then it started to come together, and I am more pleased with the result than I was with my original concept.

Also: check out the photos of all the entries on Facebook – there are a lot of really gorgeous entries. I think this necklace is my favorite.

On to something less wearable:

Back in August, Artisan’s Asylum had the opportunity to participate in a hackerspace competition. We had 3 weeks to complete a project. Which would be videotaped. The process and the final result. For the purpose of being shown on VIMBY.

The first hour of the show is up, which introduces the competition and very briefly introduces the 5 groups participating. We will get our very own hour in an upcoming week.

Much like the project itself, this both terrifies and excites me.

Share

Swapfest loot

I haven’t been to Swapfest since last year, and realized recently that I needed to remedy that. This is what I came home with (also a pair of pliers, but they are less exciting and photogenic):

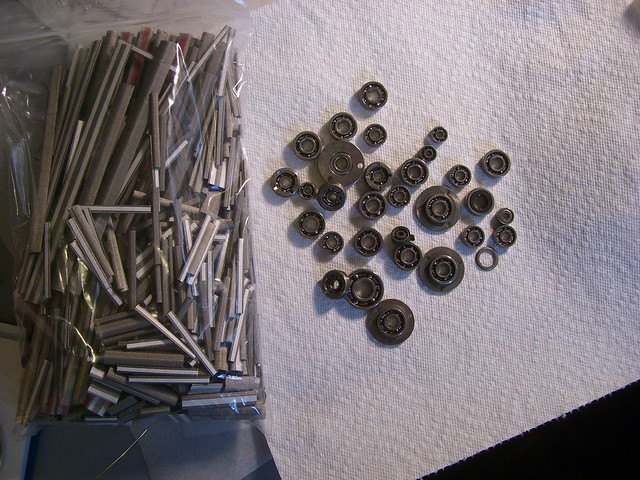
Bearings and EMF shielding strips

On the left, a bag of EMF shielding; on the right, some really lovely bearings.

The shielding is stuff I have experimented with before, but I only have a small quantity left, so I now I feel free to do more experimentation, and have plenty for good results, too! It has an adhesive strip on the back, which is not particularly useful for me, I think.

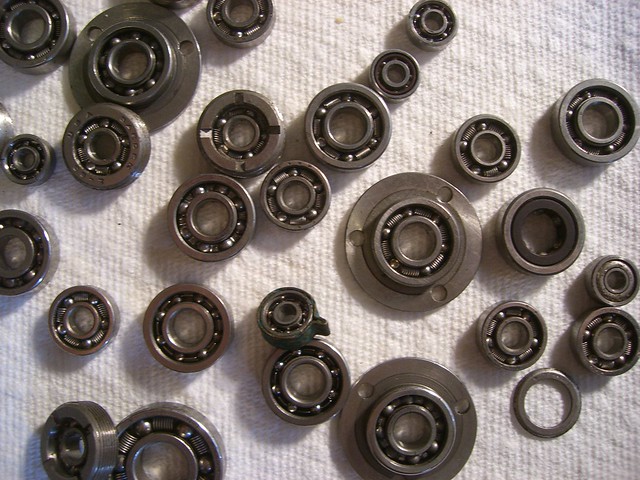
I did not buy out the bearing seller’s entire supply, but I was tempted. They’re so pretty!

Bearings

Some of the bearings have tiny springs in between the balls; other have more rigid spacers.

Share

More fun teaching! (I’ll be at StrowlerCon)

Which is a con with a lot of performance stuff at it – music and circus-type performances of the type that I have seen at Arisia and elsewhere.

Also, they will have a Maker Showcase, which is like an art show. But (or so I am told) also demonstrations going on in the same place at the same time.

I learned about this maybe a month ago, at an Asylum meeting; one of our wardens had been asked by the StrowlerCon people to help with the Maker Showcase, and we all thought we should try to get an Asylum table there. With work by some of us, and propaganda I mean fliers and fun things like that.

And then I looked around at the website and decided to write up a proposal for putting some of my wire things in the Maker Showcase (hey they said they were looking for costuming sorts of things! not just whizzy electronics). And also maybe I could do a workshop on making feather ears (or paper, or fabric, or whatever), or wire fish to hang from trees . . .

Time passed.

I began to wonder when I would hear back, but it had been less than a week.

More time passed!

I began to panic worry, because depending on the specifics, I might have to be all kinds of prepared and I didn’t want to get prepared and then find out No, but also I didn’t want to not be prepared enough and find out OMG TOO MUCH TOO LATE.

To make a boring story short, I learned last my proposals have been accepted, and I think I pretty much get to choose how to display things, and how much time I want to spend doing demonstrations/workshops, right there in the Maker room, which is lovely and much less terrifying than “Hey, here’s a two hour slot! In the program and in a room that holds 20 people and everything!”

So now I have but a short time to sit down at my desk visit the Abyss and work out a lot of details. So that I don’t find myself trying to find the right words to explain to other people how I do what I just know how to do (like the Bazaar Bizarre).

Things I am thinking about demonstrating:

  • feather ears, though possibly with paper instead of feathers (or starched fabric?)
  • simple ear cuffs, because hey! I finally sat down and worked this out myself! and they are relatively simple and quick
  • wire fish and birds and geometric shapes, for sticking in lawns and hanging from trees

I toyed briefly with the idea of paying for a vendor table, but realized that I do not have the time to make enough items to make a table worthwhile. However, there is apparently some way I can sell things, but it sounds like it is  more complicated than if I had a vendor table. So that is an intriguing option that bears more thought. And also requires I make some more things (but not SO MANY).

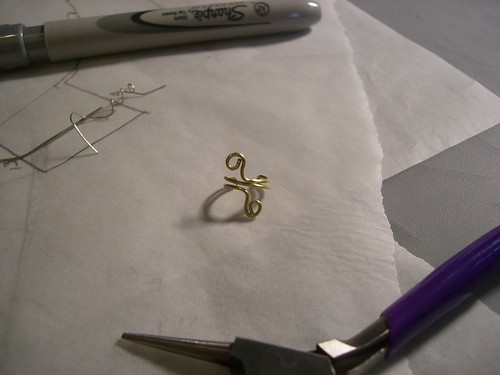
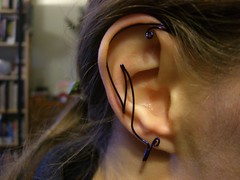
Simple brass wire ear cuff

Simple to make, simple to teach, can have dangly beaded bits hang off them for more fun.

Share

Bazaar Bizarre aftermath

So I worked at a craft fair (the Bazaar Bizarre, in its first-ever summer occurrence) for the first time ever, and it was only slightly less terrifying than I imagine it would have been if I’d actually been selling my own work.

I was there at the Artisan’s Asylum table; we were there to pass out flyers and show people how to make simple crafts. A couple of people were making neat hair decorations, tiny hats, and bags out of ties. We had bookbinding, and someone showing off Sumobots. Our coffee making demo had to cancel on account of it being too windy. And we had two people doing jewelry demos (the other person was showing knotwork).

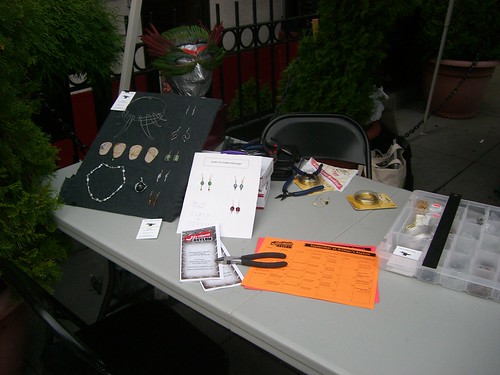
Jewelry display, plus duct tape head with feather mask, plus flyers, beads, wire, etc.

I brought a lot of glass beads, figuring I could show people how to make simple dangly earrings. I even sat down and practiced by myself, so I would know how to talk someone through the process while demonstrating it.

No one was interested in learning how to make them.

People were interested in making ear cuffs, which I had on my big display board.

And of course I didn’t have any of the really simple ear cuffs there. Fortunately, I did have my brass wire, because at the last minute I decided to bring it so I could amuse myself if nothing else was going on.

I know now how just how poorly I know what I am doing, because I found myself flailing a lot trying to explain how to hold the wire and the tools – and honestly, I don’t know that -I- always follow the same process, so there was a lot of ad hockery (ad hackery?). I figure that explaining that teaching this was all new to me might be reassuring to people who were confused by the process a bit. Well, I got some laughs at least. And my victi- er students did end up with wearable ear cuffs.

Also, I got some really nice feedback about some of the wire work I had on display (the stainless steel necklace, which I finished off and now – of course now! – want to make some edits to. Guess I’ll have to make another. OH NOES.), like encouragement to make more and sell it.

I did loads of research earlier this year into Etsy and good places to buy supplies (bulk wire, especially), but time going elsewhere, and massive terror at the prospect of taking this semi-seriously, have conspired to keep me from actually setting up a shop and making items to sell. But I think at this point (and then there was a coworker this morning, who I showed some photos to), I have no choice.

If for no other reason than to subsidize my bead buying habit.

Share

Stainless steel wire necklace, finished

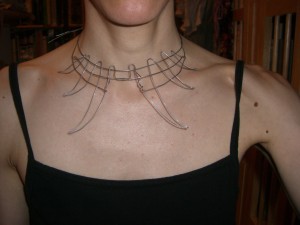
I finished the ends of this off over a week ago, and wore it a couple of times, because I couldn’t quite figure out what else, if anything, needed to be done with it. Also, I wanted to display it at the Bazaar Bizarre, which reminds me I have a draft post about that I need to publish. Oops.

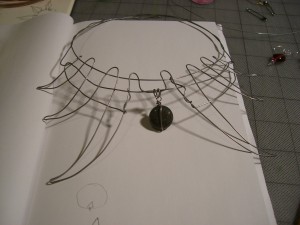
Anyway, I figured out what needed to be added, and here is a not very good picture of it:

Stainless steel wire necklace with jasper pendant

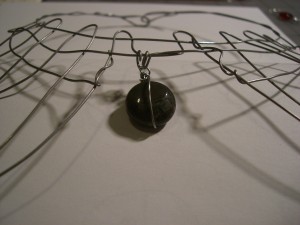
The stone is jasper. I think.

Round jasper stone

Close up of the jasper (?)

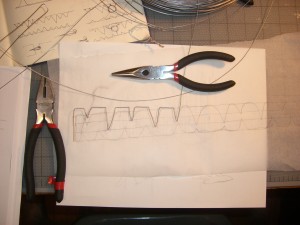
(Additional pictures on Flickr.) I wanted to move on to a new project more than I wanted to take more/better pictures. The new project is going somewhat slowly; I’m having some difficulty weaving the horizontal wires through the vertical pieces. I may have to rethink my strategy; it’s much more difficult than the necklace above.

Some early bends of a wire choker/collar in progress

Some early bends for a wire choker/collar

We shall see how this goes.

Share

Stainless steel wire necklace (in progress)

I finally felt caught up enough on stuff, and also too tired to do much else, to clean off my desk yesterday.

Seeing all that surface again kind of felt like gazing into the abyss. If, you know, you knew the abyss might possible have cake in there somewhere.

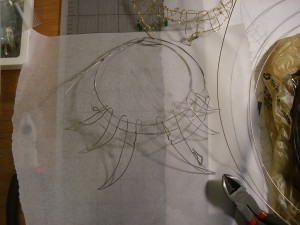
This evening I sat down and worked on another necklace, which I sketched up, er, some weeks ago. It’s not done; I need to add thinner wire to strengthen it a bit and add detail.

Stainless steel wire necklace

Originally, I was going to add some sort of dangly thing – like a biohazard symbol or something – in the middle, like I did with the brass necklace I made previously, but now I’m reconsidering. It might not actually need anything there, and I quite like it as-is.

Also, I have decided that from now on, I will say “I’m going to spend some time in the abyss” whenever I am retreating to my desk.

Share

Long overdue post full of ear cuffs

I seem to have a bit of breathing space, so I am catching up. ZOMG TWO POSTS IN ONE DAY.

So.

Have some ear cuff photos!

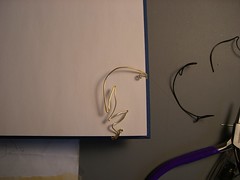
Wire earcuff

Love the simple shape. Need to redo this to fit right.

Brass feather/leaf ear cuff

It all started so simply.

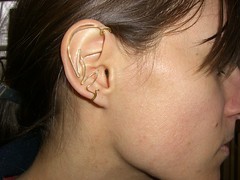
Wearing the leaf/feather ear cuff
And it fit!
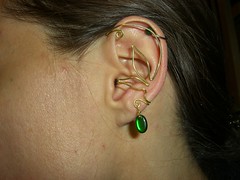
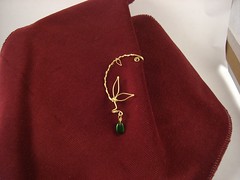
Ear cuff with green bead

Then there was a variation. With a bead.

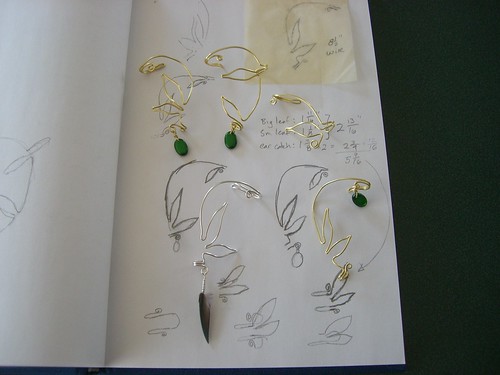
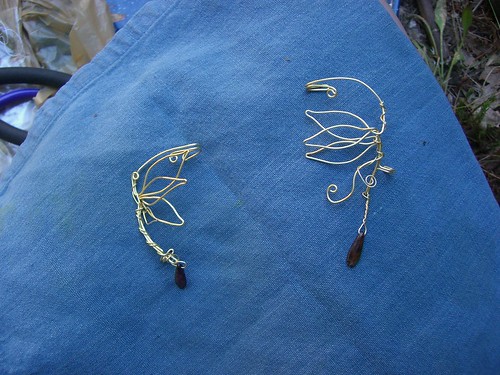
Several feather/leaf ear cuffs, all slightly different

And then there were more. (These are just some of the non-rejects.)

Ear cuffs in a row. Silver with feather; brass with beads (and without).

Ear cuffs in a row. Silver with feather; brass with beads (and without

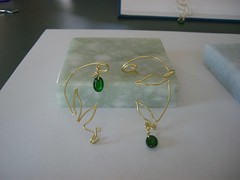
A pair of brass feather/leaf ear cuffs

A favorite pair.

Ear cuff with thinner wire wrapped around it, making a vining look.

Adding some thin wire wrapped around the main frame added some additional viney leafy bits.

Ear cuffs with multiple, layered leaf shapes

A friend suggested wrapping some excess wire back up the shape, and creating layered leaves. Needs a little refining (I dislike the indentation along the edge), but I really like the layered look.

With bonus not-ear cuff wire work:

Wire necklace made from "weaving" wire together.

This was inspired by the wire mesh I made for the sink, as well as Elise Matheson's fabulous necklace-crowns.

WordPress hates when I try to put links in captions, apparently, so let’s try that again: here is Elise’s blog (go find “new shinies” and “shiny sale” posts for jewelry goodness); here are photos of a necklace-crown.

Share

Wire wrapping feathers at Instructables

I figured out how to make the Instructables process less painful: I discovered and set up the automagic import-pictures-from-Flickr thing. That was nice!

So: Method 1

And: Method 2

Check those out if you would rather read them there (or download them as PDFs!) than in my really long post.

Also – very exciting! – they are currently “Featured” projects on Instructables’ front page.

I’ve thought about trying to videotape the process, too. As if I have the time to mess around with that; I just know I’d get sucked into all sorts of fancy video-editing things, but it might make things more understandable than flipping back and forth between pictures and text.

Share

Wire wrapping feathers

For some strange reason – well, a couple of strange reasons, actually – I have a lot of feathers, and limiting myself to gluing them to things is kind of, well, limiting. Especially if I want to make dangly earrings, or necklaces, or or things, with them.

Wire wrapping seemed like the easiest way to make dangly things with them. I can’t recall if I found any examples online before I got started (my first page of Google hits now doesn’t turn up any particularly good tutorials), so let’s just say I made it up as I went along.

I have a lovely photoset at Flickr, with instructions, or you can read it all right here. (One of these days, I may also make an Instructable, but when I started one a week or two ago, the interface was so aggravating that I gave up.)

First, you need the following tools and materials:

  • round-nose pliers*
  • flat nose pliers*
  • wire cutters
  • feathers
  • very thin wire (I used 26 gauge)

I tried two different methods. The first starts by forming a loop (with one short end and one long end) in the wire, to hang the feather from, and then wrapping wire down the shaft of the feather, trapping the short end of the wire against the feather shaft. The second starts by wrapping wire UP the shaft of the feather, again trapping wire against the shaft, then forming the hanging loop, and finishing by wrapping the remaining wire back down the shaft. I like the first method better, but both seem to create a pretty firm connection between the wire and the feather, though I didn’t try REALLY REALLY HARD to pull the feathers free.

So. On to the wrapping:
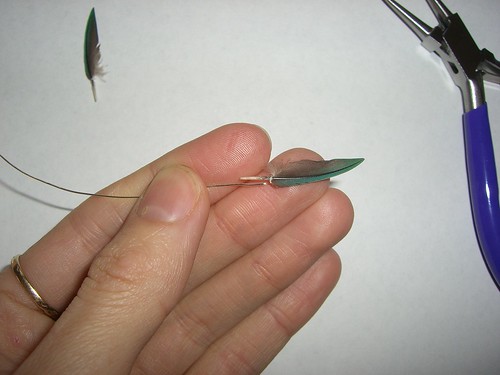
Measuring the wire by jfeathersmith.

Because this was a tiny feather (OMG do not use a tiny feather for your first try) I wanted to have almost as much straight wire held against the feather as there was bare feather shaft. It seemed like it would be the strongest way to wire the feather, and aesthetically appealing.

Measuring the wire (2) by jfeathersmith.

I grabbed the wire with the round-nose pliers where I wanted the straight part to end, and the loop (to hang the feather from) to begin.
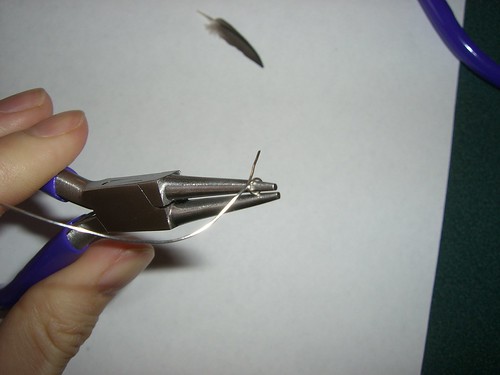
Make a wire loop by jfeathersmith.

I wrapped the long end (still attached to the spool, because I like making life more complicated) around the pliers to complete the loop.
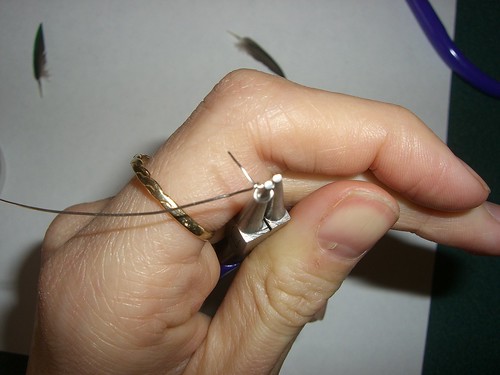
Completing the loop by jfeathersmith.

Then I bent the long end back around the short straight end, to start the wrapping of wire around the straight wire plus - in a moment - the feather.
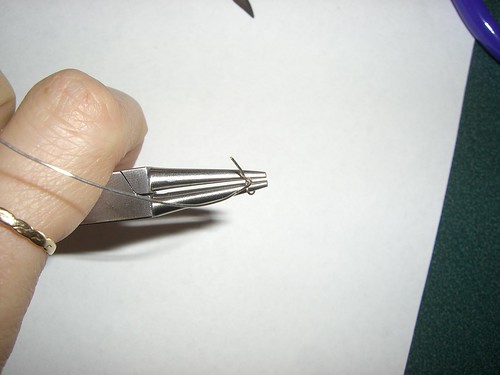
Another view of the loop by jfeathersmith.

Another view of the loop

Is the length right? by jfeathersmith.

I checked to make sure I still had the right length of wire to hold next to the shaft, and finally cut the long wire free of the spool, so I had about 2 inches of wire to wrap -around- the shaft and short end.
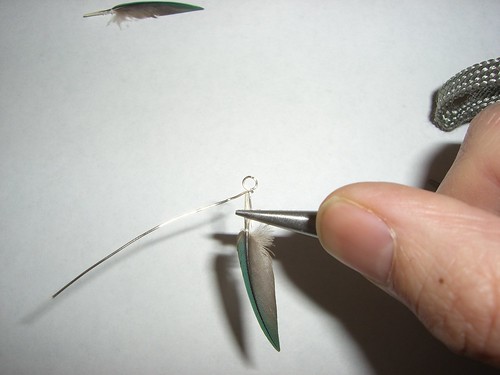
Preparing to wrap the feather by jfeathersmith.

Why you should not use a tiny feather: Because holding the thin wire and the thin shaft together tightly while also wrapping thin wire AROUND them both is a pain in the butt. Holding the short wire and the shaft really tightly with pliers helped some (yes, it squashed the shaft. in fact I think it broke it a bit. it doesn't matter; you can't see it when you're done).
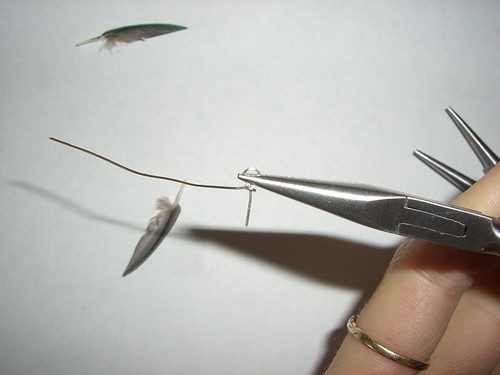
Examine this loop by jfeathersmith.

See that tiny loop of wire wrapped around the straight wire? Adjust that slightly if necessary so that it is just big enough to hold the very end of the feather shaft. That helps with the final wrapping.
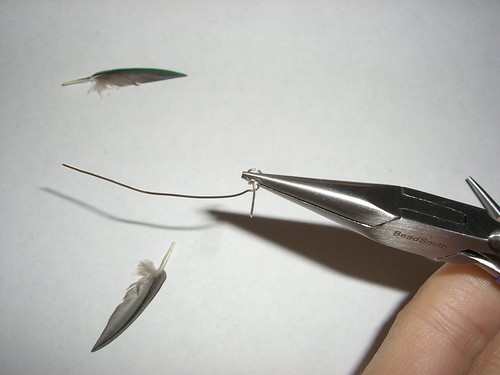
Another view of the shaft-holding loop by jfeathersmith.

Another view of the loop

Grasp firmly and wrap by jfeathersmith.

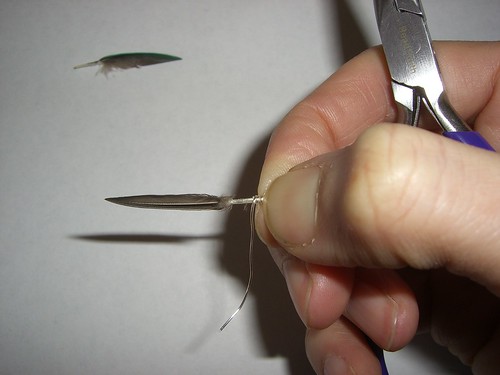
I gave up on the pliers because I couldn't get coordinated enough to manage and just pinched the feather+wire together tightly with my fingers. Having fingernails helps. Once I had the short piece of wire and the feather closely aligned, and the shaft of the feather just butting against the loop, I wrapped the long piece of wire around and around the shaft+wire combo.
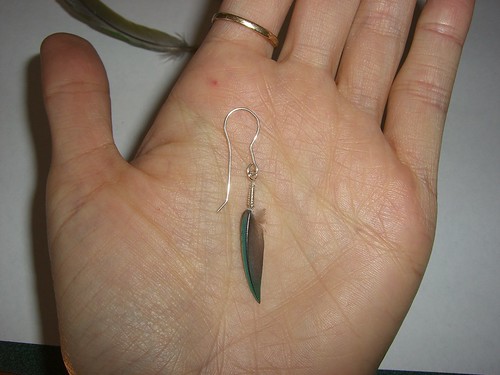
Wire-wrapped feather earring by jfeathersmith.

Connect the feather to an earring loop, and you are done!

Thus endeth the lesson.

I didn’t keep the above earring; that’s just for photographic purposes. I wrapped another tiny feather and made these:

Feather and labradorite earrings by jfeathersmith.

Feather and labradorite earrings. I have some tiny beads made from labradorite; in the right light, they show a blue "flash" that matches the feathers.

I also made an earcuff with a feather dangle, but those photos will be another post, because I have several other earcuffs I want to post at the same time.

Here is method 2 for wire wrapping a feather, but I didn’t like the results as well:
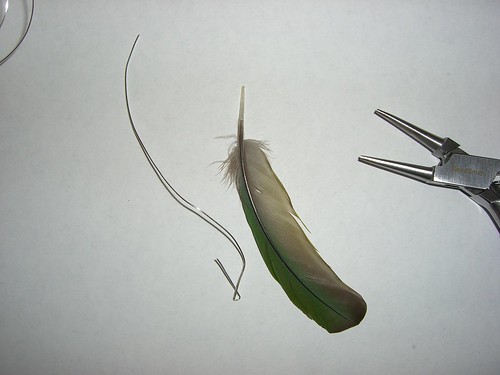
A larger feather by jfeathersmith.

This time, I started wrapping near the fluffy part of the feather, not at the end of the shaft. I didn't want to wrap the entire bare shaft, because it was fairly long. I still wanted about half an inch of overlap between wire and feather, so I formed a loop about that far from one end of the wire (which I cut this time before starting! I CAN HAS LEARNINGS). This loop is not for hanging the feather, it will go around the shaft about half an inch from the end.
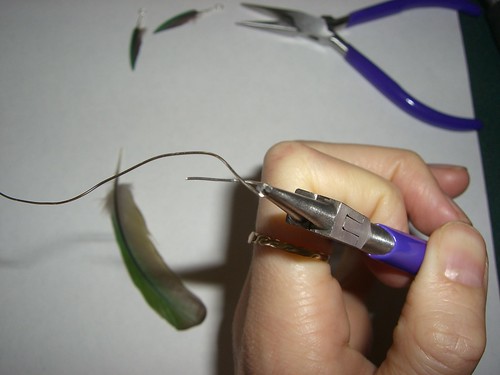
Forming the bottom loop by jfeathersmith.

Forming the first loop

Insert feather into loop by jfeathersmith.

I placed the loop in the right position against the feather.

Wire held against feather by jfeathersmith.

Another view of the wire and feather held together
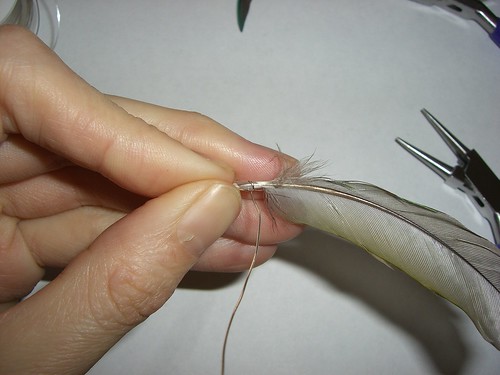
Starting the wrapping by jfeathersmith.

I again found it easier to start wrapping by holding the thing in my fingers. Here I have wrapped the wire around the feather+short wire once.

Ready to finish wrapping by jfeathersmith.

With the larger feather, and more shaft to work with, this time I found it easy to grab the wire and feather with the flat-nose pliers, and wrap the remaining wire around by hand. Part of the trick is that the wire is thinner than the feather shaft, so to hold both together, you really have to squash the feather. Otherwise, that dang wire will slide all over the place.
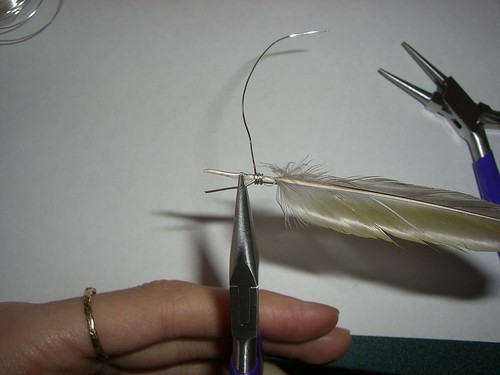
Wrapping in progress by jfeathersmith.

Don't worry about how the short wire is not tight against the shaft. As you wrap the long wire around them both, it will pull the shaft and short wire together. You will need to move the pliers out of the way; by this point, you don't need a death grip on the assembly, so you can place them over the wrapped section and hold firmly, just not so firmly you flatten things out.
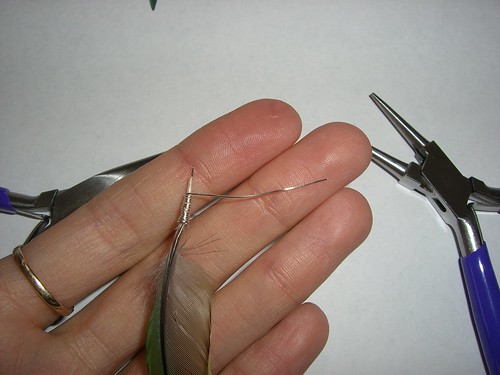
Nearly done by jfeathersmith.

I didn't get the wire positioned quite where I wanted, as there is a short bit of it sticking past the shaft. That can be clipped off.

Make the hanging loop by jfeathersmith.

Now I have just enough wire left to make a loop to hang the feather from. I'm not wrapping to the very end of the shaft right now, because I will finish that after making the hanging loop.

Preparing to make the loop by jfeathersmith.

I straightened out the wire so that it will be easier to wrap part of it against the shaft after I make the loop.
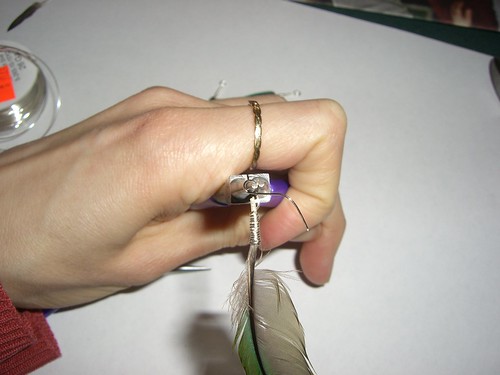
Making the hanging loop by jfeathersmith.

I used the round-nose pliers to make a loop at the end of the shaft. The bare bit of the shaft end, and the wire next to it, will be wrapped with the remaining wire.
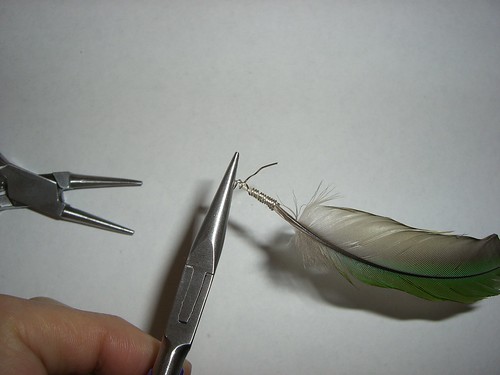
Complete wrapping by jfeathersmith.

I grabbed the loop with the flat-nose pliers, and wrapped the remaining wire back down the shaft, trapping the straight wire against it.
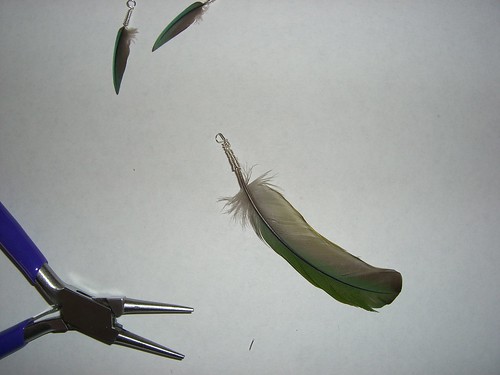
Wire-wrapped feather by jfeathersmith.

Finished!

* Some asides about pliers: Really, you could do this all with a single pair of needle-nose pliers, the kind you get at a hardware store. You won’t be able to get perfectly round loops, but if you don’t mind the look of a square-ish loop, go for it (I don’t have photos of this). You could also form the loop by wrapping the wire around a thin stick, like a bamboo skewer; the pliers just help hold the wire still while you wrap it. Also: most pliers not intended for jewelery-making have ridges/serrations on their jaws. These will mar the wire, which is a look you  might like, but if not, wrap some tape (electrical, duct, whatever) around the serrated parts to protect the wire.
Share

A bunch of links about tools

Lindstrom’s home page. They make a variety of high-end pliers and cutters, and have info online about their products.

Swanstrom’s home page. They also make a variety of high-end pliers and cutters, and have somewhat less helpful info about their products (organization of some of it leaves much to be desired.)

JewelryMakingGuide.com: article about super-flush cutters.

artjewelrymag Forum discussion about flush cutters.

From JewelryLessons.com: q&a about pliers.

Jewelry Pliers and Wire Wrapping Supplies: Basic Tools You Need…And Don’t Need – a useful list!

Another list of tools and resources.

Choosing the right pliers for the job.

Description of mandrel-tip pliers.

Advice about buying beads online.

Share