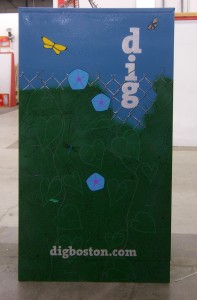
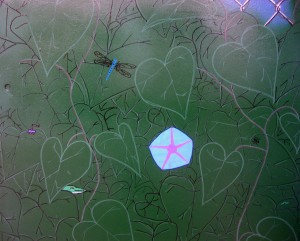
Dig box: completed

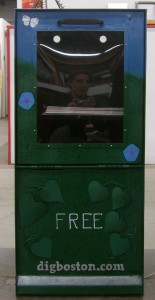
After much trial and tribulation, it is done.

Aw, look at the reflection, it's smiling!

The last week of the project, I ran into some unexpected problems.

When I decided I did want to attempt some 3d elements, I did tests. I thought spot welding would be the right solution, but it made the wire brittle and easy to snap. So I moved on to JB Weld, even though I felt kind of insecure about using epoxy, having little experience with it.

I attached a metal leaf to the wire I was using with JB Weld, let it set, and then tested to see if I could bust it. I could not! Hurray!

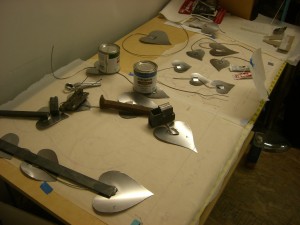
Weighting down the leaf-wire-metal sandwiches while the epoxy cures.

So I spent a day or two cutting more leaves out of steel shim stock, cutting wire to the right lengths, and sticking it all together with JB Weld (I used smaller pieces of sheet metal on the back, to sandwich the wire properly. My tests showed I had to make a sandwich to keep the wire in place.) Then I spray-painted them and drew on the veins with a paint pen.

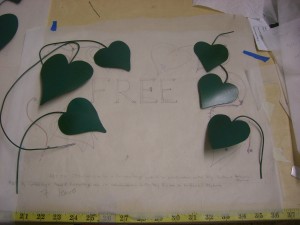
The painted leaves, with the wire stems bent into approximately the right shape.

Then, the evening that I was going to epoxy the leaves o the top of the box, one of the “welds” failed. I was trying to gently bend one of the leaves, so I could get a better connection between the box top, the epoxy, and the leaf, and POP, the leaf came free of the epoxy holding it to the wire.

A friend very kindly spent some time that evening helping me test out some other kinds of epoxy (and Gorilla Glue, borrowed from another Asylum member), but at that point I had an alternate plan in mind. And then it turned out the other epoxies/glue weren’t any better than the JB Weld. Yes, it did take some work to pop metal free of the epoxy, but the fact that it could be done made me fear for the long-term survivability of the box. It’s going to be in public, right? Someone, at some point, isn’t going to be able to resist “testing” it. So: butterflies.

The reason I wasn’t trying to weld or bolt/screw/etc. the leaves to the top is that we were not supposed to put holes in the top surface of the box, because no one wants rain inside their newspaper box! And, well, I don’t know how to weld AND my materials were so thin that welding actually seems . . . ill advised.

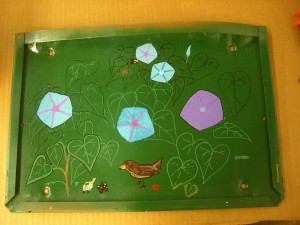
The front panel had holes in it already. In fact, I pulled off an “extra” panel that was originally on the box (and used it to test paints and methods) to use the holes it was attached by, and then discovered there were EVEN MORE holes in that panel than it seemed. So the front set of leaves have wires that go through the holes and are epoxied in place.

I also drilled additional holes through all those leaves so I could tie them to the box with thin wire (painted to match the veins). Mechanical attachments – better than glue! Unless you have REALLY AWESOME glue, which I don’t.

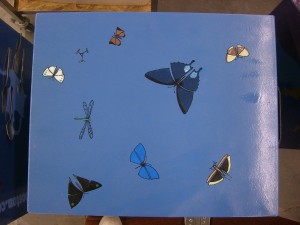
Since my original plan was to wrap several metal vines over the top of the box, I now had to come up with something to do to the top, because leaving it just plain blue was kind of boring. I settled on butterflies. And some other flying creatures. And things.

Butterflies, a dragonfly and grasshopper, even a tiny tricopter.

Ultimately, I’m pretty satisfied with this. The vines draped over the top did look good, but on a conceptual level, they didn’t seem quite right without something to really be wrapped around.

The troubles were not over with the painting of the top, because I still had the varnishing step to go, to give the box some protection from UV.

I had a convenient test panel, which I sprayed with 2 or 3 coats of varnish to see what, if anything, would happen to the various kinds of paint I had applied.

Well, it smelled bad while the varnish was still damp, but otherwise, it worked just fine.

So, a couple coats of varnish in, and I noticed that some of the most recent butterflies were, well, dripping. I wiped one of them off completely (and then drew it back on days later, because it left kind of a hole. Well, I noticed). The others I just left kind of fuzzy.

The presentation was over a week ago, and someday soon, the boxes will be removed from the Asylum and placed on the street. Here’s a post on the Asylum’s site about the first round of boxes, with video showing them being put into place on the street. There’s a map here showing the locations.

This was a fun project, and I’m glad of the advice I got from many people, some working on their own boxes.

When I had my test panel lying out one day, with some early sketches of the leaves, a couple different people, without prompting, pointed out which style they preferred . . . and it wasn’t what I thought I’d be doing! So I started asking more people for their opinions, and eventually  someone said, “It looks like these different blocks of leaves need to all be tied together somehow,” so I played around with that and discovered that by using all three different styles (black outline, green outline, black over green), I got a really great illusion of depth.

More pictures:

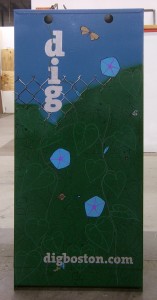
Left side

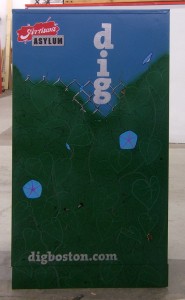
Back of box

Right side

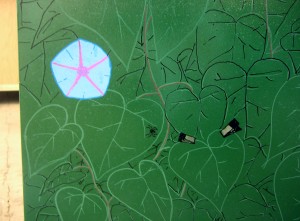
Spring clips and a spider

A bird peeks out, perhaps spying the tiny helicopter flying by.

Lizard and some other creatures

Something is hidden back there. I don't know what it is, either.

I put a lot of little creatures into the design. Many ants, because they were quick and easy and besides if there’s one ant somewhere, there are probably a thousand (though not on the box. It was a vine box, not an ant box).

There are some additional pictures on Flickr, including pictures of other artists’ boxes.

Share

Busy with several things

In addition to getting ready for the Together Festival in just over a week, I have been working on several other things. Many of which also have deadlines in the next 10 days. WHEE.

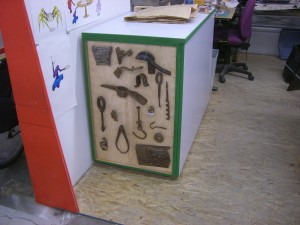
This had no deadline, but I needed the space on the top of the cabinet, where I’d had the objects laid out for weeks, and then I had some free time while waiting on an ear casting ( . . . uh, more on that later) so I took care of it:

I wired several of my favorite large pieces of found stuff on the end of this cabinet.

The top of the cabinet is, of course, now piled with other things. But that was the point of wiring the metal stuff to the end of the cabinet.

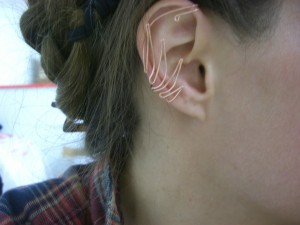
And I came up with this:

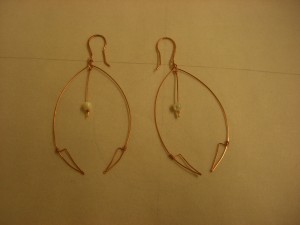
New ear cuff design

More of these at the festival! I was trying to duplicate a really old, early ear cuff design, and, well, things happened. I still haven’t duplicated the old design.

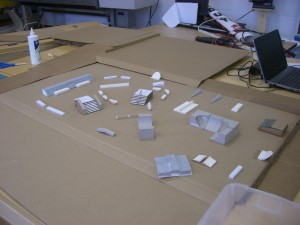
And then there’s this:

Models of things one might find in a skatepark

I made the quarter-bowl shapes by covering part of a rubber ball with paper soaked in glue.

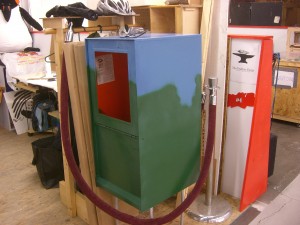
And, at long last, after more horrors than I care to recount or remember, the Dig box has its primary coating of paint, and I’ve spent some time testing out my wonderful, wonderful paint pens, which I’ll be using to do all the detail work. (Also I have some tiny bottles of Testor paints!)

Testing out designs and pens and paint for the Dig box

FINALLY I am done with stinky paint

Share

Together Festival; new art; oil paint is Bad News; probably some other things, too

NEWSY THINGS

I will be vending at the Together Festival on April 7 from 11-5. The festival itself runs from April 2-8. If you came to the Burner Bazaar in December and liked what you saw, you should come check this out, too!

And I submitted an application for this year’s CSArt program, run by the Cambridge Center for Adult Education. I won’t know for a while whether I’ve even made it through the first round of selections. It’s a really fantastic program, and I hope I get in. If I don’t, well, the proposal I submitted is something I’d like to try out anyway; it’s nice to have another art concept lurking around for days when I get bored with the same old business.

ARTY THINGS

Speaking of lurking concepts, I’ve had this one skulking about in my head for months and months, and I finally took the time to track down some reference images I could use to create the silhouette and cracked pattern:

silhouette of a raven in flight on a shattered heart

"Raven heart" needs a better title.

References used: Raven 13, by EquineStockImages, and Broken by devradiopooh (that link no longer works but it did as of 5 days ago). I have a couple other variations over on deviantART.

One of the ways I pay attention in meetings is to doodle in my sketchbook. It’s a good way to come up with new ideas and work out a million zillion variations before trying them in wire. Here’s one of them in wire now:

Variation on the tooth theme. These are rather large, but very light.

GRIPEY THINGS

OH MY GOD OIL PAINT!!!

So on the advice of several people who sell paint for a living, I bought some Serious Oil-based Paint for painting the Dig Box. And I put on a first coat, and I waited for it to dry so I could apply a second coat, because the first coat wasn’t completely covering the original paint. The cans of paint say “Dries to the touch in 3-4 hours. To apply a second coat, allow to dry overnight.”

And the next morning I checked on it, and it was NOT EVEN DRY TO THE TOUCH!!! In fact, where I touched it, the paint wrinkled up.

That was Friday morning.

Today, Monday, I came in to sand the damn thing and put on coat #2.

GUESS WHAT.

The surface is now dry to the touch, but it’ll still wrinkle up, which means NO SANDING, unless you want to immediately gunk up the sandpaper beyond salvation.

So I spent almost two hours scraping paint off the damn box, so that it might someday dry enough that I can sand ALL THE OIL PAINT OFF and go for spray paint. Or maybe latex, because that was also an option for super-duper, resistant-to-weather paint, and I should have gone with that from the start.

So. Oil paint. I have almost 2 quarts I will not be finishing off. One in a lovely dark green, the other in the wrong shade of pale blue.

Anyone want it? The paint store claims it’s awesome!!

Share

Dig box project

The Asylum and Dig Boston have a joint project going whereby members of the Asylum get to give some of the Dig’s older, more experienced (i.e. rusted, pitted, faded, abused) newsboxes facelifts. Here’s the Dig’s original article on the program.

Round 1 recently finished, and some of the boxes are out on the streets.

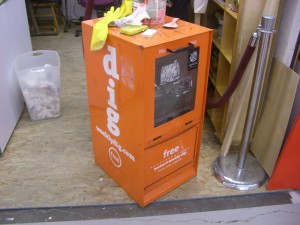
I am in round 2 (at the link: photos of completed boxes, and plans for the next round). Here is what I have to work with:

One of the Weekly Dig's newsboxes, which I will be repainting.

Once I clean off all the sticky and sand this thing down, I can really get to work.

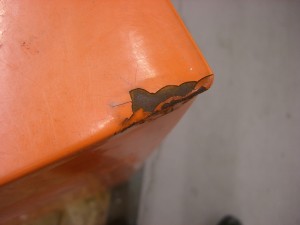
Battered, rusty corner of Dig Box

This looks like the worst damage on my box. Really not that bad!


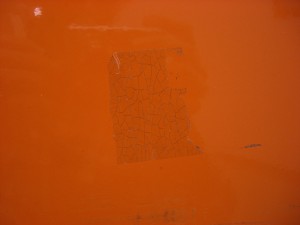
Plastic tape on a newsbox that has developed a network of fractures

This is not cracked paint. This is clear tape that has aged and fractured in a neat pattern.

I am going to cover it with vines. Mostly painted-on vines, because I am no great metalworker, but I’m considering making some of them three dimensional, coming out of the sides near the top and curving over it.

And I want to hide things in the vines. Birds and bugs and spring clips and tiny robots and glowing eyes and maybe a squid or two. There’s plenty of space for all sorts of things!

First, I will have to clean off the remaining sticker residue, sand it down, and possibly do some minor repairs to rusted areas (but my box is not nearly as beaten up as many).

And I have less than 4 weeks.

Share