Picture hangers – the exciting anticlimax!

Or perhaps the actual climax, as everything after this is just repeating what’s been done already, only better.

It works! The prototype works!!!

See?

Hanger on a shelf, under some magazines:


Hanger being used; cute picture of birds covering boring magazines:


The prototype all by its lonesome:


I used the small sheet metal brake to do the bending; it worked wonderfully. Very fast, very easy; I was done before the other folks around me had any idea I’d done anything at all (okay, they were in another room, they couldn’t see me, but I was wandering around flipping through books for several minutes before they realized I was done with the hanger).

So. The concept works. It needs a little bit of refinement: more length along the longest unbent section; it only just barely fit over the shelf. It could also use a little more room in the vertical section of the over-the-shelf hook on the back; I don’t want to end up messing up the shelf by scraping the shelf up. And I need to get the bend at the very end closer to parallel, so that pictures will hang level.

Share

Picture hangers – some actual progress!

Remember the picture hangers? Which, as it turns out, could not be easily cut out of dead fluorescent fixtures without some considerable difficulty?

Well, I finally hauled a small pile of dead fluorescent bodies to the metal shop and asked the monitor in charge if there -was- a way to turn that scrap into useful strips, or whether I should just go find some nice flat metal, maybe even already in narrow strips.

First he thought the metal chop saw might be the right approach. Then reconsidered and tried the metal bandsaw, which was quite impressive, but the fixture was way to light (and squashable) to easily be clamped down -and- sawed. It got partially cut, and then was pulled free of the clamp by the saw in a not very spectactular but still kind of alarming fashion.

So he just cut off the end of the fixture with tin snips, and suggested using a jigsaw to cut the strips out. After flattening the fixture out a bit, we (well, mostly he) set up some scrap wood to clamp the metal to, and I took the jigsaw to it. (Dangit, I should have photographed that setup. Next time . . . )

It worked great! For future, though, I want to cut the strip in one pass, rather than two, because I couldn’t get the two cuts to line up, which left a jagged edge that took too much grinding to get even.

Still, for a first try, it worked very well. Jigsaw. Who knew! (It’s all in the blade you choose. This should have been obvious to me.)

I got the strip cut to size, and one end cut and rounded off (this will be the hook that the picture hangs from), and used a belt sander to remove all the rough bits from the raw edges. It is nearly done!


I think tonight I will see about bending the strip into the right shape, using the very small metal brake (or perhaps a vise and pliers).

Share

Belated post-mortem on the Borg pirate

I really should have written this up right away after Arisia, so that I would have good notes on What Not to Do for a future iteration of the costume. Assuming there will be another. Which there might. Or at least there might be a future prosthetic arm, perhaps in a steampunk style rather than Borg.

So.

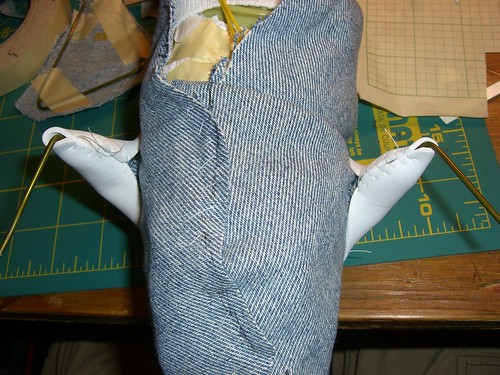
Cables: A cable that runs from the forearm all the way to the chest is Not Good. It meant I had to take off the upper arm piece, and disconnect the cable from the battery pack, in order to remove the forearm. Having a cable that can plug in at either the battery OR the forearm would be much better. I think having the cable attached to the upper arm, and then running from that in both directions, would work much better. (Or, put the power source for the arm activator -in- the arm, and reduce the number of cables. Though in this case, more cables was good, because Borg have lots of cables dripping off them.)

Arm activator: The pager motor worked fairly well for something thrown together in the last couple nights. But something that did something more interesting than spinning around and going VVVRRRRRR! would be nice. Something that moved in a grabby sort of manner, perhaps?

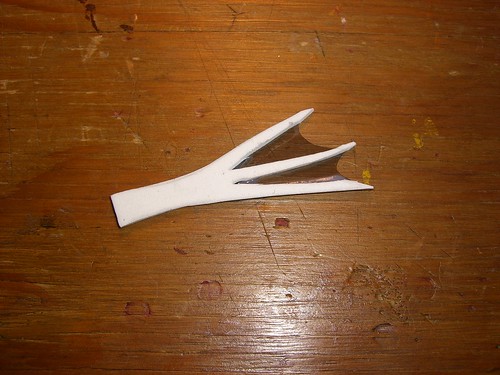
Weight: The leg was heavy. Actually, it was the foot that was heavy. The Borg foot (which just fit right over a normal boot, like an immense spat) was heavy and made walking difficult. For the future, making a foot/lower leg assembly out of paper mache, and then covering that with leather, would be better than chopping up a heavy pair of rubber boots and sticking them together with duct tape.

Leg awkwardness: The upper and lower parts of the leg armor got hung up on each other at times and made walking a bit tricky. And stairs VERY tricky (esp. with the big, heavy foot). Adding some hinge-looking bits to the outer knee would have been a nice touch aesthetically. The cable ends came loose a number of times, too.

Cable attachments: Cables were firmly fixed at one end with duct tape (or Gorilla tape), but shoved into a loop of tape/leather at the other. Some of the cable ends stayed in place pretty well with that arrangement, but a lot of the leg cables pulled out of their tape/leather end. Should look for some sort of easy-release clip or something. Perhaps some sort of clip that is designed for cables/tubing – which could be hidden inside a leather shell so that it doesn’t look like audio cable, but like it penetrates into my body. The cable that I wanted to run from my head to my torso didn’t work at all because I didn’t have a good way to keep the body end of it from pulling free.

More fiddly bits: Could have done with more LEDs and mechanical pieces. Matter of time, by which I mean I should have started more like 6 weeks, minimum, in advance instead of 4. Tritium keyring things would be a great way to get a nice glow without having to worry about a power source.

Eye prosthesis: It looked great, was pretty comfortable, and the visibility wasn’t terrible (though I really missed having peripheral vision on that side!). However, it would have been great fun if I’d had it hooked up to the shutter thingy. I need a longer remote shutter release for that, and a good way to connect that cable to the headpiece and the rest of the body armor, so that it will stay in place, and not be too likely to get hung up on things in the environment. Perhaps adding some LEDs to that (which I could turn on and off – don’t want them on ALL the time, thank you), or an other layer of lenses or something that could be rotated into place from time to time . . . So many possibly variations and so little time!

The pirate bits worked pretty well. The kerchief was unbelievably slippery and I had to clip it to my hair, and the shredded shoulder made it a real pain to get Frankie attached to my shoulder cables, but since I probably won’t redo the pirate part (or even the pirate Borg combo), that’s not something I’m much worried about.

People pretty well “got” the pirate aspect of the costume. I think. I heard several comments like, “Oh, there’s someone doing that steampunk/cyberpunk combo” or just plain “steampunk;” about as many people understood that I was (partially) a Borg as did NOT understand, but whether that was due to lack of familiarity on their part with Star Trek, or due to my failure to make something that was obviously Borg, I do not know. I got a lot of compliments, it was fun to make and fun too wear, and not too terribly tiring (though a day and a half was a bit long, see:weight issues), and really that was the point.

I need to get a bunch of photos of the pieces, since I didn’t document the process well (too busy building to stop and photograph), after which this will all make more sense to people who are not me.

Share

Background notes about Frankie

For a while now, I’ve thought it would be fun to make some kind of stuffed or robotic parrot that I could wear on my shoulder as part of a costume, or just for fun, at events like Arisia.

One of the problems with perching a fake bird on your shoulder (as opposed to a fake cat or dragon or other long quadruped, which can drape over your shoulder and look natural) is that it won’t balance the way a real bird will. If it isn’t anchored properly, and stiffened in the right places, it will bob back and forth in a ridiculous manner. And I have simply too much dignity to put up with that.

Finally it dawned on me that if the feet/legs of the bird were firmly fastened to some kind of shoulder armour, that would provide a sturdy, rigid enough base that the bird wouldn’t bobble around and look ridiculous. Plus, if I were making a cyborg kind of parrot, then having a cyborg kind of shoulder on me would look perfectly natural and not at all ridiculous (at Arisia of course, I’m not going to wear this to go buy lettuce).

While talking this over with a friend, one of us thought about the parrot issue and said, “Oh, pirate!” and the other thought about the cyborg issue and said, “Oh, Borg!” and then we both said, “BORG PIRATE!!!” Because after all, pirates are kind of like primitive Borg – replace the Borg arm prosthesis with a hook, and the Borg eye enhancement with an eyepatch, and leg prosthetics with a peg-leg, and there you go.

Not to mention they’re both known for terrorizing other sea (or space) faring folk, boarding them, killing or enslaving their victims, and making off with all their neat toys.

So most of a year went by with me thinking I really ought to get going on this costume, because it would take a lot of time. And I really wasn’t sure how to go about making the parrot.

And then, out of the blue, someone on the parrot_lovers community on Livejournal posted a link to this sun conure pattern at Silver Seams, which is free, and Open Source, and really quite excellent all round.

So I used that to build Frankie, only I made his primaries and tail out of silver paper instead of felt, and I augmented him with an LED eye (wiring and associated electronics done by a friend who had time and soldering experience that I did not), and made his feet out of aircraft cable (NOT recommended; that stuff is a real pain to work with – it doesn’t want to bend the way -you- want it to bend) so that he could grip the cables and tubing on my assimilated shoulder.


Frankie’s avian side.


Frankie’s assimilated side.

Original pattern copyright 2006 Silver Seams, Creative Commons Attribution-ShareAlike License 3.0

Share

Unsatisfyingly short work session

I have a pile of wood to use for the automata kit. Some of it needs to be milled to the right thickness, but there were plenty of pieces that are nice rectangles that want to be the thickness of the wood I’ve got.

So I went down to the basement to use the kind of sketchy bandsaw and do that. And it went really fast.

Too fast.

I want to cut more wood up, but first I have to get to the shop where the planer and drum sander live, so that I can mill down the remaining wood. That can’t happen until tomorrow evening at the earliest, and I want to do more stuff NOW.

Instead I will have to settle for uploading pictures of Frankie, the Borg parrot, to Flickr.

Like so: Borg parrot.

Share

Automata resources

Way back in September, I jotted these down with the intent to store them somewhere more useful, because the instant I started seriously thinking about making wooden automata, I knew that I must make some. (And I am – finally! having finished some other, more time-sensitive projects – in the very early stages of doing so now, using the pattern in Peppe’s Automata and Mechanical Toys.)

Books:
Rodney Peppe – Automata and Mechanical Toys – has lovely color photos of a variety of automata by different people, and plans and instructions for building a basic kit of mechanisms.

Frost’s Whacky Toys aka Making Mad Toys

Raymond Levy – Making Mechanical Marvels in Wood.

A book on BEAMbots, which sound like robotics I could get into.

Other Resources
Automata resources at Dug North.

Dug North list of useful books

A nice page of mechanisms.

Share

Project: Completed conversion of zombie into mutant aquatic creature

Right. So. Way back in October, I finished the squid-eel known as Pork Chop.

I used a pretty green pearlescent paper to cover the finished body, with some strips of thin, transparent, dark grey PVC used as a fin along the top and tail. The enclosure was a cheap bird (or small animal) cage I found at Goodwill, painted with silver and black paint. I slapped a label on the front to complete the look – I printed the text with an old-timey looking script, and used a marker to give the paper an aged look.


Pork Chop worked just fine – up until the first night of the Halloween show, at which point his eyes stopped lighting up. I still haven’t debugged that, because in order to actually get at the interior, I’ll have to remove (destructively) the paper exterior and then make a new one. Bad planning/design. Would be much better to have an exterior that could be removed non-destructively, but it turned out that the easiest way to quickly attach the paper to the denim underlayer was glue. Lots of glue. And since I didn’t design/build the denim underlayer to be easy to remove, well, I have a problem. (Not much of a problem; I have plenty of the paper left, and can buy more.)

But moving on to the construction:


Leg in progress. I wrapped pieces of thin white foam (“Foamies” from Pearl Art) around the existing plastic structure, and stitched it to the denim underlayer, and to itself on the back side of the leg.


One little flipper foot. Thin white foam and PVC used for the webbing.


Beginning to cover Pork Chop with his pretty scaly paper skin. In the foreground are the flipper feet, with the foam covered with paper – the paper that isn’t yet wrapped around the flipper will be used to attach it to the wire and to the foam making up the upper leg.


The finished beast. The fin along Pork Chop’s back and tail is made from a thin PVC sheet. The original switch from the zombie is still sticking out under his belly – this will be wired in to an Arduino to set up the IR switch that will be used in the show.


I think I liked the floppy denim tentacles better than this rigid paper ones. Still, he managed to charm a couple barristas at the local coffee shop when I went in there, squid-eel tucked under my arm, to get some coffee to tide me over dealing with the serious electronics bit of business.


To line the cage, I took some packaging paper and spray-painted it with UV-reactive paint. Poor Pork Chop didn’t fit very comfortably inside.


I had help with the electronics, because I know nothing whatsoever about programming Arduino things. See, we had this neat little handheld lights that had a UV tube and a regular LED. The LEDs were replaced with IR LEDs, and each exhibit in the show was set up with an IR-detecting LED. Waving the UV light over the exhibit was supposed to reveal the location of the IR-detecting LED; shining the IR light on the IR detector would turn on the exhibit.

Pork Chop had three ways to be activated: the pressure-activated switch from the zombie’s hand, a light/motion sensor, and a sound sensor. Since I had already deactivated (or hidden) the latter two, the pressure switch was hooked up to an Arduino that was programmed and wired up to handle the IR-detection. We left the pressure switch intact for testing purposes and because, when the show was over, the Arduino was returned to its rightful owner.


The brains of the operation.

There was only a tiny bit of programming needed, to tell the switch how long to wait before resetting. Also we had to tweak the threshold at which the IR detector would pick up additional IR – the setting for the actual show was a much dimmer place than the sunny room the electronics were built in.

So, that was the squid-eel.

It was a lot of fun – I wish I’d bought several more crawling zombies, so I could have made an entire menagerie of weird twitching creatures! Maybe next October . . .

Share