I have been busy the last few months! Craft fairs in December, which were fun, participating in the art shows at Arisia and Boskone, finally – finally – getting some reasonable photography of many items and updating ye olde Etsy shoppe a bit, plus miscellaneous long-overdue projects at home, and working on my own space at the Asylum as well as some infrastructural things there.
The Arisia Art Show was not as financially successful this year as last, but I consider it a success overall because I figured out a much nicer display system, which I can continue to use. And IT ALL FITS IN MY ROLLING CART!!! While I have more stuff to pack and unpack, the whole system is more organized, and it looks nice.
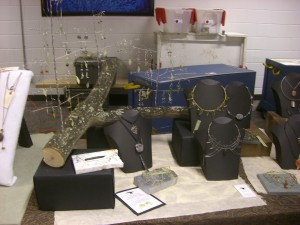
One side of the table at Arisia.
The raised boxes double as storage for all of the smaller stuff: jewelry, necklace busts, chunks of rock, and the drapes. I still have to haul a poster tube with me for the paper, and the tree branch remains awkward, but it fits into the rolling cart between the boxes.
Here’s where I got the pattern for the necklace displays.
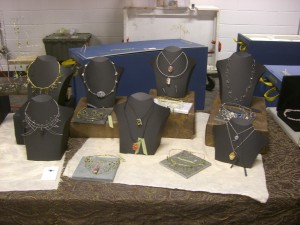
The right side of my table at Arisia 2012.
This year, I again had problems with my pre-con data entry – last year, some of the information got scrambled, and I had to rewrite parts of every bid sheet. This year, NONE of the information survived being stuffed into the internet, but I was saved an hour of hand-writing by a combination of a friend with a laptop, the hotel wifi, my cloud backups of the file in which I’d saved the data, and Arisia staff with the time to take my spreadsheet and turn it into printed bid sheets. Next year, I bring the spreadsheet on a flash drive. And maybe MY laptop, too.
Boskone was a lot smoother. They provide artists the ability to print (or write out) bid sheets in advance of showing up to the con, so I did that, which meant I knew exactly what numbers went on which pieces, so everything was labeled properly in advance of arriving. And, since I had only half a table, my setup was much shorter.
Things were so fast and easy I actually felt a little cheated. Like, there’s supposed to be some adversity to overcome here!
I sold a few pieces, including one of my favorite pendants. I will miss it, but I am glad someone else appreciated it, too.
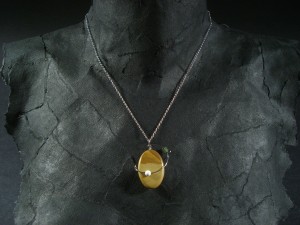
"Lonely Orbit" - stainless steel, stone (jasper and agate, I think)
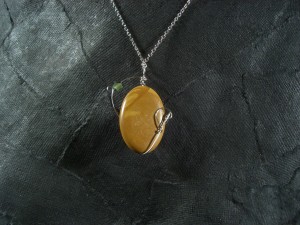
The other side of Lonely Orbit. It's not intended to be worn this way, but I think this side is also quite nice.
Oh, yeah: I also made another partial torso for photographing necklaces on.
I wrapped plastic bags and plastic wrap around my mannequin, to protect its decoupage and make the new bust easy to remove, and used some slightly thick art paper and watered-down glue to cover the neck, shoulders, and upper part of the bust. I like the beige art paper that’s covering the mannequin now, but some pieces show up a lot better on this black paper. The decoupaging process is quite enjoyable. I’m toying with the idea of doing another black display bust, but with a thinner paper, so the torn edges aren’t quite so obvious.
Other things that may be of interest:
I started a portfolio on Behance. I like the look of the site a lot, adding projects is pretty easy, and it’s a great way to waste time looking at shiny things! I mean, a great source of art and inspiration. Yes.
Also I started a Tumblr. I know, I know, I’m a little late to the party, what took me so long? (Hey look I got started on Pinterest before the whole internet noticed it was A Cool Thing, so I’m not completely behind, right?) What took me so long is that look, the last thing I need is another blog-like thing to update, but I guess I can cheat at Tumblr and post my posts here to Tumblr, right? Mixed in with sporadic additions of whatever else that catches my eye, of course.
Things upcoming: I worked out a new design for ear cuffs, using 2 different metals. It’s my original two leaf design, with a 3rd leaf of another metal overlaying them. I like them a lot, I just need to *sigh* photograph them and make some listings and stuff.
Also, I want to brag about some work I did at the Asylum, because projects that cost NO MONEY and use up lots of scrap and spare materials, AND look great are worth bragging about, but I’ll save that for another post.

