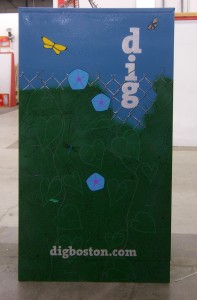
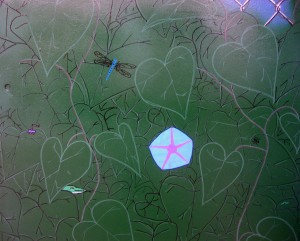
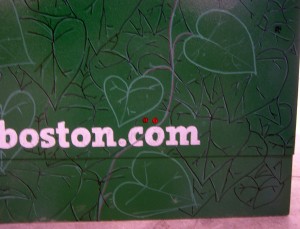
Dig box: completed

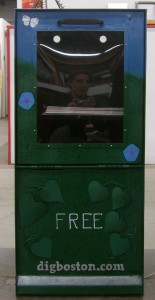
After much trial and tribulation, it is done.

Aw, look at the reflection, it's smiling!

The last week of the project, I ran into some unexpected problems.

When I decided I did want to attempt some 3d elements, I did tests. I thought spot welding would be the right solution, but it made the wire brittle and easy to snap. So I moved on to JB Weld, even though I felt kind of insecure about using epoxy, having little experience with it.

I attached a metal leaf to the wire I was using with JB Weld, let it set, and then tested to see if I could bust it. I could not! Hurray!

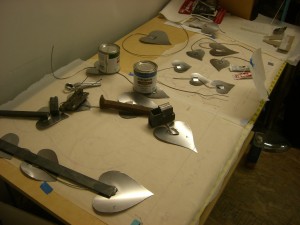
Weighting down the leaf-wire-metal sandwiches while the epoxy cures.

So I spent a day or two cutting more leaves out of steel shim stock, cutting wire to the right lengths, and sticking it all together with JB Weld (I used smaller pieces of sheet metal on the back, to sandwich the wire properly. My tests showed I had to make a sandwich to keep the wire in place.) Then I spray-painted them and drew on the veins with a paint pen.

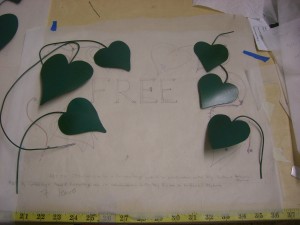
The painted leaves, with the wire stems bent into approximately the right shape.

Then, the evening that I was going to epoxy the leaves o the top of the box, one of the “welds” failed. I was trying to gently bend one of the leaves, so I could get a better connection between the box top, the epoxy, and the leaf, and POP, the leaf came free of the epoxy holding it to the wire.

A friend very kindly spent some time that evening helping me test out some other kinds of epoxy (and Gorilla Glue, borrowed from another Asylum member), but at that point I had an alternate plan in mind. And then it turned out the other epoxies/glue weren’t any better than the JB Weld. Yes, it did take some work to pop metal free of the epoxy, but the fact that it could be done made me fear for the long-term survivability of the box. It’s going to be in public, right? Someone, at some point, isn’t going to be able to resist “testing” it. So: butterflies.

The reason I wasn’t trying to weld or bolt/screw/etc. the leaves to the top is that we were not supposed to put holes in the top surface of the box, because no one wants rain inside their newspaper box! And, well, I don’t know how to weld AND my materials were so thin that welding actually seems . . . ill advised.

The front panel had holes in it already. In fact, I pulled off an “extra” panel that was originally on the box (and used it to test paints and methods) to use the holes it was attached by, and then discovered there were EVEN MORE holes in that panel than it seemed. So the front set of leaves have wires that go through the holes and are epoxied in place.

I also drilled additional holes through all those leaves so I could tie them to the box with thin wire (painted to match the veins). Mechanical attachments – better than glue! Unless you have REALLY AWESOME glue, which I don’t.

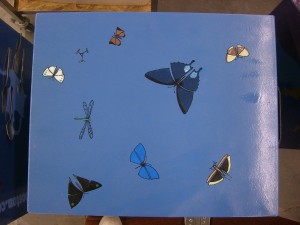
Since my original plan was to wrap several metal vines over the top of the box, I now had to come up with something to do to the top, because leaving it just plain blue was kind of boring. I settled on butterflies. And some other flying creatures. And things.

Butterflies, a dragonfly and grasshopper, even a tiny tricopter.

Ultimately, I’m pretty satisfied with this. The vines draped over the top did look good, but on a conceptual level, they didn’t seem quite right without something to really be wrapped around.

The troubles were not over with the painting of the top, because I still had the varnishing step to go, to give the box some protection from UV.

I had a convenient test panel, which I sprayed with 2 or 3 coats of varnish to see what, if anything, would happen to the various kinds of paint I had applied.

Well, it smelled bad while the varnish was still damp, but otherwise, it worked just fine.

So, a couple coats of varnish in, and I noticed that some of the most recent butterflies were, well, dripping. I wiped one of them off completely (and then drew it back on days later, because it left kind of a hole. Well, I noticed). The others I just left kind of fuzzy.

The presentation was over a week ago, and someday soon, the boxes will be removed from the Asylum and placed on the street. Here’s a post on the Asylum’s site about the first round of boxes, with video showing them being put into place on the street. There’s a map here showing the locations.

This was a fun project, and I’m glad of the advice I got from many people, some working on their own boxes.

When I had my test panel lying out one day, with some early sketches of the leaves, a couple different people, without prompting, pointed out which style they preferred . . . and it wasn’t what I thought I’d be doing! So I started asking more people for their opinions, and eventually  someone said, “It looks like these different blocks of leaves need to all be tied together somehow,” so I played around with that and discovered that by using all three different styles (black outline, green outline, black over green), I got a really great illusion of depth.

More pictures:

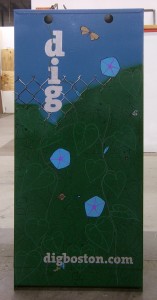
Left side

Back of box

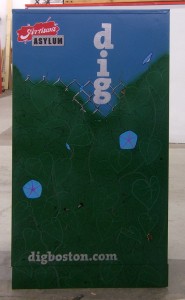
Right side

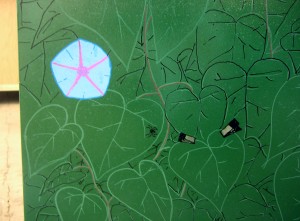
Spring clips and a spider

A bird peeks out, perhaps spying the tiny helicopter flying by.

Lizard and some other creatures

Something is hidden back there. I don't know what it is, either.

I put a lot of little creatures into the design. Many ants, because they were quick and easy and besides if there’s one ant somewhere, there are probably a thousand (though not on the box. It was a vine box, not an ant box).

There are some additional pictures on Flickr, including pictures of other artists’ boxes.

Share

Busy with several things

In addition to getting ready for the Together Festival in just over a week, I have been working on several other things. Many of which also have deadlines in the next 10 days. WHEE.

This had no deadline, but I needed the space on the top of the cabinet, where I’d had the objects laid out for weeks, and then I had some free time while waiting on an ear casting ( . . . uh, more on that later) so I took care of it:

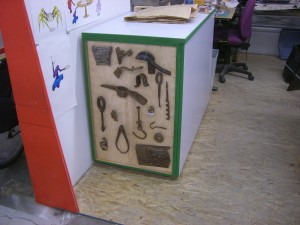
I wired several of my favorite large pieces of found stuff on the end of this cabinet.

The top of the cabinet is, of course, now piled with other things. But that was the point of wiring the metal stuff to the end of the cabinet.

And I came up with this:

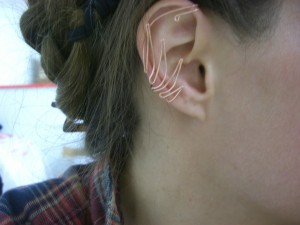
New ear cuff design

More of these at the festival! I was trying to duplicate a really old, early ear cuff design, and, well, things happened. I still haven’t duplicated the old design.

And then there’s this:

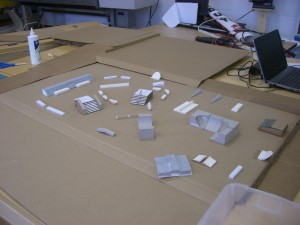
Models of things one might find in a skatepark

I made the quarter-bowl shapes by covering part of a rubber ball with paper soaked in glue.

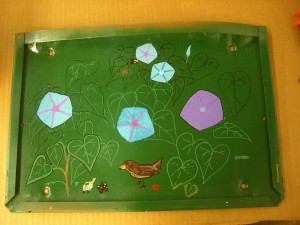
And, at long last, after more horrors than I care to recount or remember, the Dig box has its primary coating of paint, and I’ve spent some time testing out my wonderful, wonderful paint pens, which I’ll be using to do all the detail work. (Also I have some tiny bottles of Testor paints!)

Testing out designs and pens and paint for the Dig box

FINALLY I am done with stinky paint

Share

Today I made a deformed frog

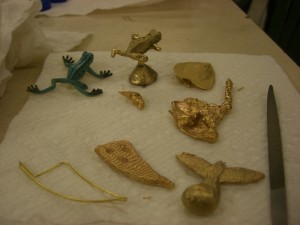
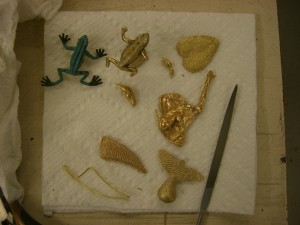
A frog, leaf, blob, bird and tooth shape cast in various methods.

Starting from the frog and going clockwise: Delft clay casting, cuttlebone leaf, water casting, cuttlebone bird and tooth shape.

I took a class this weekend at Artisan’s Asylum called Metalcasting with Sand, Bone, and Water. We learned how to cast shapes freeform, by pouring molten metal into water, how to carve shapes in cuttlebone (which gives you great ripply textures from the cuttlebone – one more tutorial for good measure), and how to use Delft clay (really sand mixed with some kind of oil) to make a mold of another object, and then recreate it with metal.

It was really terrific fun, one of my favorite classes I’ve taken there, and I highly recommend it (I believe it will be run again at some undetermined point).

I attempted to cast my little toy frog using the Delft clay, but its legs are so thin that the metal really couldn’t make it down their full length, so the results are what you see above: a frog with sad little stumps. (Though with a little of the burnt sand/oil mix still on the surface, it could almost pass as some ancient artifact that has mostly survived some great catastrophe. Froggy de Milo?) This is a great method for recreating something that has a lot of fine detail – one person used little plastic fish (flexible, though not as badly as the frog, so it took some extra care to make sure it left a good impression in the clay) – and the results are amazing. It picked up every scale and fine line in the fish’s fins.

We did the water casting to gain some familiarity with the process of melting the metal and then pouring it. The target is a bowl of water, as opposed to the small funnel that we cut into the clay or cuttlebone to pour metal into. (You can see part of the funnel there on the frog’s base.)

The shape is impossible to control precisely, but the height of the crucible above the water does determine how much the metal spreads out. One of the other students got a really interesting shape, like a wide, flat, curving ribbon, by “throwing” the metal into the water. This would be a fun technique to play around with more. (Other people suggested trying things spinning the bowl of water; dropping the metal into a much deeper bowl so that the bottom of the metal would be round instead of flattening out; and dropping the metal into boiling water to see what the bubbling would do.)

The cuttlebone turned out to be my favorite method. The texture that the pieces end up with is so fantastic – it is great for narrow wiggly organic shapes, and for things like wings and fish.

The other side of some of the shapes.

For two of the cuttlebone castings, I attempted to shape both sides. The mold is made by sanding two cuttlebones flat, carving your design into one surface, and then taping them together to pour. It is difficult to figure out how the outline of your shape would show up on both halves of the mold, so usually the cuttlebone shapes are flat on their back side (well, flat except for the natural grain of the cuttlebone).

For the leaf and tooth shape, I attempted to give both sides some depth. With the leaf, I just kind of guessed, and carved the reverse side significantly smaller than the front.

For the tooth, I bent a piece of brass wire into my outline, and then sandwiched it between the pieces of cuttlebone, pushing them together to press the wire into the bone, before beginning to carve – the wire left a nice outline on both pieces for me to follow, and I did get some depth on both sides of the cast. I ended up liking the “reverse” side of the tooth better, because I cut it deeper and with a little more curve to it, and the deeper, more curved shapes showed the texture of the cuttlebone better.

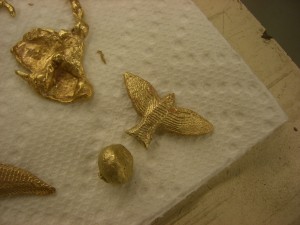
For the last piece, I wanted to really take advantage of the texture, have it work well with the overall form, so I carved a really abstract bird, with spread wings, into the cuttlebone, hoping the ridges would look like really abstracted feathers.

Bird cast in cuttlebone, with the sprue cut away

Bird cast in cuttlebone, with the sprue cut away

I didn’t do any major finishing for the pieces – I trimmed the sprues and filed the sharpest edges down, but I haven’t taken any polishing wheels to them, so they look a little dull (really. after going through several steps of polishing, that brassy metal GLEAMS).

I think it would be really neat to cast some bezels or frames in cuttlebone that I can wire stones into. I think the ridged texture could look really fantastic. The metal we were using for most of the work was some sort of copper alloy (it looks very similar to brass, but I don’t know if it was alloyed with tin or zinc or what), and quite soft, so I could also cast narrow shapes and wind them around stones, like a really, really fat wire. A couple of students brought in silver jewelry they no longer wore, and melted that down for casting; there was additional sterling casting grain on hand that we could buy if we wanted to, but since I was more focused on experimenting with carving shapes into cuttlebone, I didn’t feel like splurging.

There are plans in place to set up an area at the Asylum that is dedicated to jewelry work (and glass – lampworking!!!), which I am really looking forward to.

Of course, I’m going to want to cast steel, too.

Share

Dig box project

The Asylum and Dig Boston have a joint project going whereby members of the Asylum get to give some of the Dig’s older, more experienced (i.e. rusted, pitted, faded, abused) newsboxes facelifts. Here’s the Dig’s original article on the program.

Round 1 recently finished, and some of the boxes are out on the streets.

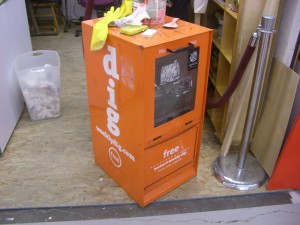
I am in round 2 (at the link: photos of completed boxes, and plans for the next round). Here is what I have to work with:

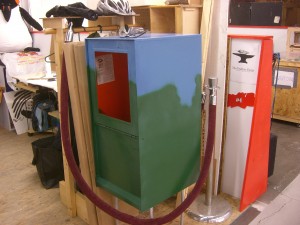
One of the Weekly Dig's newsboxes, which I will be repainting.

Once I clean off all the sticky and sand this thing down, I can really get to work.

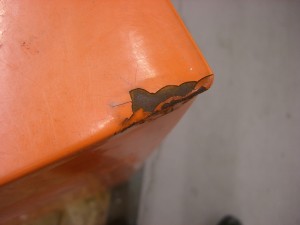
Battered, rusty corner of Dig Box

This looks like the worst damage on my box. Really not that bad!


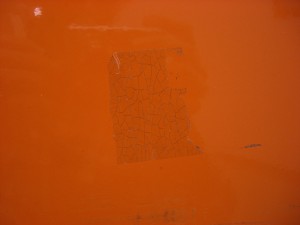
Plastic tape on a newsbox that has developed a network of fractures

This is not cracked paint. This is clear tape that has aged and fractured in a neat pattern.

I am going to cover it with vines. Mostly painted-on vines, because I am no great metalworker, but I’m considering making some of them three dimensional, coming out of the sides near the top and curving over it.

And I want to hide things in the vines. Birds and bugs and spring clips and tiny robots and glowing eyes and maybe a squid or two. There’s plenty of space for all sorts of things!

First, I will have to clean off the remaining sticker residue, sand it down, and possibly do some minor repairs to rusted areas (but my box is not nearly as beaten up as many).

And I have less than 4 weeks.

Share

I like long walks on the beach, and picking rusted things up off the street

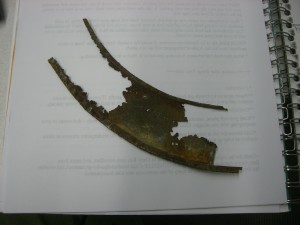
A lovely flat piece of rusted metal

I found this lovely thing on the sidewalk this morning while I was walking to the T.

Most things I pick up like that are smaller and not terribly fragile – old nails or bolts, pieces of chain – and I can immediately stuff them into a pocket, where they will either languish for months (if in my jacket), or be discovered in the washing machine in a week or two.

This was too big and too fragile to fit into a pocket, but I had some time while waiting for the train to arrive to carefully stow it inside a notebook, like a pressed flower.

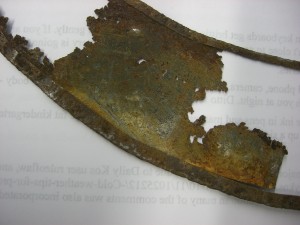
A closer look at one side of the metal thing.

Gorgeous, isn’t it?

I don’t know what I’ll do with this. I think it is probably too fragile, and possibly too big, and too corroded, to be used for jewelry, though it would be amazing as the main piece of a necklace. I suppose it could be made into a necklace or pectoral that isn’t actually intended to be worn, but at that point, I’d rather make something that is definitely NOT meant to be worn. While I appreciate art that results in something that appears functional but is really just meant to be looked at, I also find it kind of irritating, so I am disinclined to do that sort of thing myself.

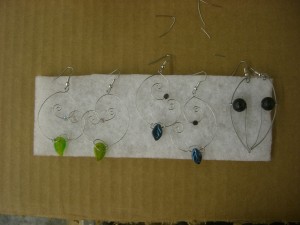
Besides, I still have plenty of materials for making actually wearable pieces of jewelry; here are the first things I made in my first day using my space at Artisan’s Asylum:

Stainless steel wire, glass beads, lava beads

It was fantastic having a work space that isn’t doubling as kitchen counter, miscellaneous craft table, or horizontal surface of holding all the stuff. I’m realistic enough to know that my uncluttered work surface won’t stay that way for long, but I am enjoying the hell out of it while it lasts (and at least it will NEVER be competing with the production of a big meal, so there’s that).

These are not new designs, but OMG I am out of practice. It took way too long to get those damn spirally earrings right; in the process, I created and then had to cut up another 2 pairs (had to cut them up at 80% done to free the beads).

The workspace isn’t completely set up yet: I bought 3 full sheets of OSB to lay down as the floor, thinking it would be nicer to walk on that than concrete, and also less likely to end in the destruction of fragile dropped things, but the walls of my space are not quite big enough to just lay the boards down.

They are supposed to be 8 feet apart, which would be perfect, but they are about 2 inches too close together.

So I have to haul the OSB all the way to the wood shop, trim 2 inches off one end of each sheet, and then haul it back, and I am not fit enough to do more than maybe one of those a day.

The 1/3 of the floor that I have put the OSB down on is much nicer to walk on, however, and the sooner I get the rest cut and laid down, the sooner I can bring in more shelving and work surface and . . . stuff.

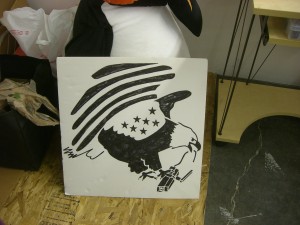
The floor, in progress, with anti-surveillance eagle sign, and penguin.

The stencil version of the anti-surveillance eagle works quite well as  stencil; I used it to make a large sign on foamcore. The penguin supporting it I deny all responsibility for.

ANYWAY. As soon as I get more work surfaces set up, the sooner I can lay out and admire the contents of my various boxes of random rusted metal things (I got 26 pounds shipped to me from home recently!), and figure out if I can find a good use for my newest acquisition.

Share

SOS spells success!

Put that dictionary down before you hurt someone; you know what I mean.

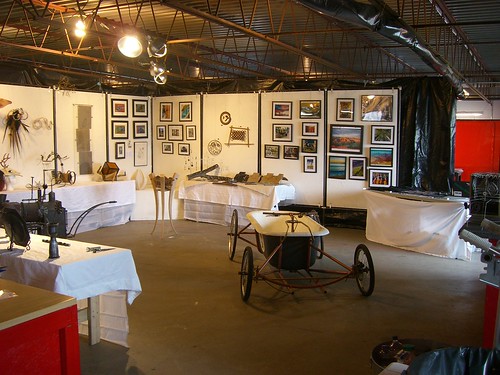
The exhibit looked great, thanks to the hard work of a bunch of folks at the Asylum, especially Ecco and Carolyn, who organized it all. We – and I mean mostly other people – gave a lot of tours of the space to visitors, and people seemed really enthusiastic about it.

The art was great, too. I didn’t take many pictures, but other people did. Eventually I will have links to those photos. In the meantime:

Art! And a go-kart! There's more on the left; click the photo to see the whole set.

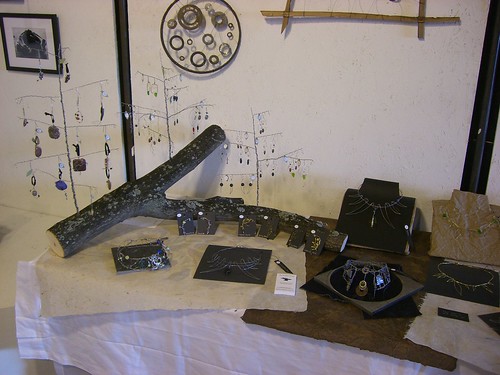
Part of my display, showing off my wire trees and some of the necklace busts.

Here are more photos of the construction of the necklace busts, which were made from cardboard boxes (and covered with the kraft paper the boxes were stuff with, except that black one, which I covered with a layer of black art paper, all the better to show off the necklace). They pack mostly flat when disassembled.

Share

Final SOS Prep

It is a perfect spring day, and soon I will need to get dressed and haul the rest of my stuff to the Asylum, but everything is packed (I am sure of it) and ready to go. I took the big display pieces over last night, and also the pieces I made at Yestermorrow last summer, the only pieces that count as just art.

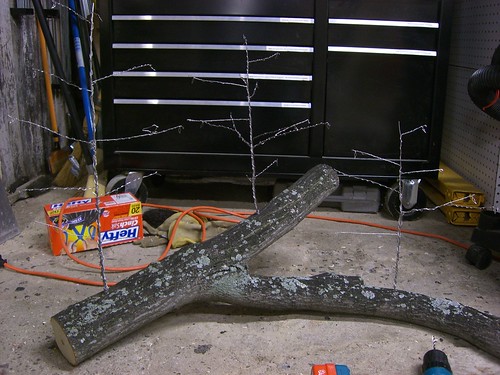
Wire trees embedded in a chunk of the branch that fell into our yard during the winter.

This morning I am taking all the jewelry and my boxes of beads and rolls of wire (so I have something to fidget with). Like now. Now would be good.

Share

Next: Somerville Open Studios and beyond

The Spring Fever Market was fun! A bit cold, but I can’t complain about having a table in between a chocolate maker and the great and wonderful seller of cider donuts.

We had quite a lot of people ask if we’d be back in May; the answer is still “Don’t know, no plans as of yet . . . ”

I, however, will definitely be at Artisan’s Asylum in just over a week for the Open Studios. We are number 99 on the map, and are conveniently located on Joy St., a short walk from the Joy Street Studios, which has several of its members showing work at their location. Parking on the street is free! And we’re on the trolley route!!

I have a particular necklace idea I want to finish by then, as well as what might be a really awesome display for pendants and earrings, made from a chunk of the massive tree branch that fell in our backyard during the first big snowstorm of the winter. It’s got some really fantastic patches of lichen on it.

I’m also working on making more earrings along the lines of these:

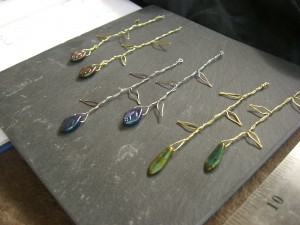
Three pairs of wire earrings, shaped like vines, with glass beads dangling at the end.

Three pairs of "Little Vines" earrings, awaiting ear wires. Brass or stainless steel, plus glass beads.

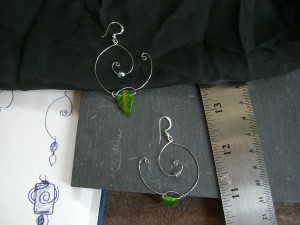
Earrings made with wire shaped into two spirals, with glass beads dangling from them.

Stainless steel and some of my favorite glass leaf beads.

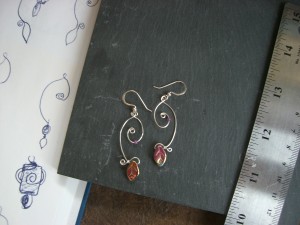
Earrings with wire spirals and glass dangles

Sterling silver spirals and glass beads.

I’m finding that I can only make 3 or 4 pairs of the spirally kind in a session, because at that point I run out of patience for getting both earrings to have the same shape. I need to develop some really good jigs and clamps, I think.

Also coming up, I’m donating some work to Jumpstart’s Literacy Olympics, happening May 11, so I have that to work on. My original thought was to make some pieces similar to what I already have, but then I got to thinking about the subject of the event.

And then I went looking for book charms, and I found some really neat ones!

And then . . .

I found tiny books.

TINY. BOOKS.

I was so excited by the impending arriving of the TINY BOOKS!!!! that as soon as I could lay hands on my wire, I mocked up a tiny book out of some cardboard and started to work out how to incorporate one into jewelry. Without damaging it. Or letting it get lost. But still being accessible for writing tiny notes in it (these are blank books).

It’s probably a good thing they won’t get here before the weekend (maybe. maybe not), because there is work I need to get done for the Open Studios.

Although . . . I am getting several tiny books. So I could probably do some work using them and have it available during Open Studios, too.

Share

A craft fair!! (Spring Fever Market at the Armory)

Arts at the Armory, located a convenient mile away, has hosted a really awesome winter farmers market this year. Sadly, the winter farmers market is over, but happily, they decided to bridge the winter/summer gap with 4 Spring Fever Markets. (Here is the Armory’s shiny Facebook page for it.)

Which includes crafts. Not just lettuce!

Wonderful though the lettuce is. (And the onions and kale – well, Edgar approves of kale – and THE CIDER DONUTS omg.)

So I signed up for one. As a craft vendor, not a farmer, because the garden this year, it is well I think it may be lying fallow this year. Yes.

I will be there with Sara of Khyamara, Sunday, April 17, from 10 am until 2 pm.

Very exciting. By which I mean terrifying. Though I think we’re safe from an attack by lettuce.

Also! The Feather Forge now has a Facebook page . . . which I can’t figure out how to link to yet. I think it doesn’t have enough fans or friends or whatevers for that to be easy and or possible. Nevermind. Got it.

At any rate, I have made a lot of interesting new things – pendants and earrings, mostly – and soon (after the craft fair, probably) I will upload more pictures. I’m excited about having worked out some designs that I really like, since I’d been struggling for a long time with those particular items. Here’s for doodling during meetings, and that’s all I have to say about that!

In “Finding supplies can be frustrating” news, I can’t find the little green oval glass beads I use in the Spring Rites ear cuffs, and I am very sad about that. I spent HOURS searching online bead stores after discovering my favorite local source doesn’t stock them any more. I also bought their last bag of some really lovely green glass leaves, but I’ve found online sources for them. Sadness. I will have to find a suitable replacement for the little ovals.

I will be updating the Etsy store soon, too, and probably raising some prices (I read several more articles about how to price things and decided that some things should be changed).

And last but not least, I will be at Artisan’s Asylum during Somerville Open Studios (April 30-May 1, 12-6), along with several others!

Share

Jewelry Happy Hours!

I’m running a couple of jewelry work sessions at the Asylum this month.

They are classes in that I and 2 or 3 other jewelry makers will be around to show people how to make shiny things, and also to work on our own projects. We don’t have lesson plans; we’ll cover whatever it is people are interested in.

We had our first night last week, and it was fun and productive! Cider was drunk! Necklaces were knotted and bent! Not both at once, mind.

I also learned that the hunting and camping supply store near me is a good place to buy feathers.

Khrysti and Sara (who run Khyamara together) both worked on knotwork projects; Sara also made a lot of progress on a wire-wrapped ring.

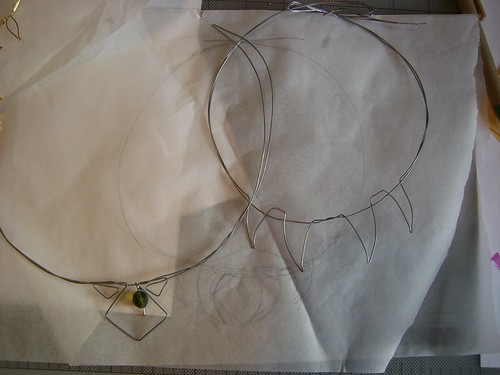
I finally – FINALLY – went through my sketches from StrowlerCon and prototyped a couple of designs:

A simpler "tooth" design and a geometric shape, accented with a glass bead.

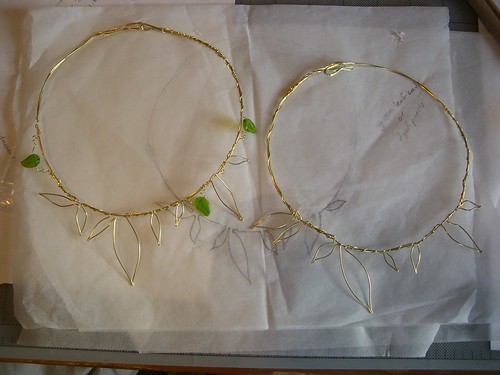
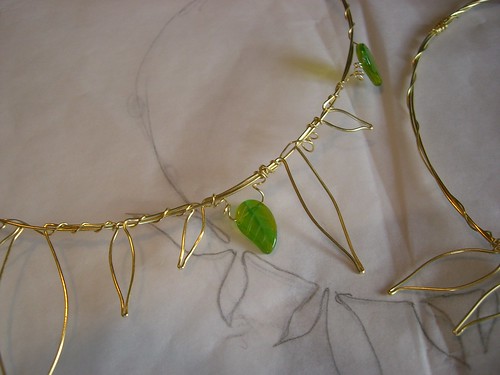
The leaf shapes come from my original Spring Rites necklace and ear cuffs design.

Leaf and tendril detail of Spring Rites necklace.

The Spring Rites pieces are probably going to be listed on Etsy (if not those exact two, then I’ll be making more much like them). I also came up with a loooooooong list of ideas for that series, so I am excited to get more variations on that theme out of my head and into the wire.

Jewelry Happy Hour is meeting two more times this month, and I believe that our 4th instructor will be joining us both of those times, along with a jewelry maker who does some metalsmithing work (Purpleshiny), and at least one person who wants some lessons.

I am really looking forward to it! It was great to see different kinds of work in process, and to understand the amount of time some seemingly very simple projects take (Khrysti made a very nice, very simple bracelet that took something like an hour).

Share