Next: Somerville Open Studios and beyond

The Spring Fever Market was fun! A bit cold, but I can’t complain about having a table in between a chocolate maker and the great and wonderful seller of cider donuts.

We had quite a lot of people ask if we’d be back in May; the answer is still “Don’t know, no plans as of yet . . . ”

I, however, will definitely be at Artisan’s Asylum in just over a week for the Open Studios. We are number 99 on the map, and are conveniently located on Joy St., a short walk from the Joy Street Studios, which has several of its members showing work at their location. Parking on the street is free! And we’re on the trolley route!!

I have a particular necklace idea I want to finish by then, as well as what might be a really awesome display for pendants and earrings, made from a chunk of the massive tree branch that fell in our backyard during the first big snowstorm of the winter. It’s got some really fantastic patches of lichen on it.

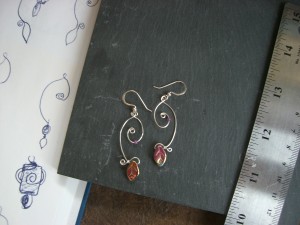
I’m also working on making more earrings along the lines of these:
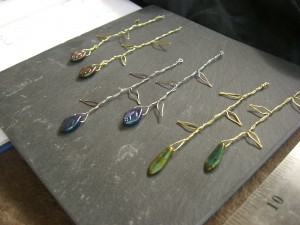
Three pairs of wire earrings, shaped like vines, with glass beads dangling at the end.

Three pairs of "Little Vines" earrings, awaiting ear wires. Brass or stainless steel, plus glass beads.

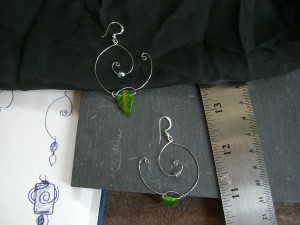
Earrings made with wire shaped into two spirals, with glass beads dangling from them.

Stainless steel and some of my favorite glass leaf beads.

Earrings with wire spirals and glass dangles

Sterling silver spirals and glass beads.

I’m finding that I can only make 3 or 4 pairs of the spirally kind in a session, because at that point I run out of patience for getting both earrings to have the same shape. I need to develop some really good jigs and clamps, I think.

Also coming up, I’m donating some work to Jumpstart’s Literacy Olympics, happening May 11, so I have that to work on. My original thought was to make some pieces similar to what I already have, but then I got to thinking about the subject of the event.

And then I went looking for book charms, and I found some really neat ones!

And then . . .

I found tiny books.

TINY. BOOKS.

I was so excited by the impending arriving of the TINY BOOKS!!!! that as soon as I could lay hands on my wire, I mocked up a tiny book out of some cardboard and started to work out how to incorporate one into jewelry. Without damaging it. Or letting it get lost. But still being accessible for writing tiny notes in it (these are blank books).

It’s probably a good thing they won’t get here before the weekend (maybe. maybe not), because there is work I need to get done for the Open Studios.

Although . . . I am getting several tiny books. So I could probably do some work using them and have it available during Open Studios, too.

Share

Jewelry Happy Hours!

I’m running a couple of jewelry work sessions at the Asylum this month.

They are classes in that I and 2 or 3 other jewelry makers will be around to show people how to make shiny things, and also to work on our own projects. We don’t have lesson plans; we’ll cover whatever it is people are interested in.

We had our first night last week, and it was fun and productive! Cider was drunk! Necklaces were knotted and bent! Not both at once, mind.

I also learned that the hunting and camping supply store near me is a good place to buy feathers.

Khrysti and Sara (who run Khyamara together) both worked on knotwork projects; Sara also made a lot of progress on a wire-wrapped ring.

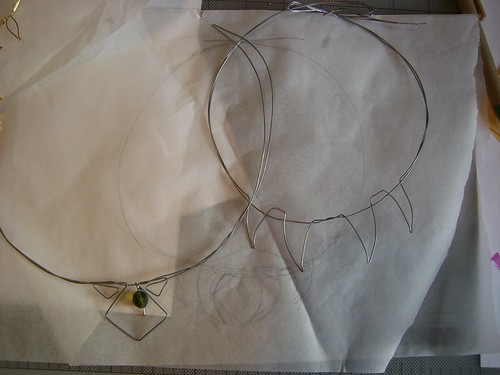
I finally – FINALLY – went through my sketches from StrowlerCon and prototyped a couple of designs:

A simpler "tooth" design and a geometric shape, accented with a glass bead.

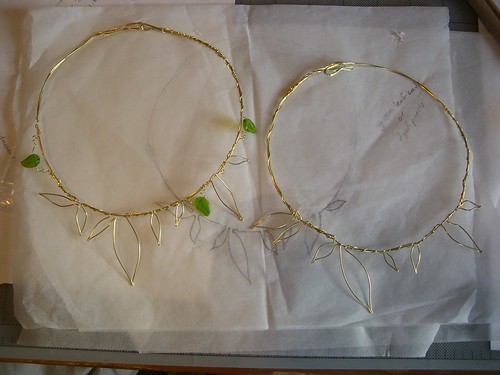
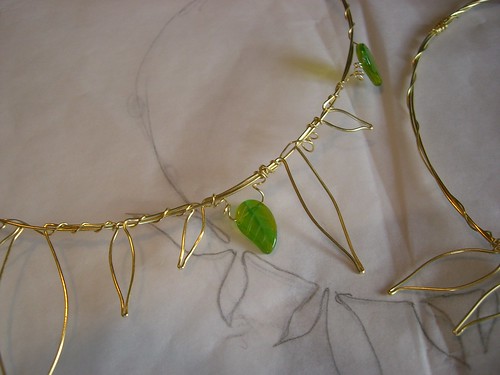
The leaf shapes come from my original Spring Rites necklace and ear cuffs design.

Leaf and tendril detail of Spring Rites necklace.

The Spring Rites pieces are probably going to be listed on Etsy (if not those exact two, then I’ll be making more much like them). I also came up with a loooooooong list of ideas for that series, so I am excited to get more variations on that theme out of my head and into the wire.

Jewelry Happy Hour is meeting two more times this month, and I believe that our 4th instructor will be joining us both of those times, along with a jewelry maker who does some metalsmithing work (Purpleshiny), and at least one person who wants some lessons.

I am really looking forward to it! It was great to see different kinds of work in process, and to understand the amount of time some seemingly very simple projects take (Khrysti made a very nice, very simple bracelet that took something like an hour).

Share

A collection of shiny things

First, shiny words!

One of my favorite authors, Catherynne Valente, has a new book out: The Habitation of the Blessed, the first of three books about the mythical Prester John and the amazing land he had supposedly discovered, who the medieval world got all excited and crazed about. Embedded in her post about the book release is a really awesome video explaining who Prester John was – using action fictions and LOLcats. (Plus links to the online chapters and info about how you can enter in a drawing to win some phenomenally gorgeous art.)

The first 5 chapters are online FOR FREE, and I read them, and then I found myself later in the day thinking, “Yeah, I need to go finish reading that – CURSES I don’t have the book yet! Argh.”

My introduction to her work was Palimpsest, which I can’t be effusive enough about. Her writing – all of her writing – is typically more descriptive and lush and lyrical and evocative of myth and mystery than most writers’, and Palimpsest some of the very lushest. I was torn, when I started it, between spreading the reading out over a week so I could enjoy it for more days, and spending my entire weekend engrossed in it because Oh my god. (I didn’t get much else done that weekend; I recently reread it, spread out over a week or two, and it was just as good.)

(I also recently finished This Is My Letter to the World, an anthology of short stories written for her Omikuji Project. I highly recommend it, especially if you like retellings of old myths, but if you are the kind to get teared up over what you are reading, I don’t recommend reading it on the T, unless you like risking crying in public.)

Boston area folks – she is doing a reading at Pandemonium on Dec. 11, 3pm, as part of her book tour.

Next, shiny birds!

I was poking around deviantART, pondering setting up an account, and this caught my eye:

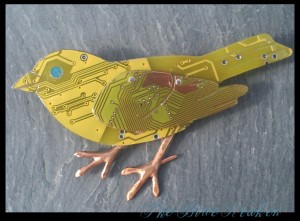
Bird broach made out of circuit boards.

Bird broach made out of circuit boards. OMG THOSE FEET.

Thebluekraken has a lot of other jewelry made from circuit boards, much of it cut into leaf shapes. A lot of circuit board art leaves me cold, but I really, really like the juxtaposition of technology with shapes from nature.

Next, shiny free software! Named after birds.

Aviary is a suite of browser-based tools for creating and editing images. So if you don’t have Photoshop ($$$), or the GIMP (free, open source), you may want to check this out. They also have a tool for creating vector drawings, which is what Illustrator ($$$) and Inkscape (free, open source) can do. Plus other things I have barely looked at. (I have the full Adobe suite, so I have spent little time testing out alternatives.) Since it is browser based, you can access it whenever you have access to a browser, rather than only when you are using the machine you have the other programs installed on.

Last, something that should have its own post, but I am feeling lazy.

Look! Over there! In the sidebar! Yes, I finally got some items listed on Etsy.

I started with some favorites, and I have a BIG PILE of other things (well, okay, maybe half a dozen. or 10?) to get listed, but it’s a start.

Thanks to everyone who encouraged and pushed me over the last year or so to do this. Once I got through writing policies, it wasn’t nearly as terrifying as I thought it would be.

Share

Swapfest loot

I haven’t been to Swapfest since last year, and realized recently that I needed to remedy that. This is what I came home with (also a pair of pliers, but they are less exciting and photogenic):

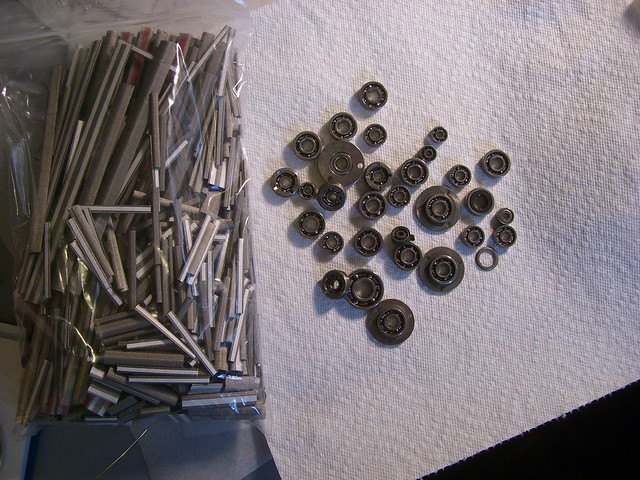
Bearings and EMF shielding strips

On the left, a bag of EMF shielding; on the right, some really lovely bearings.

The shielding is stuff I have experimented with before, but I only have a small quantity left, so I now I feel free to do more experimentation, and have plenty for good results, too! It has an adhesive strip on the back, which is not particularly useful for me, I think.

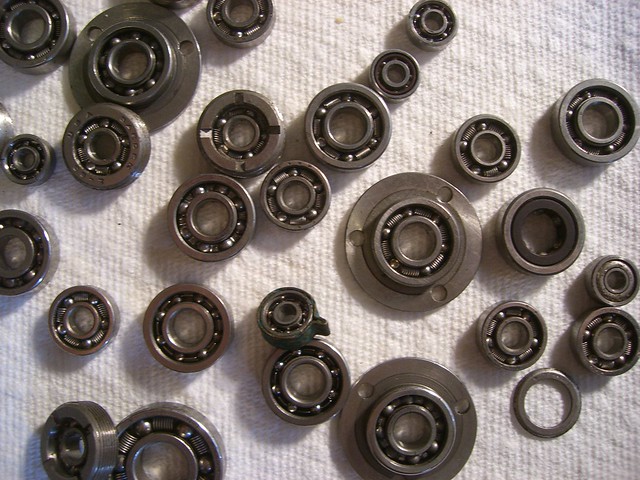
I did not buy out the bearing seller’s entire supply, but I was tempted. They’re so pretty!

Bearings

Some of the bearings have tiny springs in between the balls; other have more rigid spacers.

Share

A bunch of links about tools

Lindstrom’s home page. They make a variety of high-end pliers and cutters, and have info online about their products.

Swanstrom’s home page. They also make a variety of high-end pliers and cutters, and have somewhat less helpful info about their products (organization of some of it leaves much to be desired.)

JewelryMakingGuide.com: article about super-flush cutters.

artjewelrymag Forum discussion about flush cutters.

From JewelryLessons.com: q&a about pliers.

Jewelry Pliers and Wire Wrapping Supplies: Basic Tools You Need…And Don’t Need – a useful list!

Another list of tools and resources.

Choosing the right pliers for the job.

Description of mandrel-tip pliers.

Advice about buying beads online.

Share

The world’s ugliest lightbox

I’m not a very proficient photographer, and I don’t have a lot of patience for fiddling with the various settings on my camera to get perfect results, so when I saw some easy instructions for how to build your own lightbox, I made a mental note of it. I figured someday it might be a useful thing to know how to do, if I had small objects I wanted to make some effort to photograph nicely. I know I can always adjust things in Photoshop later, but I’d rather not have to add that step to the process.

Since I started making more jewelry, I’ve become even more bothered by the crappy pictures I’ve been getting under inferior artificial light, so a week or so ago, I looked up the “How to build a lightbox” instructions, and built my own last night.

Here is one such tutorial via Strobist.

Here is another using fabric instead of trace or tissue paper.

Google provides a variety of other alternatives; I saw another one built out of foam core, with solid walls; illumination is provided by clamping lights to the front walls and aiming them into the box (instead of lighting the exterior, and diffusing the light with trace paper or fabric).

Here’s my version:

Lightbox built from binder clips and used Priority Mail boxes

One clip-on lamp + one ugly old saved-from-a-basement lamp = my light sources.

It’s made from two Priority Mail boxes, with trace paper covering the cut-outs in the sides and top. I use binder clips to hold the two pieces together. I cut the top so I can lift a flap of paper out of the way and take photos from above my subject; it is generally held (mostly) in place with tape.

Yeah, it’s ugly, and it probably took longer to make than if I’d started with a single box of the right size. And there are gaps where there technically shouldn’t be. BUT it can be taken apart and stored flat, so it takes up very little space!

Here are some pictures I took to test it all out:

Testing white balance

Not too shabby.

Another white balance test

Also not bad. If only I'd made notes about what the camera settings were.

Overhead picture

I cut a hole in the trace paper on the box top so I could take overhead pictures.

Flash!

Flash! A bit too yellow.

One of my current light sources is a fluorescent bulb, which is not really as bright as I’d like; this will be an easy fix (in fact now that I think about it, I think I might have a nice incandescent stored in a large yogurt container on the little table next to the window). Usually I only use that light, clipped to a bookcase, to provide additional light when I need to use my big mirror. It turns out the clip part of it balances very well when placed on the desk, so the lamp can be a desk lamp without needing to be clipped to the edge of the desk! Nice design, that.

I do want to get a large sheet of white paper to cover the back and create the bottom of the light box; the cutting mat and brown cardboard are not particularly nice.

I originally thought about making a teeny tiny lightbox out of a kleenex box, but it’s easier to put different backdrops and props into the bigger box. (I may make a tiny one anyway, because it would be fun and cute.)

Share