Progress and etc.

I picked up crocheting again this summer: I have a project I started in early 2000 and put aside a month or two later that I am finally going to finish off. And because I set up an account on Ravelry a while back, when I went there to see if anyone else was using that old pattern (yes), I fell down a rabbithole or two of crochet patterns and found several that look like fun, so I’ve got one of those in progress, too. (Did you know there are some REALLY AMAZING complex-looking textured doilies out there?? There are!)

I also dug out a sewing project I started in a class 8 or 9 years ago and got almost finished with and then . . . Well.

It’s still not done, but it’s closer to done than it was a month ago! I’ll get there! It’s just that I have never sewed anything like this and I’ve gotten to a part of the pattern I’m nervous about so I’m procrastinating, besides which there are other exciting things to do, like crocheting and the internet and pretty much everything else.

And I put the Etsy store back up, hoping maybe this time around I can sell this stuff and no longer have it in boxes, and then remembered that I’d done some digital art once upon a time, and maybe I should post about that some, too, and one thing lead to another and I set up a Threadless store which also has a new design in it, because suddenly I had more ideas, and I am now in a rush to get more of them made.

The crocheting is probably going to get abandoned again until I get some of digital art urges under control. That’s ok, the shawl’s been waiting almost 20 years it can wait another week to get edged and blocked and etc.

Share

I’m back, I think?

I didn’t intend for a lengthy hiatus, especially one of five and a half years, but shortly after that last post, a number of unplanned things came into being and here we are. Weirdly – very very weirdly – my life right now has some peculiar similarities to my life about the time I made that last post.

In early 2012, I’d been intentionally out of work for a while, to recover from doing horrible boring jobs and get my head back into a space where I could seriously try and move towards my desired career in architecture. In April, after a few months doing art and feeling better about life, I was starting to make plans: I was looking into possible employers in Portland, Maine; I also wanted to move out of the Boston area, you see. I’d never been happy there. Not long after that post, some really not-kidding Weird things started to happen and long story short I stopped being an atheist and became a pagan/polytheist/mystic. You know, “when the going gets weird the weird turn pro” except about the “pro” part, I don’t really get paid for this stuff. I mean in a traditional sense. Maybe in a traditional fairy tale sense I get paid but I digress. My plans to take “a few months off” in early 2012 turned into “a year” before I had steady work again, and during that time I realized that Oregon, where I grew up, was home and Maine wouldn’t cut it, and I needed to move back, so in early 2013 I moved to Portland, Oregon.

I also realized that architecture also wouldn’t cut it. For as long as I’d been pursuing that as a career, it was for the opportunity to do work that would be beneficial for the planet, and “sustainable architecture” looked like a good thing, right? Also for that long I’d had this small inner certainty that there was something not-quite-right about going into architecture, that it was missing something I needed. During grad school I realized that “sustainable” isn’t good enough; “regenerative” design is what is needed, and lots of it. Couldn’t find anything much in the realm of architecture like that, though – permaculture came up instead. I didn’t want to be a farmer or anything, though.

Anyway, after some divine intervention, I had to face up to architecture being wrong for me and start looking into landscape-related work. That’s where regenerative work can best be done.

Without any experience to draw on in that field, I had to look elsewhere for paying work, so I got yet-another boring, and slowly soul-crushing, job while doing landscape-ish things on a volunteer and hobby basis (I have so many plants now! it’s great!!). Walking away from design work was one of the most painful things I’ve ever done. Also, the day job was exhausting and I felt zero interest in doing much of any creative work for myself. I mean I built some shelving, and did a few devotional pieces of jewelry, but the energy/drive/desire for more, for anything like major projects, or even doing the same jewelry work I used to, just wasn’t there. I should’ve taken that as a more serious warning sign than I did, perhaps, but the slide down was very slow for a long time, until it became a terrible fall that had to be halted.

So, now: I left my horrible boring job earlier this year, extremely, nearly catastrophically burned out, exhausted, thinking I’d take “a few months” to recuperate while looking for work in something landscape related. I think it’s going to take about a year; I’m still not back to pre-burnout levels of energy. I finished up a permaculture course this spring, too. It was terrific, and doing the design work for our final project felt so good, I nearly cried. And I realized early this summer that while Oregon may be “home,” it is Central Oregon, the high desert, that is Home-where-my-heart-is, and I need to leave this lovely city.

I’ve had a number of weird “the past is repeating, kind of, only slightly less bad this time” experiences in the last 5 or 6 years. Kind of thought I might be done with that, but here we are again.

A couple months ago I had enough mental oomph back to start working through my mending. I decided to learn embroidery, too, make the mending prettier AND do some other projects. I started messing around with some old watercolor stuff, too. That gave me a bit more of an emotional boost, which made me more enthusiastic about other creative work, and life generally, which has been long overdue.

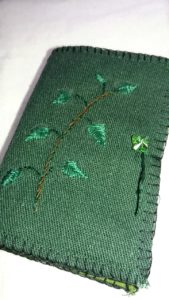
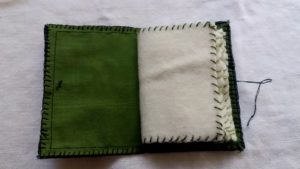
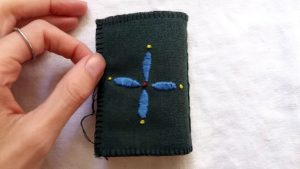
Here’s my first completed embroidery project, a needlebook:

Front cover with glass butterfly closure

Front inside cover and first page. I used a machine to hem the cover and cover lining, but the rest of the stitching was by hand.

Needlebook pages

Back cover of needlebook. Stitches are dreadfully uneven.

I intended to use a button as part of the closure, but none of the buttons I have looked right. I felt a pull to look through my long-ignored beads to find something toggle-like. I have lots of green beads, and a lot of leafy beads, but the leafy ones really didn’t work well with the embroidered design. I didn’t even know I had the little faceted glass butterfly – it was mixed in a bag with some other green glass – but it is perfect. It doesn’t draw attention away from the embroidery.

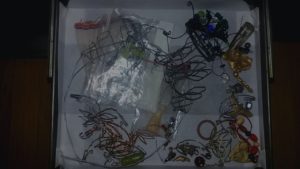
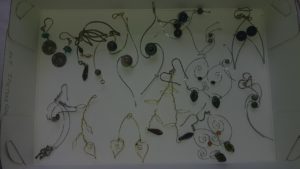
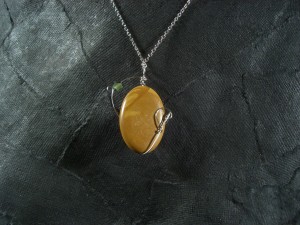
When I was going through the bead bins, I felt some real pangs about it – I suddenly missed doing the jewelry work. So I decided I would at least finish up some long-ignored projects, including finally making something from some focal beads I’ve had set aside for myself for years (and years). I also went through the drawers of disorganized stuff – prototypes, experiments, plus a few completed but imperfect (I guess?) earrings – and pulled out things good enough, or nearly good enough, to do things with.

One of the drawers of disaster, slightly less disastrous after I picked some things out.

Salvage from a drawer of disaster.

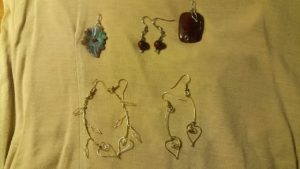
Newly completed works.

So I made some things! I finally made the earrings to match the red stone pendant I completed uhhhh let’s say 6 years ago. Every time I’ve worn it I wished I had the matching earrings already. Two of those leaf earrings just needed ear wires, but I made a mate to the more complex leafy thing, because I need them. Not that I wear a lot of jewelry but you know. The carved stone leaf had also been carefully wrapped up, to be turned into something for myself some day, and now it’s done. It needed a tiny red stone (red spinel) at its heart.

I’ve also started getting ready to take photos of older finished works I made originally to sell. It would be nice to see them go to good homes, and also to get some money on hand for things like future moving expenses. And, since I’ve little desire to find yet-another boring awful desk job, though I suspect I could do some on a very temporary basis without my body rebelling in a major way, I’ll probably make some new things, too. Maybe a couple pairs of the curvey brass leaf earrings. Those are fun.

I don’t know where this is all going to go, but it’s good to have my hands on these things again.

Share

Robots!

A few weeks ago, another member of the Asylum, Cherry Ogata, told me she knew someone who was making a robot-themed mini-comic, and might I be interested in submitted some of my robots for it?

ROBOTS!, by Jesse Lonergan, will be available this weekend at Boston Comic Con (and presumably afterwards, too, though I don’t know the details). I have work in there from Cake and Robots, as does Cherry, along with dozens of others.

I am really super excited to get my hands on a copy. Or multiple copies.

Share

Dig box: completed

After much trial and tribulation, it is done.
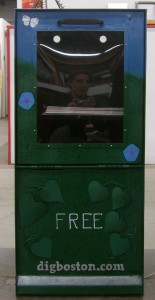
Aw, look at the reflection, it's smiling!

The last week of the project, I ran into some unexpected problems.

When I decided I did want to attempt some 3d elements, I did tests. I thought spot welding would be the right solution, but it made the wire brittle and easy to snap. So I moved on to JB Weld, even though I felt kind of insecure about using epoxy, having little experience with it.

I attached a metal leaf to the wire I was using with JB Weld, let it set, and then tested to see if I could bust it. I could not! Hurray!
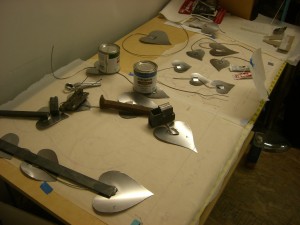
Weighting down the leaf-wire-metal sandwiches while the epoxy cures.

So I spent a day or two cutting more leaves out of steel shim stock, cutting wire to the right lengths, and sticking it all together with JB Weld (I used smaller pieces of sheet metal on the back, to sandwich the wire properly. My tests showed I had to make a sandwich to keep the wire in place.) Then I spray-painted them and drew on the veins with a paint pen.
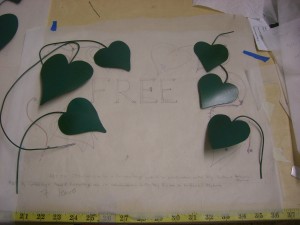
The painted leaves, with the wire stems bent into approximately the right shape.

Then, the evening that I was going to epoxy the leaves o the top of the box, one of the “welds” failed. I was trying to gently bend one of the leaves, so I could get a better connection between the box top, the epoxy, and the leaf, and POP, the leaf came free of the epoxy holding it to the wire.

A friend very kindly spent some time that evening helping me test out some other kinds of epoxy (and Gorilla Glue, borrowed from another Asylum member), but at that point I had an alternate plan in mind. And then it turned out the other epoxies/glue weren’t any better than the JB Weld. Yes, it did take some work to pop metal free of the epoxy, but the fact that it could be done made me fear for the long-term survivability of the box. It’s going to be in public, right? Someone, at some point, isn’t going to be able to resist “testing” it. So: butterflies.

The reason I wasn’t trying to weld or bolt/screw/etc. the leaves to the top is that we were not supposed to put holes in the top surface of the box, because no one wants rain inside their newspaper box! And, well, I don’t know how to weld AND my materials were so thin that welding actually seems . . . ill advised.

The front panel had holes in it already. In fact, I pulled off an “extra” panel that was originally on the box (and used it to test paints and methods) to use the holes it was attached by, and then discovered there were EVEN MORE holes in that panel than it seemed. So the front set of leaves have wires that go through the holes and are epoxied in place.

I also drilled additional holes through all those leaves so I could tie them to the box with thin wire (painted to match the veins). Mechanical attachments – better than glue! Unless you have REALLY AWESOME glue, which I don’t.

Since my original plan was to wrap several metal vines over the top of the box, I now had to come up with something to do to the top, because leaving it just plain blue was kind of boring. I settled on butterflies. And some other flying creatures. And things.
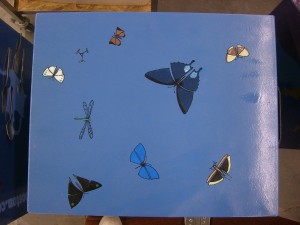
Butterflies, a dragonfly and grasshopper, even a tiny tricopter.

Ultimately, I’m pretty satisfied with this. The vines draped over the top did look good, but on a conceptual level, they didn’t seem quite right without something to really be wrapped around.

The troubles were not over with the painting of the top, because I still had the varnishing step to go, to give the box some protection from UV.

I had a convenient test panel, which I sprayed with 2 or 3 coats of varnish to see what, if anything, would happen to the various kinds of paint I had applied.

Well, it smelled bad while the varnish was still damp, but otherwise, it worked just fine.

So, a couple coats of varnish in, and I noticed that some of the most recent butterflies were, well, dripping. I wiped one of them off completely (and then drew it back on days later, because it left kind of a hole. Well, I noticed). The others I just left kind of fuzzy.

The presentation was over a week ago, and someday soon, the boxes will be removed from the Asylum and placed on the street. Here’s a post on the Asylum’s site about the first round of boxes, with video showing them being put into place on the street. There’s a map here showing the locations.

This was a fun project, and I’m glad of the advice I got from many people, some working on their own boxes.

When I had my test panel lying out one day, with some early sketches of the leaves, a couple different people, without prompting, pointed out which style they preferred . . . and it wasn’t what I thought I’d be doing! So I started asking more people for their opinions, and eventually  someone said, “It looks like these different blocks of leaves need to all be tied together somehow,” so I played around with that and discovered that by using all three different styles (black outline, green outline, black over green), I got a really great illusion of depth.

More pictures:
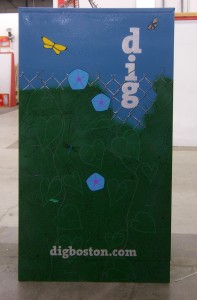
Left side
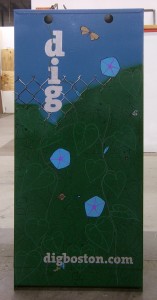
Back of box
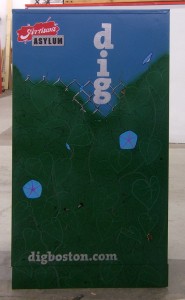
Right side
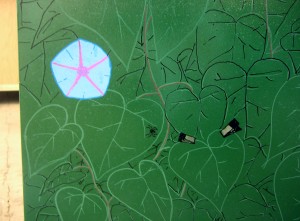
Spring clips and a spider

A bird peeks out, perhaps spying the tiny helicopter flying by.
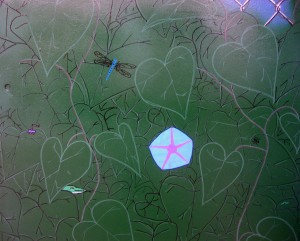
Lizard and some other creatures
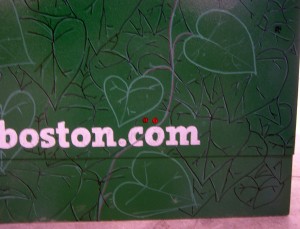
Something is hidden back there. I don't know what it is, either.

I put a lot of little creatures into the design. Many ants, because they were quick and easy and besides if there’s one ant somewhere, there are probably a thousand (though not on the box. It was a vine box, not an ant box).

There are some additional pictures on Flickr, including pictures of other artists’ boxes.

Share

Blue Cloud Gallery anniversary bash

I have a longer post to write up with lots of pictures of the completed Dig box, and some other things, but first, an important announcement:

The Blue Cloud Gallery, where I sell earrings, is having an anniversary bash on Saturday, April 21, from 2-5pm. It is located in Ball Square, Somerville, at 731 Broadway.

The gallery shows work by local artists and craftspersons, and has A LOT of variety in a fairly small space. I highly recommend checking it out any time!

The party next week will feature a free raffle of items from the artists showing work, and (I have it on good authority) good wine and tasty treats.

Share

Busy with several things

In addition to getting ready for the Together Festival in just over a week, I have been working on several other things. Many of which also have deadlines in the next 10 days. WHEE.

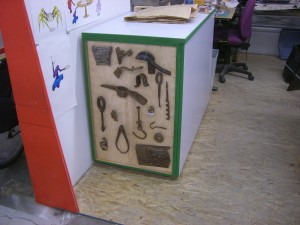
This had no deadline, but I needed the space on the top of the cabinet, where I’d had the objects laid out for weeks, and then I had some free time while waiting on an ear casting ( . . . uh, more on that later) so I took care of it:

I wired several of my favorite large pieces of found stuff on the end of this cabinet.

The top of the cabinet is, of course, now piled with other things. But that was the point of wiring the metal stuff to the end of the cabinet.

And I came up with this:

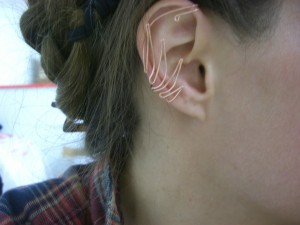
New ear cuff design

More of these at the festival! I was trying to duplicate a really old, early ear cuff design, and, well, things happened. I still haven’t duplicated the old design.

And then there’s this:

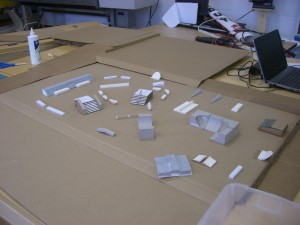
Models of things one might find in a skatepark

I made the quarter-bowl shapes by covering part of a rubber ball with paper soaked in glue.

And, at long last, after more horrors than I care to recount or remember, the Dig box has its primary coating of paint, and I’ve spent some time testing out my wonderful, wonderful paint pens, which I’ll be using to do all the detail work. (Also I have some tiny bottles of Testor paints!)

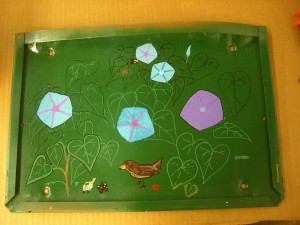
Testing out designs and pens and paint for the Dig box

FINALLY I am done with stinky paint

Share

Together Festival; new art; oil paint is Bad News; probably some other things, too

NEWSY THINGS

I will be vending at the Together Festival on April 7 from 11-5. The festival itself runs from April 2-8. If you came to the Burner Bazaar in December and liked what you saw, you should come check this out, too!

And I submitted an application for this year’s CSArt program, run by the Cambridge Center for Adult Education. I won’t know for a while whether I’ve even made it through the first round of selections. It’s a really fantastic program, and I hope I get in. If I don’t, well, the proposal I submitted is something I’d like to try out anyway; it’s nice to have another art concept lurking around for days when I get bored with the same old business.

ARTY THINGS

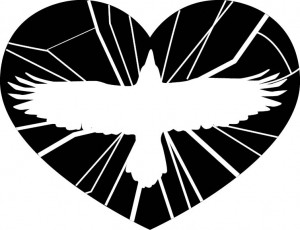
Speaking of lurking concepts, I’ve had this one skulking about in my head for months and months, and I finally took the time to track down some reference images I could use to create the silhouette and cracked pattern:

silhouette of a raven in flight on a shattered heart

"Raven heart" needs a better title.

References used: Raven 13, by EquineStockImages, and Broken by devradiopooh (that link no longer works but it did as of 5 days ago). I have a couple other variations over on deviantART.

One of the ways I pay attention in meetings is to doodle in my sketchbook. It’s a good way to come up with new ideas and work out a million zillion variations before trying them in wire. Here’s one of them in wire now:

Variation on the tooth theme. These are rather large, but very light.

GRIPEY THINGS

OH MY GOD OIL PAINT!!!

So on the advice of several people who sell paint for a living, I bought some Serious Oil-based Paint for painting the Dig Box. And I put on a first coat, and I waited for it to dry so I could apply a second coat, because the first coat wasn’t completely covering the original paint. The cans of paint say “Dries to the touch in 3-4 hours. To apply a second coat, allow to dry overnight.”

And the next morning I checked on it, and it was NOT EVEN DRY TO THE TOUCH!!! In fact, where I touched it, the paint wrinkled up.

That was Friday morning.

Today, Monday, I came in to sand the damn thing and put on coat #2.

GUESS WHAT.

The surface is now dry to the touch, but it’ll still wrinkle up, which means NO SANDING, unless you want to immediately gunk up the sandpaper beyond salvation.

So I spent almost two hours scraping paint off the damn box, so that it might someday dry enough that I can sand ALL THE OIL PAINT OFF and go for spray paint. Or maybe latex, because that was also an option for super-duper, resistant-to-weather paint, and I should have gone with that from the start.

So. Oil paint. I have almost 2 quarts I will not be finishing off. One in a lovely dark green, the other in the wrong shade of pale blue.

Anyone want it? The paint store claims it’s awesome!!

Share

Today I made a deformed frog

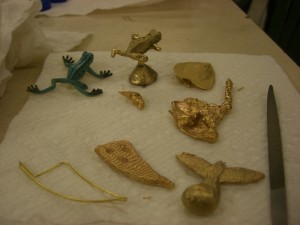
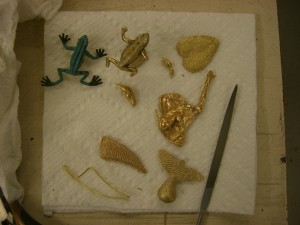
A frog, leaf, blob, bird and tooth shape cast in various methods.

Starting from the frog and going clockwise: Delft clay casting, cuttlebone leaf, water casting, cuttlebone bird and tooth shape.

I took a class this weekend at Artisan’s Asylum called Metalcasting with Sand, Bone, and Water. We learned how to cast shapes freeform, by pouring molten metal into water, how to carve shapes in cuttlebone (which gives you great ripply textures from the cuttlebone – one more tutorial for good measure), and how to use Delft clay (really sand mixed with some kind of oil) to make a mold of another object, and then recreate it with metal.

It was really terrific fun, one of my favorite classes I’ve taken there, and I highly recommend it (I believe it will be run again at some undetermined point).

I attempted to cast my little toy frog using the Delft clay, but its legs are so thin that the metal really couldn’t make it down their full length, so the results are what you see above: a frog with sad little stumps. (Though with a little of the burnt sand/oil mix still on the surface, it could almost pass as some ancient artifact that has mostly survived some great catastrophe. Froggy de Milo?) This is a great method for recreating something that has a lot of fine detail – one person used little plastic fish (flexible, though not as badly as the frog, so it took some extra care to make sure it left a good impression in the clay) – and the results are amazing. It picked up every scale and fine line in the fish’s fins.

We did the water casting to gain some familiarity with the process of melting the metal and then pouring it. The target is a bowl of water, as opposed to the small funnel that we cut into the clay or cuttlebone to pour metal into. (You can see part of the funnel there on the frog’s base.)

The shape is impossible to control precisely, but the height of the crucible above the water does determine how much the metal spreads out. One of the other students got a really interesting shape, like a wide, flat, curving ribbon, by “throwing” the metal into the water. This would be a fun technique to play around with more. (Other people suggested trying things spinning the bowl of water; dropping the metal into a much deeper bowl so that the bottom of the metal would be round instead of flattening out; and dropping the metal into boiling water to see what the bubbling would do.)

The cuttlebone turned out to be my favorite method. The texture that the pieces end up with is so fantastic – it is great for narrow wiggly organic shapes, and for things like wings and fish.

The other side of some of the shapes.

For two of the cuttlebone castings, I attempted to shape both sides. The mold is made by sanding two cuttlebones flat, carving your design into one surface, and then taping them together to pour. It is difficult to figure out how the outline of your shape would show up on both halves of the mold, so usually the cuttlebone shapes are flat on their back side (well, flat except for the natural grain of the cuttlebone).

For the leaf and tooth shape, I attempted to give both sides some depth. With the leaf, I just kind of guessed, and carved the reverse side significantly smaller than the front.

For the tooth, I bent a piece of brass wire into my outline, and then sandwiched it between the pieces of cuttlebone, pushing them together to press the wire into the bone, before beginning to carve – the wire left a nice outline on both pieces for me to follow, and I did get some depth on both sides of the cast. I ended up liking the “reverse” side of the tooth better, because I cut it deeper and with a little more curve to it, and the deeper, more curved shapes showed the texture of the cuttlebone better.

For the last piece, I wanted to really take advantage of the texture, have it work well with the overall form, so I carved a really abstract bird, with spread wings, into the cuttlebone, hoping the ridges would look like really abstracted feathers.

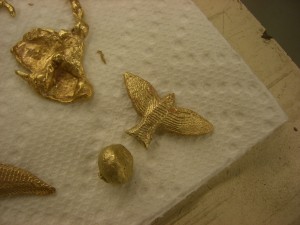
Bird cast in cuttlebone, with the sprue cut away

Bird cast in cuttlebone, with the sprue cut away

I didn’t do any major finishing for the pieces – I trimmed the sprues and filed the sharpest edges down, but I haven’t taken any polishing wheels to them, so they look a little dull (really. after going through several steps of polishing, that brassy metal GLEAMS).

I think it would be really neat to cast some bezels or frames in cuttlebone that I can wire stones into. I think the ridged texture could look really fantastic. The metal we were using for most of the work was some sort of copper alloy (it looks very similar to brass, but I don’t know if it was alloyed with tin or zinc or what), and quite soft, so I could also cast narrow shapes and wind them around stones, like a really, really fat wire. A couple of students brought in silver jewelry they no longer wore, and melted that down for casting; there was additional sterling casting grain on hand that we could buy if we wanted to, but since I was more focused on experimenting with carving shapes into cuttlebone, I didn’t feel like splurging.

There are plans in place to set up an area at the Asylum that is dedicated to jewelry work (and glass – lampworking!!!), which I am really looking forward to.

Of course, I’m going to want to cast steel, too.

Share

Dig box project

The Asylum and Dig Boston have a joint project going whereby members of the Asylum get to give some of the Dig’s older, more experienced (i.e. rusted, pitted, faded, abused) newsboxes facelifts. Here’s the Dig’s original article on the program.

Round 1 recently finished, and some of the boxes are out on the streets.

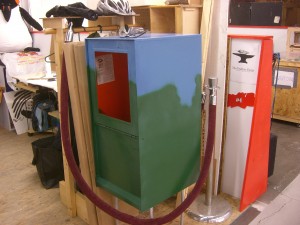
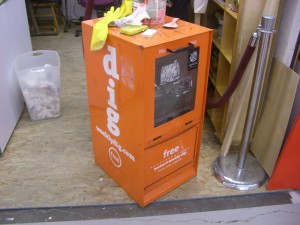
I am in round 2 (at the link: photos of completed boxes, and plans for the next round). Here is what I have to work with:

One of the Weekly Dig's newsboxes, which I will be repainting.

Once I clean off all the sticky and sand this thing down, I can really get to work.

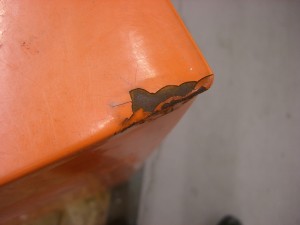
Battered, rusty corner of Dig Box

This looks like the worst damage on my box. Really not that bad!


Plastic tape on a newsbox that has developed a network of fractures

This is not cracked paint. This is clear tape that has aged and fractured in a neat pattern.

I am going to cover it with vines. Mostly painted-on vines, because I am no great metalworker, but I’m considering making some of them three dimensional, coming out of the sides near the top and curving over it.

And I want to hide things in the vines. Birds and bugs and spring clips and tiny robots and glowing eyes and maybe a squid or two. There’s plenty of space for all sorts of things!

First, I will have to clean off the remaining sticker residue, sand it down, and possibly do some minor repairs to rusted areas (but my box is not nearly as beaten up as many).

And I have less than 4 weeks.

Share

Late winter progress

I have been busy the last few months! Craft fairs in December, which were fun, participating in the art shows at Arisia and Boskone, finally – finally – getting some reasonable photography of many items and updating ye olde Etsy shoppe a bit, plus miscellaneous long-overdue projects at home, and working on my own space at the Asylum as well as some infrastructural things there.

The Arisia Art Show was not as financially successful this year as last, but I consider it a success overall because I figured out a much nicer display system, which I can continue to use. And IT ALL FITS IN MY ROLLING CART!!! While I have more stuff to pack and unpack, the whole system is more organized, and it looks nice.

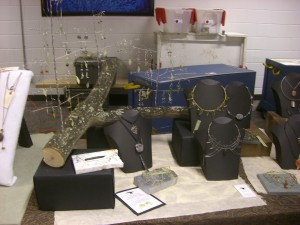
Table at Arisia Art Show 2012

One side of the table at Arisia.

The raised boxes double as storage for all of the smaller stuff: jewelry, necklace busts, chunks of rock, and the drapes. I still have to haul a poster tube with me for the paper, and the tree branch remains awkward, but it fits into the rolling cart between the boxes.
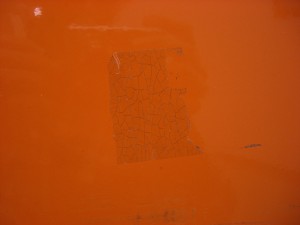
Here’s where I got the pattern for the necklace displays.

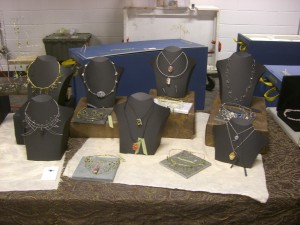
Necklaces at Arisia Art Show 2012

The right side of my table at Arisia 2012.

This year, I again had problems with my pre-con data entry – last year, some of the information got scrambled, and I had to rewrite parts of every bid sheet. This year, NONE of the information survived being stuffed into the internet, but I was saved an hour of hand-writing by a combination of a friend with a laptop, the hotel wifi, my cloud backups of the file in which I’d saved the data, and Arisia staff with the time to take my spreadsheet and turn it into printed bid sheets. Next year, I bring the spreadsheet on a flash drive. And maybe MY laptop, too.

Boskone was a lot smoother. They provide artists the ability to print (or write out) bid sheets in advance of showing up to the con, so I did that, which meant I knew exactly what numbers went on which pieces, so everything was labeled properly in advance of arriving. And, since I had only half a table, my setup was much shorter.

Things were so fast and easy I actually felt a little cheated. Like, there’s supposed to be some adversity to overcome here!

I sold a few pieces, including one of my favorite pendants. I will miss it, but I am glad someone else appreciated it, too.

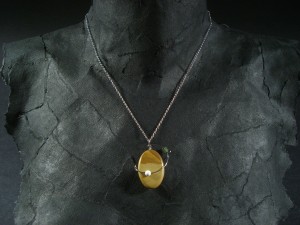
Stone and wire pendant - Lonely Orbit

"Lonely Orbit" - stainless steel, stone (jasper and agate, I think)

reverse side of Lonely Orbit stone and wire pendant

The other side of Lonely Orbit. It's not intended to be worn this way, but I think this side is also quite nice.

Oh, yeah: I also made another partial torso for photographing necklaces on.

I wrapped plastic bags and plastic wrap around my mannequin, to protect its decoupage and make the new bust easy to remove, and used some slightly thick art paper and watered-down glue to cover the neck, shoulders, and upper part of the bust. I like the beige art paper that’s covering the mannequin now, but some pieces show up a lot better on this black paper. The decoupaging process is quite enjoyable. I’m toying with the idea of doing another black display bust, but with a thinner paper, so the torn edges aren’t quite so obvious.

Other things that may be of interest:

I started a portfolio on Behance. I like the look of the site a lot, adding projects is pretty easy, and it’s a great way to waste time looking at shiny things! I mean, a great source of art and inspiration. Yes.
Also I started a Tumblr. I know, I know, I’m a little late to the party, what took me so long? (Hey look I got started on Pinterest before the whole internet noticed it was A Cool Thing, so I’m not completely behind, right?) What took me so long is that look, the last thing I need is another blog-like thing to update, but I guess I can cheat at Tumblr and post my posts here to Tumblr, right? Mixed in with sporadic additions of whatever else that catches my eye, of course.

Things upcoming: I worked out a new design for ear cuffs, using 2 different metals. It’s my original two leaf design, with a 3rd leaf of another metal overlaying them. I like them a lot, I just need to *sigh* photograph them and make some listings and stuff.

Also, I want to brag about some work I did at the Asylum, because projects that cost NO MONEY and use up lots of scrap and spare materials, AND look great are worth bragging about, but I’ll save that for another post.

Share