Helpful hint: Misplacing your prototypes is not a good idea. Forgetting which opaque container they’ve been stored in counts as “misplacing.” (And of course the container was literally right in front of me.)
This among other things has emphasized the importance of getting some better storage going for the beads and jewelry stuff and small tools and etc. etc. I think the old metal tool chest is going to be my jewelry/small tool storage, so now that I know what it will be good for, I have even more reason to get back to that project.
And now I see I haven’t uploaded any photos of the tool chest. After some extensive searching, it appears that is because I hadn’t taken any pictures. I could have sworn I did! Well, I do now:
(Things needing doing to the chest: finishing cleaning out drawers. Reline with felt? felt over cardboard? velveteen? Possibly repaint the exterior. Would delay getting it into useful state, because it would be better to paint before putting in nice new lining. Unless the lining was easy to remove; see: gluing the fabric to thin cardstock so the liners could be lifted out intact. I’d have to sand it all down before painting, and working around the drawer pulls and the decorative bits would be a real pain; ditto painting around them. But it would be really pretty; I’m imagining a rich metallic green.)
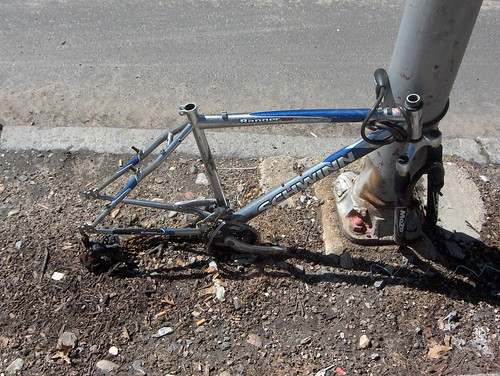
Speaking of photos languishing, I have finally finished uploading all my abused/abandoned bicycle pics, including a few brand spankin’ new ones (but mostly they are old ones, the pictures I first took when I started collecting them). This is the first photo of the latest uploads; go forward from there.
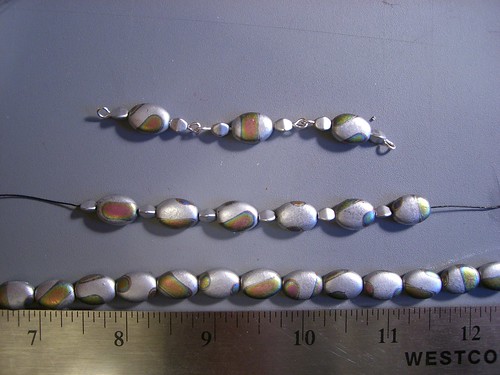
Finished remaking the pigeon bead necklace – after comparing different looks, I went with the metal link style:
I also made some good attempts at some new styles of ear cuffs, and made a couple of jigs to try and make some of the shaping easier. It turns out that, in at least one case, the jig is actually not that helpful. What was really useful was to carefully wrap some string along the curves of the ear cuff, and mark the string at each place the wire bends. Then lay the string out straight, transfer the marks to paper, and note what each mark means.
When it came to trying to duplicate the shapes, it was much easier to hold a length of wire against that straight template, and grab the wire with my pliers at the given places. Since I ended up doing a couple of variations on this particular pattern, the template came in even handier than the jig, since the template made it easier to place some of the shapes at different places along the curve of the ear cuff. This would all make more sense with pictures, I know, but I’m not done yet, and it really deserves an entire post of documentation on its own.
A few of my fingers are rather sore from bending wire. They can do things my pliers can’t, and sometimes I have pliers in one hand, holding the wire firmly, and I need to shape it. I suppose if I spend enough time doing this, I’ll build up calluses. Or figure out how to do things with other tools, not my fingers!
Also: I was thinking about how to document some of my other techniques, and thinking about how much time it takes to take photos of every step, and write out text to explain every step, I realized I do actually have the technology to record video. And that might be better than still images and text. Setting up the camera to get a good look at what I am doing may be a bit tricky, though; I would like to set it so that the point of view is the same as MY point of view, which means the camera would probably have to be between me and my hands. Could be awkward. We shall see; now that I’ve thought about it, I want to do it. If nothing else, I need to know how it will work!
Another to-do, needing doing since I moved from blogspot to this site: figuring out which tags need to be converted into categories, and properly categorizing the old posts.


