Brass wire can cut itself

This weekend was productive, and I learned several new things.

Like how to wrap wire around tiny books.

And that, if you wrap thin brass wire around more thin brass wire, and then use your pliers to smash the coils flat, and you use enough force, the coils will cut through the wire they are coiled around.

So I will be redoing that piece.

It was only 90% perfect anyway. And I can probably reuse parts of it.

See that bent bit on the right edge? That's not supposed to be nearly cut in two.

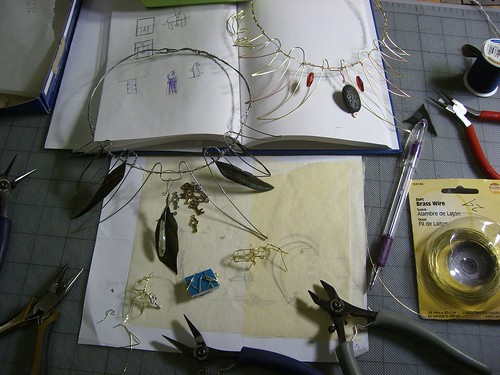
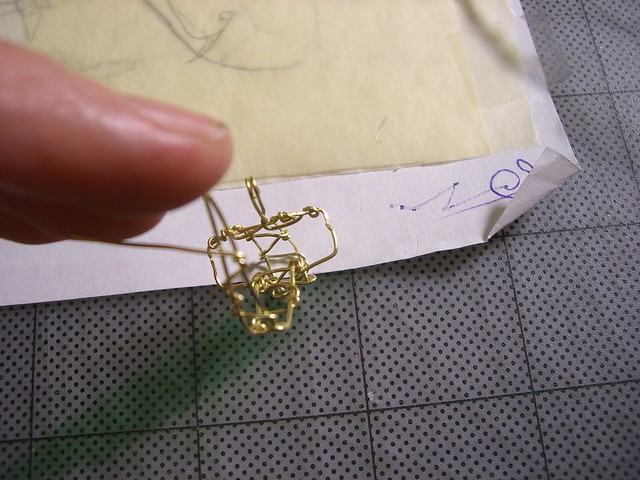
I started making some new displays for earrings and pendants. I still don’t have a good method for the necklaces, but in the process of making the new hanging displays, I ended up with a tiny wire bird, about the right size to be incorporated into wire necklaces, although this particular bird seems quite attached to the display. Oh no, I shall have to make another! Or, perhaps, an entire flock.

Two necklaces and some experiments in wire wrapping tiny books.

Yes, those little messy looking tangles of brass are for the books, and the blue thing is a book, so there’s some scale for you.

The skin on several of my fingers is covered all over with what look like very light cuts. I am pretty sure it is just from using my soft, uncalloused fingers to pull and bend thin brass and stainless steel (there was a lot of that in the display) over and over again. It’s pretty remarkable; my fingertips look like they were on the verge of losing a papercut war. Clearly I need to spend more time at this, and build up tougher skin.

Share

Process and progress

Back in September, I was playing around with a bunch of sea-themed beads. I had this really amazing large mermaid charm/pendant, but I couldn’t quite see her as just a pendant. Or even as just a pendant with a lot of interesting supporting beads and wire around.

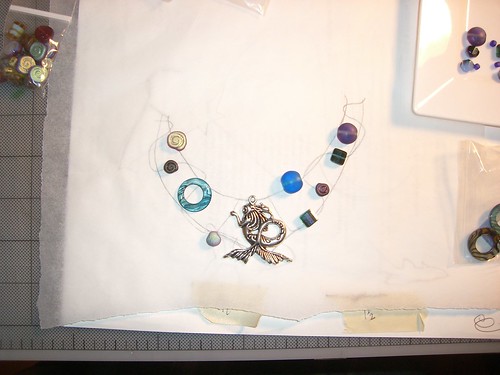
I thought the centerpiece of an elaborate necklace would be nice, so I did a crude sketch and laid out some beads in a way that seemed reasonable:

A large metal mermaid charm with some beads arranged on a sketch of a necklace design.

This is more or less how I design necklaces: sketch out what I think the structure will be, put beads down on it, then photograph.

I didn’t quite feel like making it then. Or maybe I was really busy. Or both. But periodically I remembered (like when I was pawing through beads, and be reminded there was this piece lurking, completely unfinished), and I’d want to get back to it.

Well, what with Arisia coming up, I have suddenly felt spurred to action!

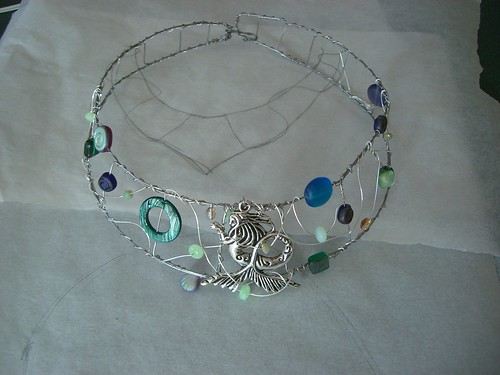
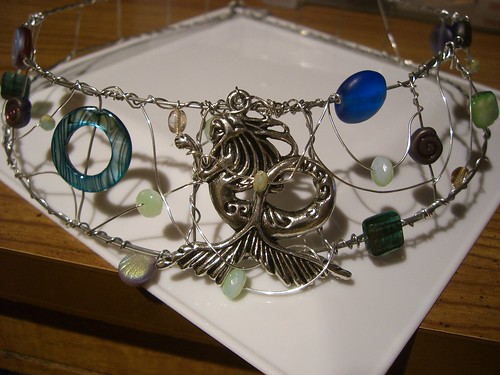
Tragically, I took no more in-process photos, but here is the completed piece:

Completed collar. Necklace. Whatever.

The structure is, as usual, stainless steel, in three different gauges. The swoopy, wave-like wires are sterling silver. HOLY COW, is silver wire easy to bend! After spending quite some time forcing the stainless steel (and it is a soft temper steel!) to do what I wanted, the sterling felt like putty. Wow. So nice.

Components are: big metal mermaid charm/pendant, lots of different glass beads, and a couple of pieces of dyed shell. The circle that the mermaid is facing is dyed shell, and there’s a chunky green rectangular bead on the other side that is also shell.

I put one of the pale green beads behind her head to make her face stand out a little more.

This was the most painful piece I’ve done. I am used to my finger pads feeling tender after bending a lot of stainless steel, and I occasionally wind up with minor stab and scratch wounds from unfiled wire ends. But working on it last night, I managed an impressive puncture wound as well as an embarrassing incident with the flush cut pliers. (Embarrassing because seriously, it isn’t that hard to keep the soft bits away from the sharp parts of tools!)

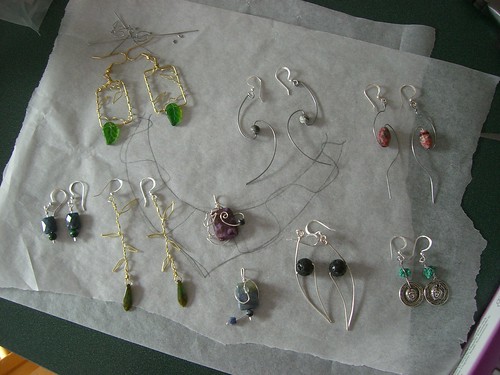
In other news, I made a bunch of earrings, and a couple more pendants. I am liking this productivity!

THe usual sorts of things: brass wire, sterling silver wire, stainless steel; glass and stone beads.

Still to do for Arisia: title all of these things. And the other things. And submit all that plus size info and pricing. And work out table layout; I think I am NOT going to use slabs of rock this time, because it is heavy to carry around! And I do not have enough slabs for every necklace anyway.

I do have a chunk of a tree branch. Maybe I can hang things off that.

Share

Progress towards Arisia

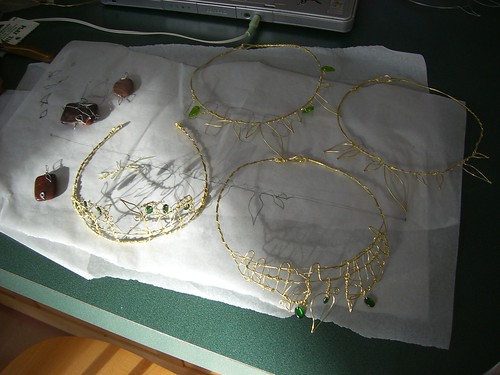
So I have a table in the Arisia art show, and not enough work to fill it. I’ve made some progress towards that in recent weeks; the previous post showed a couple of necklaces in the Spring Rites series, which will be in the show.

Anyway, this week, my office was closed for the holidays, so I’ve made some more things! Pendants, even. And another (slightly different) version of my original Spring Rites necklace.

The tiara is entirely new this week.

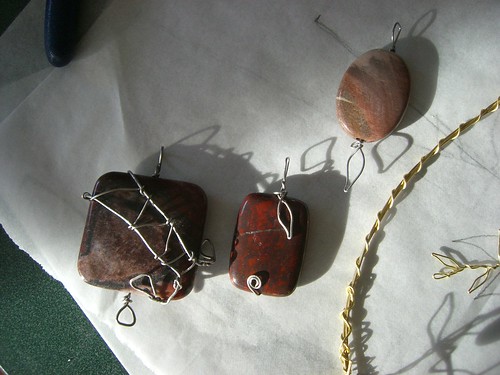
Wire-wrapped pendants. The pinkish-grey oval is imperial jasper. No clue about the other stones!

The wire on the pendants is all stainless steel, but I am feeling like I am finally ready to see how the sterling silver I have on hand goes.

I’m also not wild about the jasper pendant. It’s a nice enough stone that it really doesn’t need any special treatment or accent. Also I hate that with the addition of the leaf on the bottom, it’s just a long piece.  Maybe I should bend the leaf up so it wraps around the bottom; I don’t know.

I think one of my biggest problems going forward is going to be naming things. I have a HUGE list of names for Spring Rites items, and selecting from that is going to be its own painful process. Coming up with names for random pendants, though, beyond “Stone Pendant 24,” argh.

And yes, it has crossed my mind to just go find a random name generator and use that! Random drow elf names, random Martian names, whatever.

Share

I made a bird!

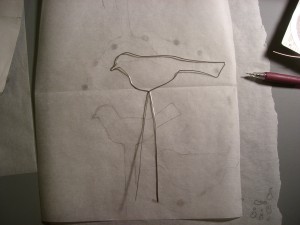
Bird silhouette made from wire

Bird silhouette made from wire, ready to be stuck in the ground

I can’t entirely remember where the idea came from, but a few days ago I started thinking that I could probably make bird silhouettes using the 19 gauge stainless wire I have around, and use them to mark where some of my plants are. Especially the bulbs, which are starting to go dormant. I already made some other plant markers using 14 gauge (?) wire, but that’s rather hard to work with compared to this thin stuff; I can work the thin wire mostly by hand.

The previous plant markers are spirals and loops and things, and I am bored with them, and I like birds, so, a couple rough sketches of birds were enough to get me started, and then as I was bending it, it took the final shape.

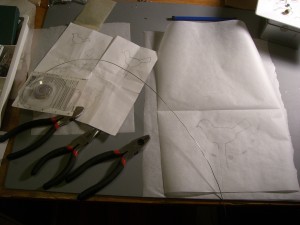
Sketches for wire birds; wire-bending tools

Serious tools for serious wire, plus sketches

I very nearly grabbed my good jewelry-making tools, but remembered in time to go get the normal tools, because they can handle steel wire without being harmed.

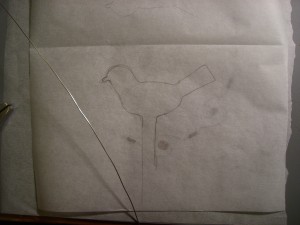
Silhouette of a bird

Silhouette of a bird; the shapes behind it are sketches for a necklace on another piece of trace paper

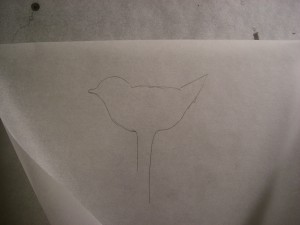
Sketch of a bird silhouette

Sketch of a bird silhouette. Very cute. I think this one will be next.

Now I am thinking of ways to suspend a piece of beer can, cut in a wing shape, inside the silhouette; the aluminum is soft enough to “write” on (make an impression, really) with a ballpoint pen, so the wing could serve as a plant label. I’d probably need to add more wire (maybe thinner gauge) to suspend the wing/label, and that might ruin the lines a bit. We shall see.

Oh! While I am thinking about it: this weekend I (re)added a couple of ways to subscribe to the blog, meaning, get an annoying email letting you know an update has occurred; the options are in the right column here on the main blog, but they will not show up in the syndicated feed on LJ. The Add to Any button will also let you get an update through about a million zillion other ways, too, in addition to email (Netvibes, um, uh, stuff). At the present time, the update email will only send a short excerpt from the post, not the whole thing.

Share

Wire wrapping feathers at Instructables

I figured out how to make the Instructables process less painful: I discovered and set up the automagic import-pictures-from-Flickr thing. That was nice!

So: Method 1

And: Method 2

Check those out if you would rather read them there (or download them as PDFs!) than in my really long post.

Also – very exciting! – they are currently “Featured” projects on Instructables’ front page.

I’ve thought about trying to videotape the process, too. As if I have the time to mess around with that; I just know I’d get sucked into all sorts of fancy video-editing things, but it might make things more understandable than flipping back and forth between pictures and text.

Share

Wire wrapping feathers

For some strange reason – well, a couple of strange reasons, actually – I have a lot of feathers, and limiting myself to gluing them to things is kind of, well, limiting. Especially if I want to make dangly earrings, or necklaces, or or things, with them.

Wire wrapping seemed like the easiest way to make dangly things with them. I can’t recall if I found any examples online before I got started (my first page of Google hits now doesn’t turn up any particularly good tutorials), so let’s just say I made it up as I went along.

I have a lovely photoset at Flickr, with instructions, or you can read it all right here. (One of these days, I may also make an Instructable, but when I started one a week or two ago, the interface was so aggravating that I gave up.)

First, you need the following tools and materials:

  • round-nose pliers*
  • flat nose pliers*
  • wire cutters
  • feathers
  • very thin wire (I used 26 gauge)

I tried two different methods. The first starts by forming a loop (with one short end and one long end) in the wire, to hang the feather from, and then wrapping wire down the shaft of the feather, trapping the short end of the wire against the feather shaft. The second starts by wrapping wire UP the shaft of the feather, again trapping wire against the shaft, then forming the hanging loop, and finishing by wrapping the remaining wire back down the shaft. I like the first method better, but both seem to create a pretty firm connection between the wire and the feather, though I didn’t try REALLY REALLY HARD to pull the feathers free.

So. On to the wrapping:
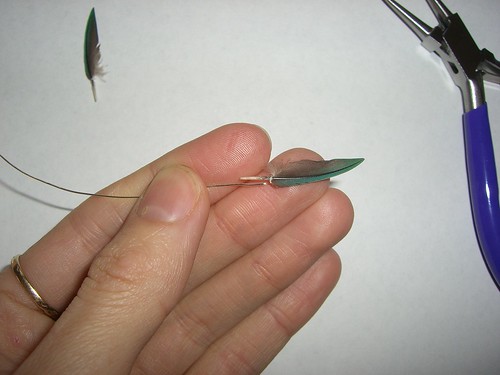
Measuring the wire by jfeathersmith.

Because this was a tiny feather (OMG do not use a tiny feather for your first try) I wanted to have almost as much straight wire held against the feather as there was bare feather shaft. It seemed like it would be the strongest way to wire the feather, and aesthetically appealing.

Measuring the wire (2) by jfeathersmith.

I grabbed the wire with the round-nose pliers where I wanted the straight part to end, and the loop (to hang the feather from) to begin.
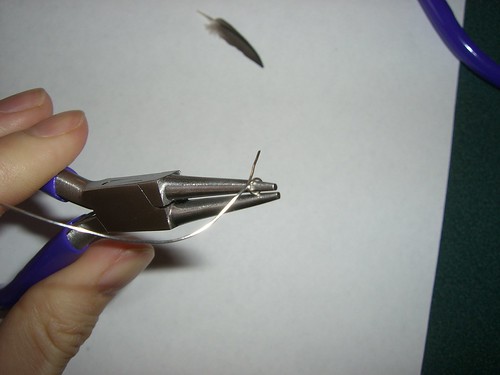
Make a wire loop by jfeathersmith.

I wrapped the long end (still attached to the spool, because I like making life more complicated) around the pliers to complete the loop.
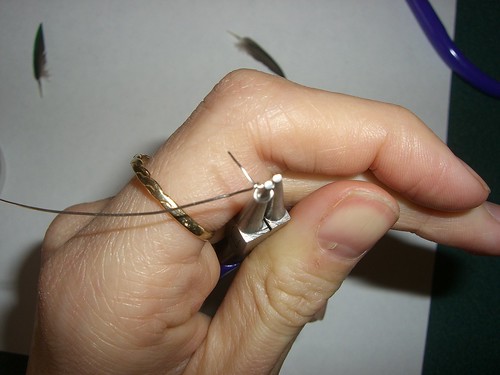
Completing the loop by jfeathersmith.

Then I bent the long end back around the short straight end, to start the wrapping of wire around the straight wire plus - in a moment - the feather.
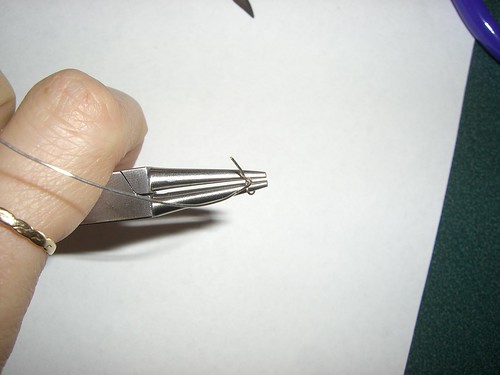
Another view of the loop by jfeathersmith.

Another view of the loop

Is the length right? by jfeathersmith.

I checked to make sure I still had the right length of wire to hold next to the shaft, and finally cut the long wire free of the spool, so I had about 2 inches of wire to wrap -around- the shaft and short end.
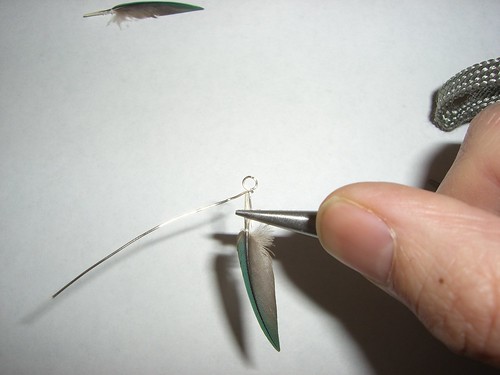
Preparing to wrap the feather by jfeathersmith.

Why you should not use a tiny feather: Because holding the thin wire and the thin shaft together tightly while also wrapping thin wire AROUND them both is a pain in the butt. Holding the short wire and the shaft really tightly with pliers helped some (yes, it squashed the shaft. in fact I think it broke it a bit. it doesn't matter; you can't see it when you're done).
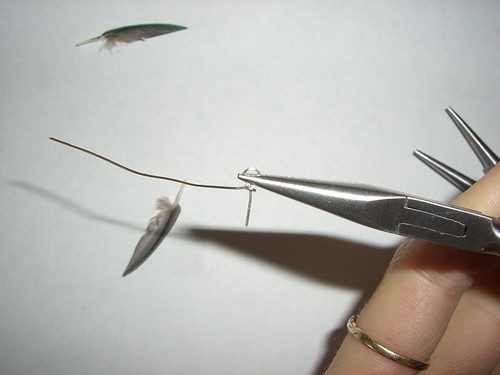
Examine this loop by jfeathersmith.

See that tiny loop of wire wrapped around the straight wire? Adjust that slightly if necessary so that it is just big enough to hold the very end of the feather shaft. That helps with the final wrapping.
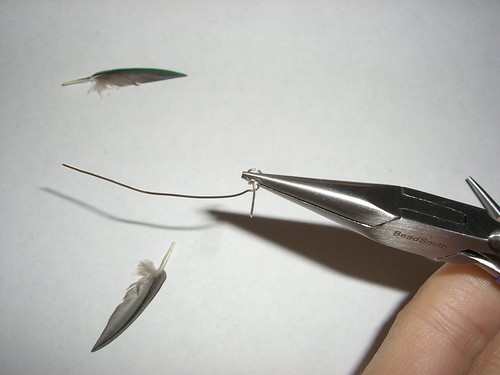
Another view of the shaft-holding loop by jfeathersmith.

Another view of the loop

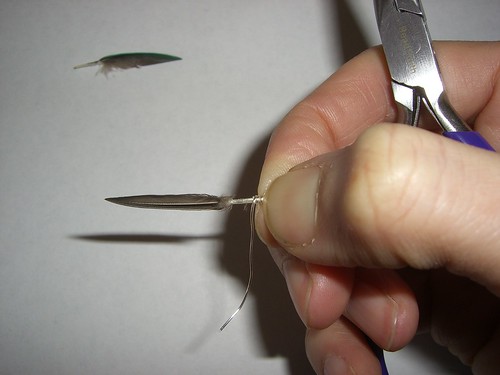
Grasp firmly and wrap by jfeathersmith.

I gave up on the pliers because I couldn't get coordinated enough to manage and just pinched the feather+wire together tightly with my fingers. Having fingernails helps. Once I had the short piece of wire and the feather closely aligned, and the shaft of the feather just butting against the loop, I wrapped the long piece of wire around and around the shaft+wire combo.
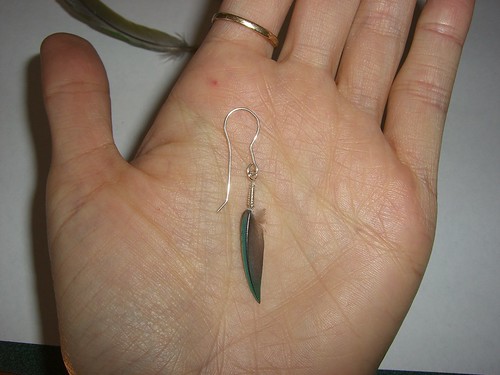
Wire-wrapped feather earring by jfeathersmith.

Connect the feather to an earring loop, and you are done!

Thus endeth the lesson.

I didn’t keep the above earring; that’s just for photographic purposes. I wrapped another tiny feather and made these:

Feather and labradorite earrings by jfeathersmith.

Feather and labradorite earrings. I have some tiny beads made from labradorite; in the right light, they show a blue "flash" that matches the feathers.

I also made an earcuff with a feather dangle, but those photos will be another post, because I have several other earcuffs I want to post at the same time.

Here is method 2 for wire wrapping a feather, but I didn’t like the results as well:
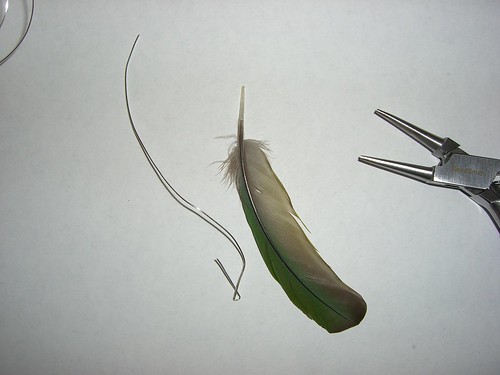
A larger feather by jfeathersmith.

This time, I started wrapping near the fluffy part of the feather, not at the end of the shaft. I didn't want to wrap the entire bare shaft, because it was fairly long. I still wanted about half an inch of overlap between wire and feather, so I formed a loop about that far from one end of the wire (which I cut this time before starting! I CAN HAS LEARNINGS). This loop is not for hanging the feather, it will go around the shaft about half an inch from the end.
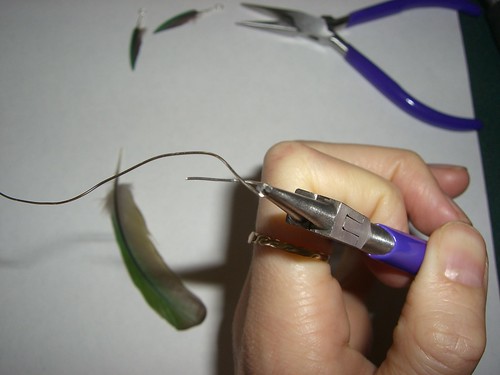
Forming the bottom loop by jfeathersmith.

Forming the first loop

Insert feather into loop by jfeathersmith.

I placed the loop in the right position against the feather.

Wire held against feather by jfeathersmith.

Another view of the wire and feather held together
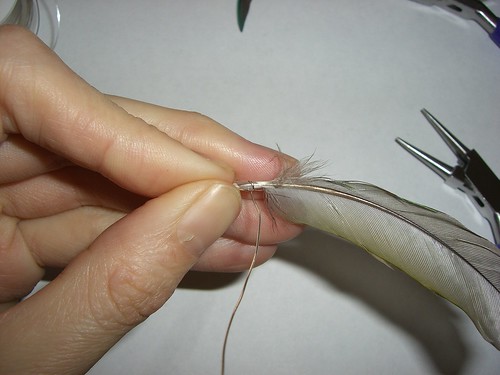
Starting the wrapping by jfeathersmith.

I again found it easier to start wrapping by holding the thing in my fingers. Here I have wrapped the wire around the feather+short wire once.

Ready to finish wrapping by jfeathersmith.

With the larger feather, and more shaft to work with, this time I found it easy to grab the wire and feather with the flat-nose pliers, and wrap the remaining wire around by hand. Part of the trick is that the wire is thinner than the feather shaft, so to hold both together, you really have to squash the feather. Otherwise, that dang wire will slide all over the place.
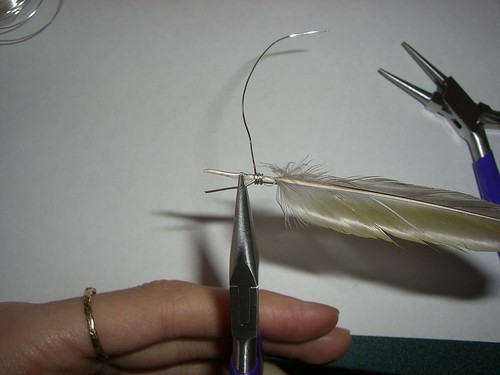
Wrapping in progress by jfeathersmith.

Don't worry about how the short wire is not tight against the shaft. As you wrap the long wire around them both, it will pull the shaft and short wire together. You will need to move the pliers out of the way; by this point, you don't need a death grip on the assembly, so you can place them over the wrapped section and hold firmly, just not so firmly you flatten things out.
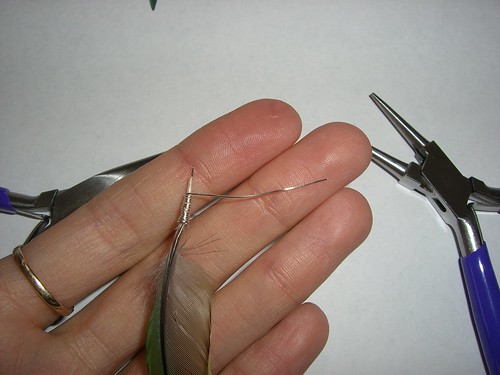
Nearly done by jfeathersmith.

I didn't get the wire positioned quite where I wanted, as there is a short bit of it sticking past the shaft. That can be clipped off.

Make the hanging loop by jfeathersmith.

Now I have just enough wire left to make a loop to hang the feather from. I'm not wrapping to the very end of the shaft right now, because I will finish that after making the hanging loop.

Preparing to make the loop by jfeathersmith.

I straightened out the wire so that it will be easier to wrap part of it against the shaft after I make the loop.
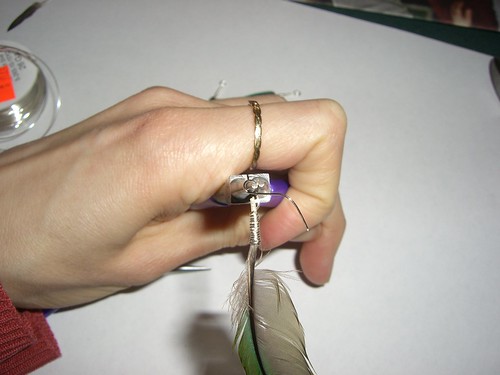
Making the hanging loop by jfeathersmith.

I used the round-nose pliers to make a loop at the end of the shaft. The bare bit of the shaft end, and the wire next to it, will be wrapped with the remaining wire.
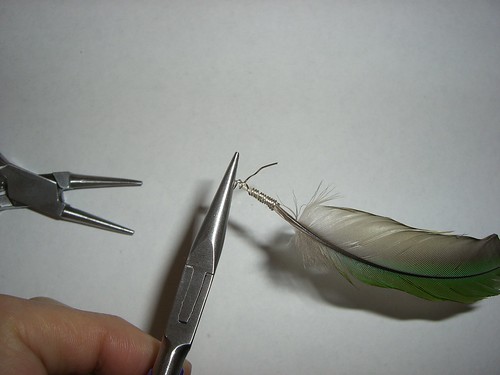
Complete wrapping by jfeathersmith.

I grabbed the loop with the flat-nose pliers, and wrapped the remaining wire back down the shaft, trapping the straight wire against it.
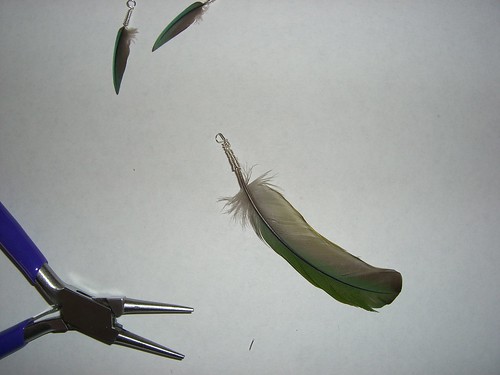
Wire-wrapped feather by jfeathersmith.

Finished!

* Some asides about pliers: Really, you could do this all with a single pair of needle-nose pliers, the kind you get at a hardware store. You won’t be able to get perfectly round loops, but if you don’t mind the look of a square-ish loop, go for it (I don’t have photos of this). You could also form the loop by wrapping the wire around a thin stick, like a bamboo skewer; the pliers just help hold the wire still while you wrap it. Also: most pliers not intended for jewelery-making have ridges/serrations on their jaws. These will mar the wire, which is a look you  might like, but if not, wrap some tape (electrical, duct, whatever) around the serrated parts to protect the wire.

Share