A tiara is just an upside-down necklace

So a couple of weeks ago, during Building the Asylum, I walked in on the end of a conversation between a couple of people – I caught the words “diva” and “need a tiara!” and had to ask one of the participants who it was who needed a tiara, her or him.

At that point, I was merely amused.

She said she needed one.

Then part of my brain had a flash of inspiration, and so I asked, “Really? Because I could make you one,” and decided to interpret her response (uncontrolled laughter) as approval and encouragement, while simultaneously trying to work out how to actually make it. It seemed like it shouldn’t be that much different than wire necklaces, right?

Eventually I did get some actual words, to the effect that sparkly pink was Right Out, but stainless steel and black were good ideas (we have Internets in the space; I pointed her to some photos on the blog).

So I did some sketches at StrowlerCon, and took a couple of hours a week later to put it all together. I am always surprised by how long it takes to wind wire around other wire; the main structure took about an hour, but all the fiddly bits to finish it up took almost as much time!

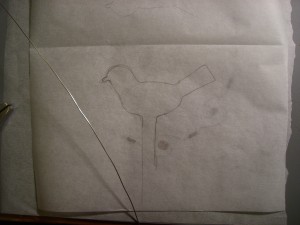
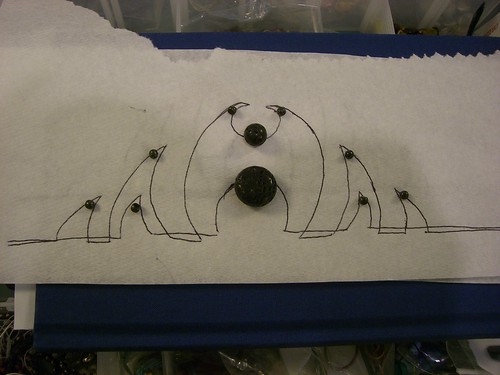
Tiara sketch with beads laid over it

A final sketch - on paper towels, because I forgot to bring trace paper - with some beads laid on top of it to see how those might look.

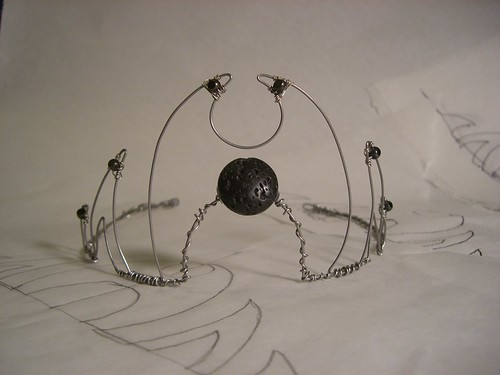
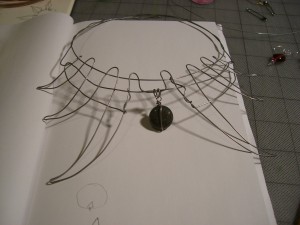
Completed tiara, formed by bending stainless steel wire and wiring glass and lava beads to it.

The completed tiara. The large bead is lava; the small ones are glass.

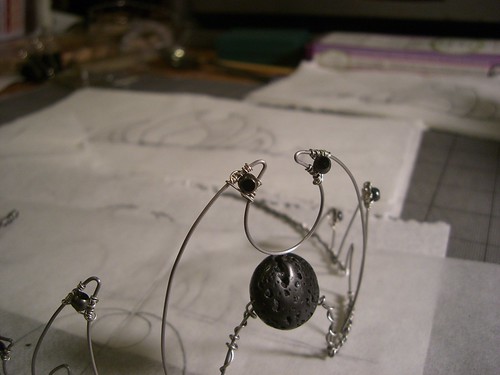
I used 20 ga stainless steel for the main structure, and 22 ga stainless for the windings around the structure, and to attach the big bead. The 22 ga was too heavy to attach the small beads, so I ended up using some 24? 26? ga tinned copper to attach those. Note to self: Order some smaller gauge stainless!

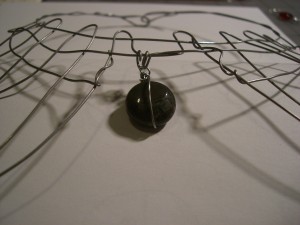
Closeup image of parts of the tiara, focusing on the small gauge wire and beads.

I really like how the thin wire, repeated enough, becomes an additional decorative element, background to the beads and general overall form. It keeps surprising me when that happens.

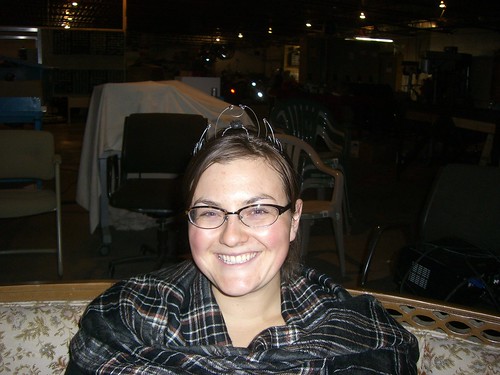
Jamie wearing her tiara

Success!

Conclusion: really not that much different from the necklaces, though forming the base into the right shape was a lot trickier.

Share

Bazaar Bizarre aftermath

So I worked at a craft fair (the Bazaar Bizarre, in its first-ever summer occurrence) for the first time ever, and it was only slightly less terrifying than I imagine it would have been if I’d actually been selling my own work.

I was there at the Artisan’s Asylum table; we were there to pass out flyers and show people how to make simple crafts. A couple of people were making neat hair decorations, tiny hats, and bags out of ties. We had bookbinding, and someone showing off Sumobots. Our coffee making demo had to cancel on account of it being too windy. And we had two people doing jewelry demos (the other person was showing knotwork).

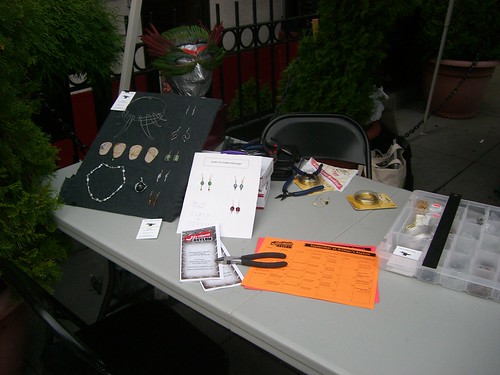
Jewelry display, plus duct tape head with feather mask, plus flyers, beads, wire, etc.

I brought a lot of glass beads, figuring I could show people how to make simple dangly earrings. I even sat down and practiced by myself, so I would know how to talk someone through the process while demonstrating it.

No one was interested in learning how to make them.

People were interested in making ear cuffs, which I had on my big display board.

And of course I didn’t have any of the really simple ear cuffs there. Fortunately, I did have my brass wire, because at the last minute I decided to bring it so I could amuse myself if nothing else was going on.

I know now how just how poorly I know what I am doing, because I found myself flailing a lot trying to explain how to hold the wire and the tools – and honestly, I don’t know that -I- always follow the same process, so there was a lot of ad hockery (ad hackery?). I figure that explaining that teaching this was all new to me might be reassuring to people who were confused by the process a bit. Well, I got some laughs at least. And my victi- er students did end up with wearable ear cuffs.

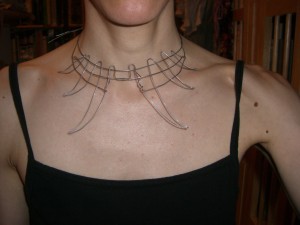
Also, I got some really nice feedback about some of the wire work I had on display (the stainless steel necklace, which I finished off and now – of course now! – want to make some edits to. Guess I’ll have to make another. OH NOES.), like encouragement to make more and sell it.

I did loads of research earlier this year into Etsy and good places to buy supplies (bulk wire, especially), but time going elsewhere, and massive terror at the prospect of taking this semi-seriously, have conspired to keep me from actually setting up a shop and making items to sell. But I think at this point (and then there was a coworker this morning, who I showed some photos to), I have no choice.

If for no other reason than to subsidize my bead buying habit.

Share

Stainless steel wire necklace, finished

I finished the ends of this off over a week ago, and wore it a couple of times, because I couldn’t quite figure out what else, if anything, needed to be done with it. Also, I wanted to display it at the Bazaar Bizarre, which reminds me I have a draft post about that I need to publish. Oops.

Anyway, I figured out what needed to be added, and here is a not very good picture of it:

Stainless steel wire necklace with jasper pendant

The stone is jasper. I think.

Round jasper stone

Close up of the jasper (?)

(Additional pictures on Flickr.) I wanted to move on to a new project more than I wanted to take more/better pictures. The new project is going somewhat slowly; I’m having some difficulty weaving the horizontal wires through the vertical pieces. I may have to rethink my strategy; it’s much more difficult than the necklace above.

Some early bends of a wire choker/collar in progress

Some early bends for a wire choker/collar

We shall see how this goes.

Share

Stainless steel wire necklace (in progress)

I finally felt caught up enough on stuff, and also too tired to do much else, to clean off my desk yesterday.

Seeing all that surface again kind of felt like gazing into the abyss. If, you know, you knew the abyss might possible have cake in there somewhere.

This evening I sat down and worked on another necklace, which I sketched up, er, some weeks ago. It’s not done; I need to add thinner wire to strengthen it a bit and add detail.

Stainless steel wire necklace

Originally, I was going to add some sort of dangly thing – like a biohazard symbol or something – in the middle, like I did with the brass necklace I made previously, but now I’m reconsidering. It might not actually need anything there, and I quite like it as-is.

Also, I have decided that from now on, I will say “I’m going to spend some time in the abyss” whenever I am retreating to my desk.

Share

Long overdue post full of ear cuffs

I seem to have a bit of breathing space, so I am catching up. ZOMG TWO POSTS IN ONE DAY.

So.

Have some ear cuff photos!

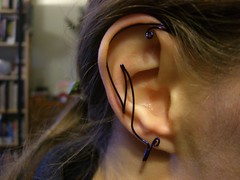
Wire earcuff

Love the simple shape. Need to redo this to fit right.

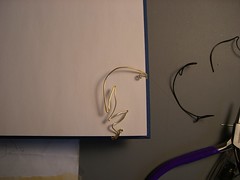
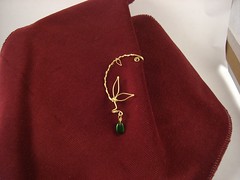
Brass feather/leaf ear cuff

It all started so simply.

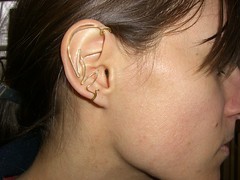
Wearing the leaf/feather ear cuff
And it fit!
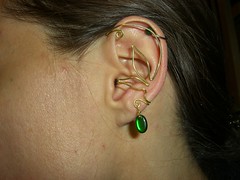
Ear cuff with green bead

Then there was a variation. With a bead.

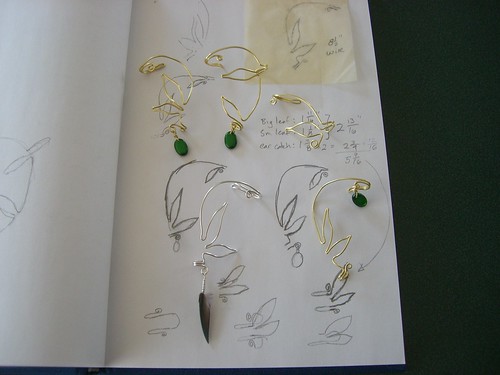
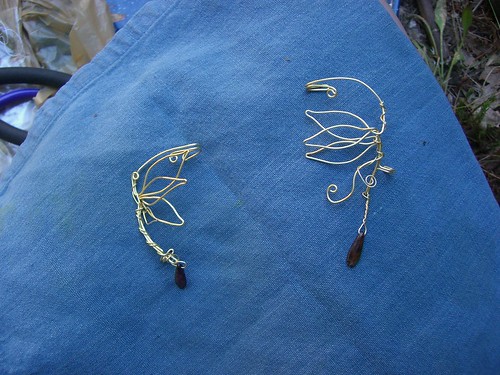
Several feather/leaf ear cuffs, all slightly different

And then there were more. (These are just some of the non-rejects.)

Ear cuffs in a row. Silver with feather; brass with beads (and without).

Ear cuffs in a row. Silver with feather; brass with beads (and without

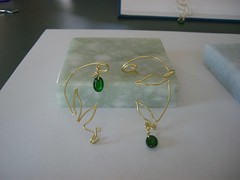
A pair of brass feather/leaf ear cuffs

A favorite pair.

Ear cuff with thinner wire wrapped around it, making a vining look.

Adding some thin wire wrapped around the main frame added some additional viney leafy bits.

Ear cuffs with multiple, layered leaf shapes

A friend suggested wrapping some excess wire back up the shape, and creating layered leaves. Needs a little refining (I dislike the indentation along the edge), but I really like the layered look.

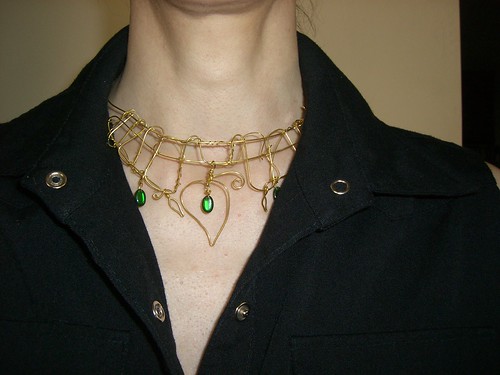
With bonus not-ear cuff wire work:

Wire necklace made from "weaving" wire together.

This was inspired by the wire mesh I made for the sink, as well as Elise Matheson's fabulous necklace-crowns.

WordPress hates when I try to put links in captions, apparently, so let’s try that again: here is Elise’s blog (go find “new shinies” and “shiny sale” posts for jewelry goodness); here are photos of a necklace-crown.

Share

I made a fish!

And who could stop with just one? Not me.

A shark, ray, and several other fish made from wire

For scale, the sheets of paper behind the fish are 11x17.

Unlike the birds, I decided to twist the two ends of the wire together to make a single wire to stick into the ground. Partly because I can’t have two wires, imitating legs, and partly because trying to get two different pieces of wire into the ground at the same kind is annoying.

I posted more pictures of the wire birds on Flickr. Like this one:

Little wire bird in the garden

Early in the season, pansies and daffodils and other miscellanous plants help hide the little bird.

Share

I made a bird!

Bird silhouette made from wire

Bird silhouette made from wire, ready to be stuck in the ground

I can’t entirely remember where the idea came from, but a few days ago I started thinking that I could probably make bird silhouettes using the 19 gauge stainless wire I have around, and use them to mark where some of my plants are. Especially the bulbs, which are starting to go dormant. I already made some other plant markers using 14 gauge (?) wire, but that’s rather hard to work with compared to this thin stuff; I can work the thin wire mostly by hand.

The previous plant markers are spirals and loops and things, and I am bored with them, and I like birds, so, a couple rough sketches of birds were enough to get me started, and then as I was bending it, it took the final shape.

Sketches for wire birds; wire-bending tools

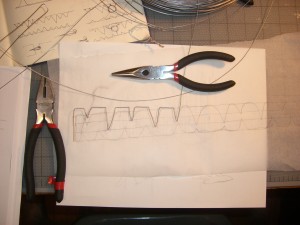
Serious tools for serious wire, plus sketches

I very nearly grabbed my good jewelry-making tools, but remembered in time to go get the normal tools, because they can handle steel wire without being harmed.

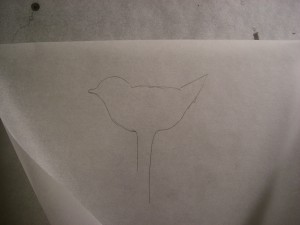
Silhouette of a bird

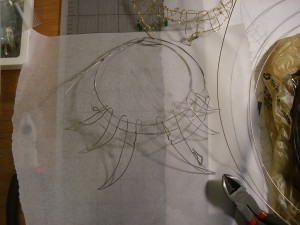
Silhouette of a bird; the shapes behind it are sketches for a necklace on another piece of trace paper

Sketch of a bird silhouette

Sketch of a bird silhouette. Very cute. I think this one will be next.

Now I am thinking of ways to suspend a piece of beer can, cut in a wing shape, inside the silhouette; the aluminum is soft enough to “write” on (make an impression, really) with a ballpoint pen, so the wing could serve as a plant label. I’d probably need to add more wire (maybe thinner gauge) to suspend the wing/label, and that might ruin the lines a bit. We shall see.

Oh! While I am thinking about it: this weekend I (re)added a couple of ways to subscribe to the blog, meaning, get an annoying email letting you know an update has occurred; the options are in the right column here on the main blog, but they will not show up in the syndicated feed on LJ. The Add to Any button will also let you get an update through about a million zillion other ways, too, in addition to email (Netvibes, um, uh, stuff). At the present time, the update email will only send a short excerpt from the post, not the whole thing.

Share

Wire wrapping feathers

For some strange reason – well, a couple of strange reasons, actually – I have a lot of feathers, and limiting myself to gluing them to things is kind of, well, limiting. Especially if I want to make dangly earrings, or necklaces, or or things, with them.

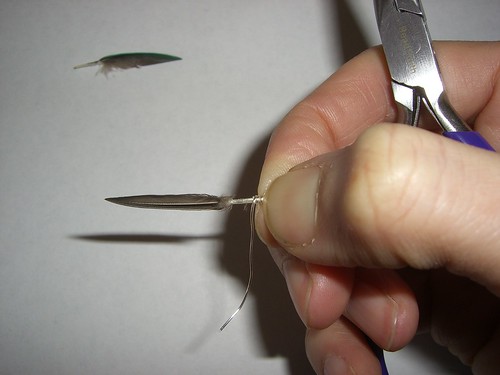
Wire wrapping seemed like the easiest way to make dangly things with them. I can’t recall if I found any examples online before I got started (my first page of Google hits now doesn’t turn up any particularly good tutorials), so let’s just say I made it up as I went along.

I have a lovely photoset at Flickr, with instructions, or you can read it all right here. (One of these days, I may also make an Instructable, but when I started one a week or two ago, the interface was so aggravating that I gave up.)

First, you need the following tools and materials:

  • round-nose pliers*
  • flat nose pliers*
  • wire cutters
  • feathers
  • very thin wire (I used 26 gauge)

I tried two different methods. The first starts by forming a loop (with one short end and one long end) in the wire, to hang the feather from, and then wrapping wire down the shaft of the feather, trapping the short end of the wire against the feather shaft. The second starts by wrapping wire UP the shaft of the feather, again trapping wire against the shaft, then forming the hanging loop, and finishing by wrapping the remaining wire back down the shaft. I like the first method better, but both seem to create a pretty firm connection between the wire and the feather, though I didn’t try REALLY REALLY HARD to pull the feathers free.

So. On to the wrapping:
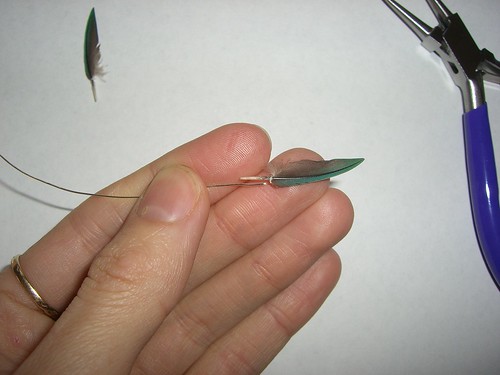
Measuring the wire by jfeathersmith.

Because this was a tiny feather (OMG do not use a tiny feather for your first try) I wanted to have almost as much straight wire held against the feather as there was bare feather shaft. It seemed like it would be the strongest way to wire the feather, and aesthetically appealing.

Measuring the wire (2) by jfeathersmith.

I grabbed the wire with the round-nose pliers where I wanted the straight part to end, and the loop (to hang the feather from) to begin.
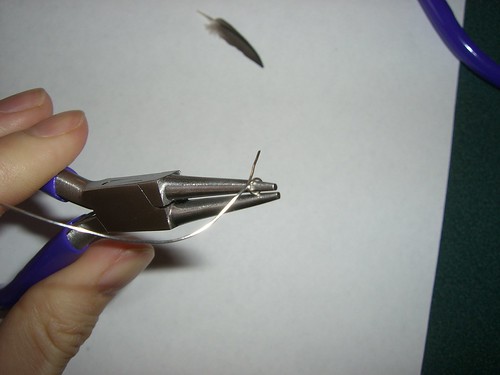
Make a wire loop by jfeathersmith.

I wrapped the long end (still attached to the spool, because I like making life more complicated) around the pliers to complete the loop.
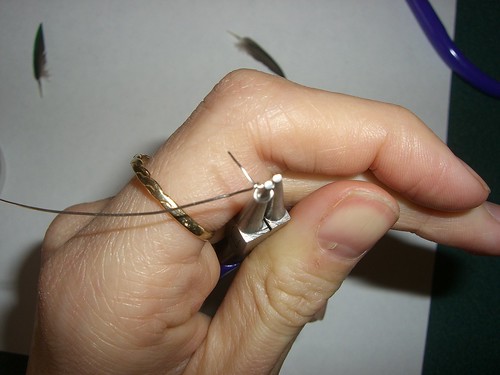
Completing the loop by jfeathersmith.

Then I bent the long end back around the short straight end, to start the wrapping of wire around the straight wire plus - in a moment - the feather.
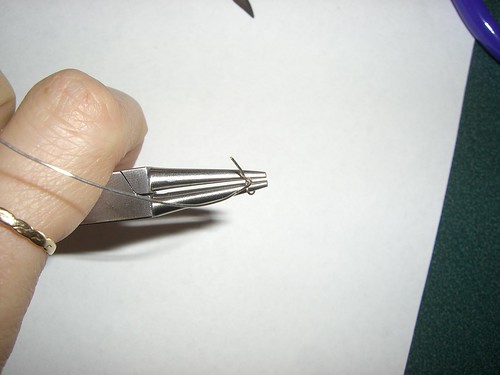
Another view of the loop by jfeathersmith.

Another view of the loop

Is the length right? by jfeathersmith.

I checked to make sure I still had the right length of wire to hold next to the shaft, and finally cut the long wire free of the spool, so I had about 2 inches of wire to wrap -around- the shaft and short end.
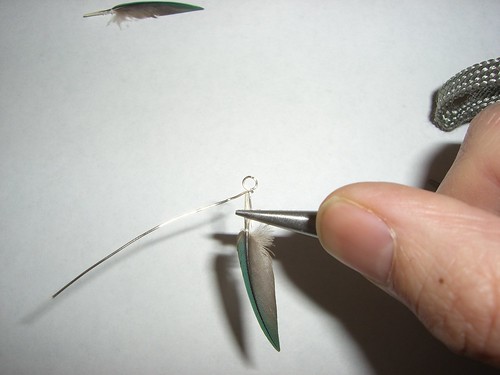
Preparing to wrap the feather by jfeathersmith.

Why you should not use a tiny feather: Because holding the thin wire and the thin shaft together tightly while also wrapping thin wire AROUND them both is a pain in the butt. Holding the short wire and the shaft really tightly with pliers helped some (yes, it squashed the shaft. in fact I think it broke it a bit. it doesn't matter; you can't see it when you're done).
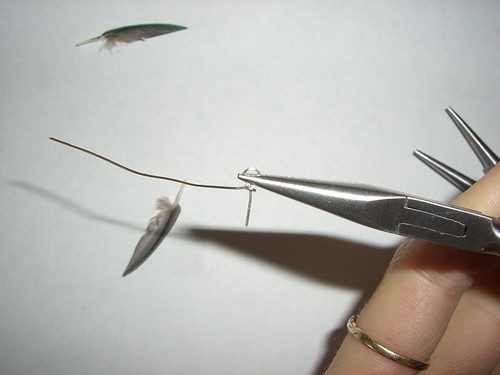
Examine this loop by jfeathersmith.

See that tiny loop of wire wrapped around the straight wire? Adjust that slightly if necessary so that it is just big enough to hold the very end of the feather shaft. That helps with the final wrapping.
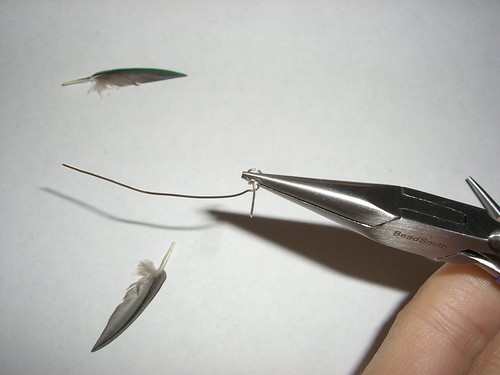
Another view of the shaft-holding loop by jfeathersmith.

Another view of the loop

Grasp firmly and wrap by jfeathersmith.

I gave up on the pliers because I couldn't get coordinated enough to manage and just pinched the feather+wire together tightly with my fingers. Having fingernails helps. Once I had the short piece of wire and the feather closely aligned, and the shaft of the feather just butting against the loop, I wrapped the long piece of wire around and around the shaft+wire combo.
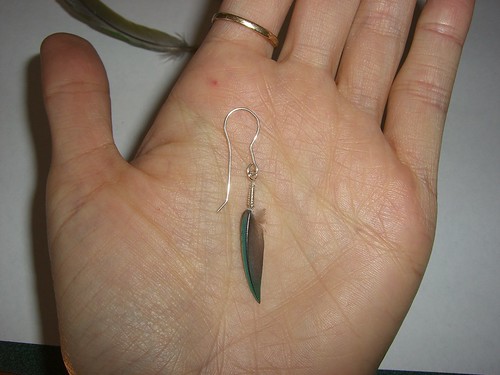
Wire-wrapped feather earring by jfeathersmith.

Connect the feather to an earring loop, and you are done!

Thus endeth the lesson.

I didn’t keep the above earring; that’s just for photographic purposes. I wrapped another tiny feather and made these:

Feather and labradorite earrings by jfeathersmith.

Feather and labradorite earrings. I have some tiny beads made from labradorite; in the right light, they show a blue "flash" that matches the feathers.

I also made an earcuff with a feather dangle, but those photos will be another post, because I have several other earcuffs I want to post at the same time.

Here is method 2 for wire wrapping a feather, but I didn’t like the results as well:
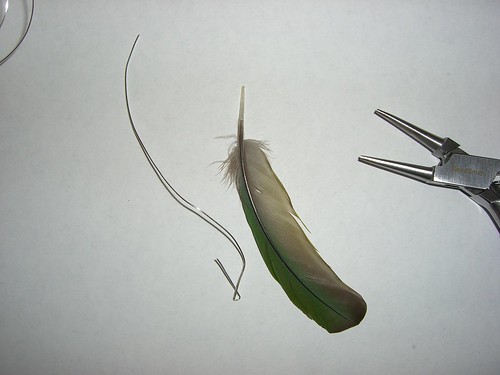
A larger feather by jfeathersmith.

This time, I started wrapping near the fluffy part of the feather, not at the end of the shaft. I didn't want to wrap the entire bare shaft, because it was fairly long. I still wanted about half an inch of overlap between wire and feather, so I formed a loop about that far from one end of the wire (which I cut this time before starting! I CAN HAS LEARNINGS). This loop is not for hanging the feather, it will go around the shaft about half an inch from the end.
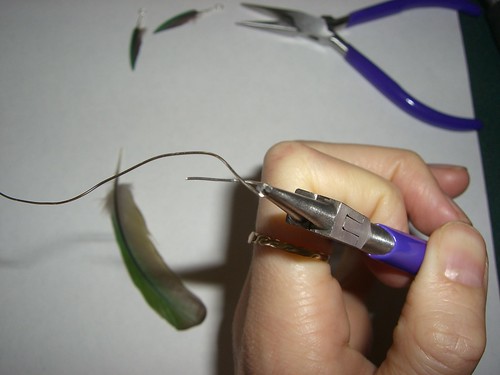
Forming the bottom loop by jfeathersmith.

Forming the first loop

Insert feather into loop by jfeathersmith.

I placed the loop in the right position against the feather.

Wire held against feather by jfeathersmith.

Another view of the wire and feather held together
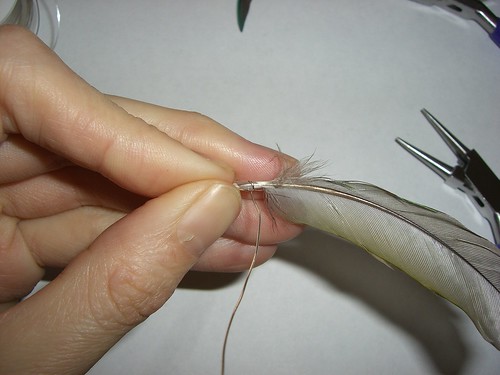
Starting the wrapping by jfeathersmith.

I again found it easier to start wrapping by holding the thing in my fingers. Here I have wrapped the wire around the feather+short wire once.

Ready to finish wrapping by jfeathersmith.

With the larger feather, and more shaft to work with, this time I found it easy to grab the wire and feather with the flat-nose pliers, and wrap the remaining wire around by hand. Part of the trick is that the wire is thinner than the feather shaft, so to hold both together, you really have to squash the feather. Otherwise, that dang wire will slide all over the place.
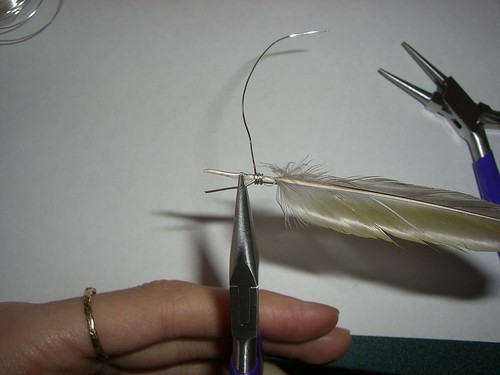
Wrapping in progress by jfeathersmith.

Don't worry about how the short wire is not tight against the shaft. As you wrap the long wire around them both, it will pull the shaft and short wire together. You will need to move the pliers out of the way; by this point, you don't need a death grip on the assembly, so you can place them over the wrapped section and hold firmly, just not so firmly you flatten things out.
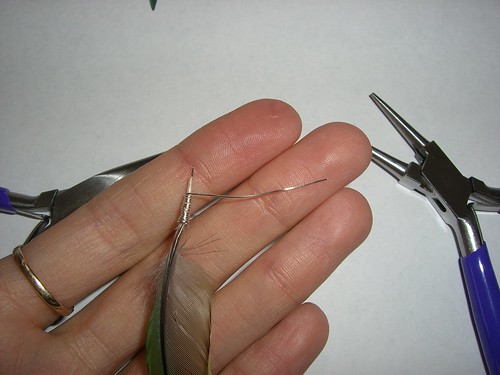
Nearly done by jfeathersmith.

I didn't get the wire positioned quite where I wanted, as there is a short bit of it sticking past the shaft. That can be clipped off.

Make the hanging loop by jfeathersmith.

Now I have just enough wire left to make a loop to hang the feather from. I'm not wrapping to the very end of the shaft right now, because I will finish that after making the hanging loop.

Preparing to make the loop by jfeathersmith.

I straightened out the wire so that it will be easier to wrap part of it against the shaft after I make the loop.
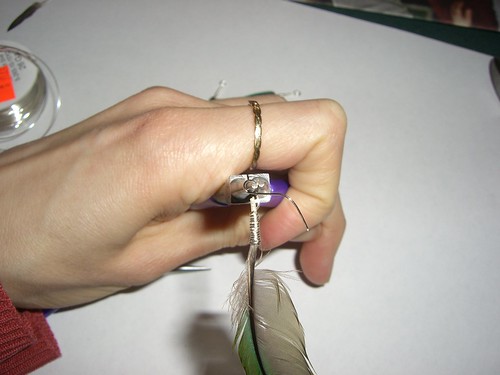
Making the hanging loop by jfeathersmith.

I used the round-nose pliers to make a loop at the end of the shaft. The bare bit of the shaft end, and the wire next to it, will be wrapped with the remaining wire.
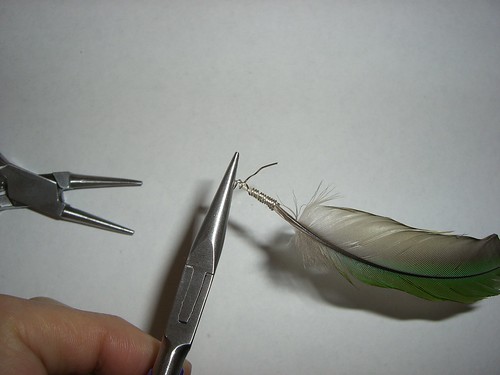
Complete wrapping by jfeathersmith.

I grabbed the loop with the flat-nose pliers, and wrapped the remaining wire back down the shaft, trapping the straight wire against it.
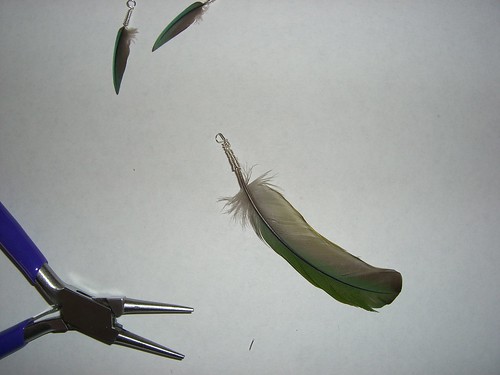
Wire-wrapped feather by jfeathersmith.

Finished!

* Some asides about pliers: Really, you could do this all with a single pair of needle-nose pliers, the kind you get at a hardware store. You won’t be able to get perfectly round loops, but if you don’t mind the look of a square-ish loop, go for it (I don’t have photos of this). You could also form the loop by wrapping the wire around a thin stick, like a bamboo skewer; the pliers just help hold the wire still while you wrap it. Also: most pliers not intended for jewelery-making have ridges/serrations on their jaws. These will mar the wire, which is a look you  might like, but if not, wrap some tape (electrical, duct, whatever) around the serrated parts to protect the wire.
Share

Saving the kitchen sink from boggy horror, part 1

Historically, this has been the way sponges and scrubbing things have been stored on the kitchen sink:

Sponges and scrubbers at the kitchen sink

IMPERILED! Sponges rest on the sink edge; scrubbers sit in a dish

The dish has no drainage. It gets quite disgusting as water drips off the brushes. And anything sitting all the way in the bottom of the dish also gets quite disgusting.

So I started thinking about trying to find some kind of metal or plastic mesh that could be fitted inside the dish, raised up slightly, so that the cleaning objects could sit on the mesh, ABOVE the disgusting soapy water muck mix that accumulates. The back of the sink would also need something so the sponges would actually have a chance to dry out.

Early sketches of the brush-saving device

Early sketches of the brush-saving device

First I thought about making it all one piece that would loop up from the sink over the edge of the dish and down into the dish.

Then I thought it made more sense to make 2 pieces, so they could be removed and cleaned individually; the mesh for the sponges still needs some kind of hook on it to hold it to the dish so it doesn’t get knocked into the sink.

I also thought that maybe some kind of Y-shaped support could be inserted into the dish to hold the brush handles up; right now, they tend to fall onto the sponges. Making hooks to hang from the windowsill above the sink is another idea.

So far, I have made the mesh to sit inside the dish:

Half of the dish mesh, on a jig made with small nails and scrap wood

Half of the dish mesh, on a jig made with small nails and scrap wood

The mesh woven together, with the jig set up for the 2nd piece

The mesh woven together, with the jig set up for the 2nd piece. The feet still need to be formed from the ends of the wires, and it needs some minor bending to flatten it out.

Finished mesh

Finished, feet and all.

Mesh in dish

Mesh in dish. I had to bend a couple of the loops of wire a bit to get it to fit; apparently the jig (or my bending technique) was not quite precise enough.

Scrubbers resting on the mesh

Hooray! The scrubbers are saved from the Bog of Doom!

I used stainless steel wire, which was a disappointing matte grey, not the shiny highly polished stainless steel that I am used to seeing in the silverware drawer. However, with all the bending and manipulating of the metal with metal pliers (and rubbing against the wire nails, it was a lot shinier by the time I finished. (So if when I make jewelry with this stuff, I shall see about polishing it to make it shiny.)

The weaving process took the most time, because as soon as I’d push the wire just over the other piece of mesh, it wanted to slip off. And weaving in the very last length of wire was pretty difficult. Wire: not as flexible as string or yarn! Shocking!

I’m thinking now that pieces of woven wire might be interesting foundational structures to support beads and other, more complicated shapes, perhaps for bracelets (not that I wear bracelets) or necklaces or . . . things. And brass (or copper) would be a lot easier to manipulate. Perhaps instead of a straight, rectangular mesh, I could set up a jig to create more angular shapes, something more V-shaped. (I can see it in my head, but I haven’t sketched it out. Yet.)

Time to make:

  • One washing machine cycle (somewhere between 30 minutes and an hour). I know this because I started my laundry and then started the jig and bending, down in the basement where I could easily hear the machine going through its process. (I did the sketching on a previous day. But it didn’t take very long.)

Materials:

  • Stainless steel wire from the local Tags.
  • Wire nails (for the jig)
  • Scrap wood (for the jig)

Tools:

  • Hammer
  • Small needle-nose pliers (to hold the wire nails while I hammered them in; this saved me many smashed fingers. Also used sometimes to bend the wire, though I used my hands a lot, too)
  • Diagonal wire cutters

Now to save the sponges.

Share